I N S T A L L A T I O N
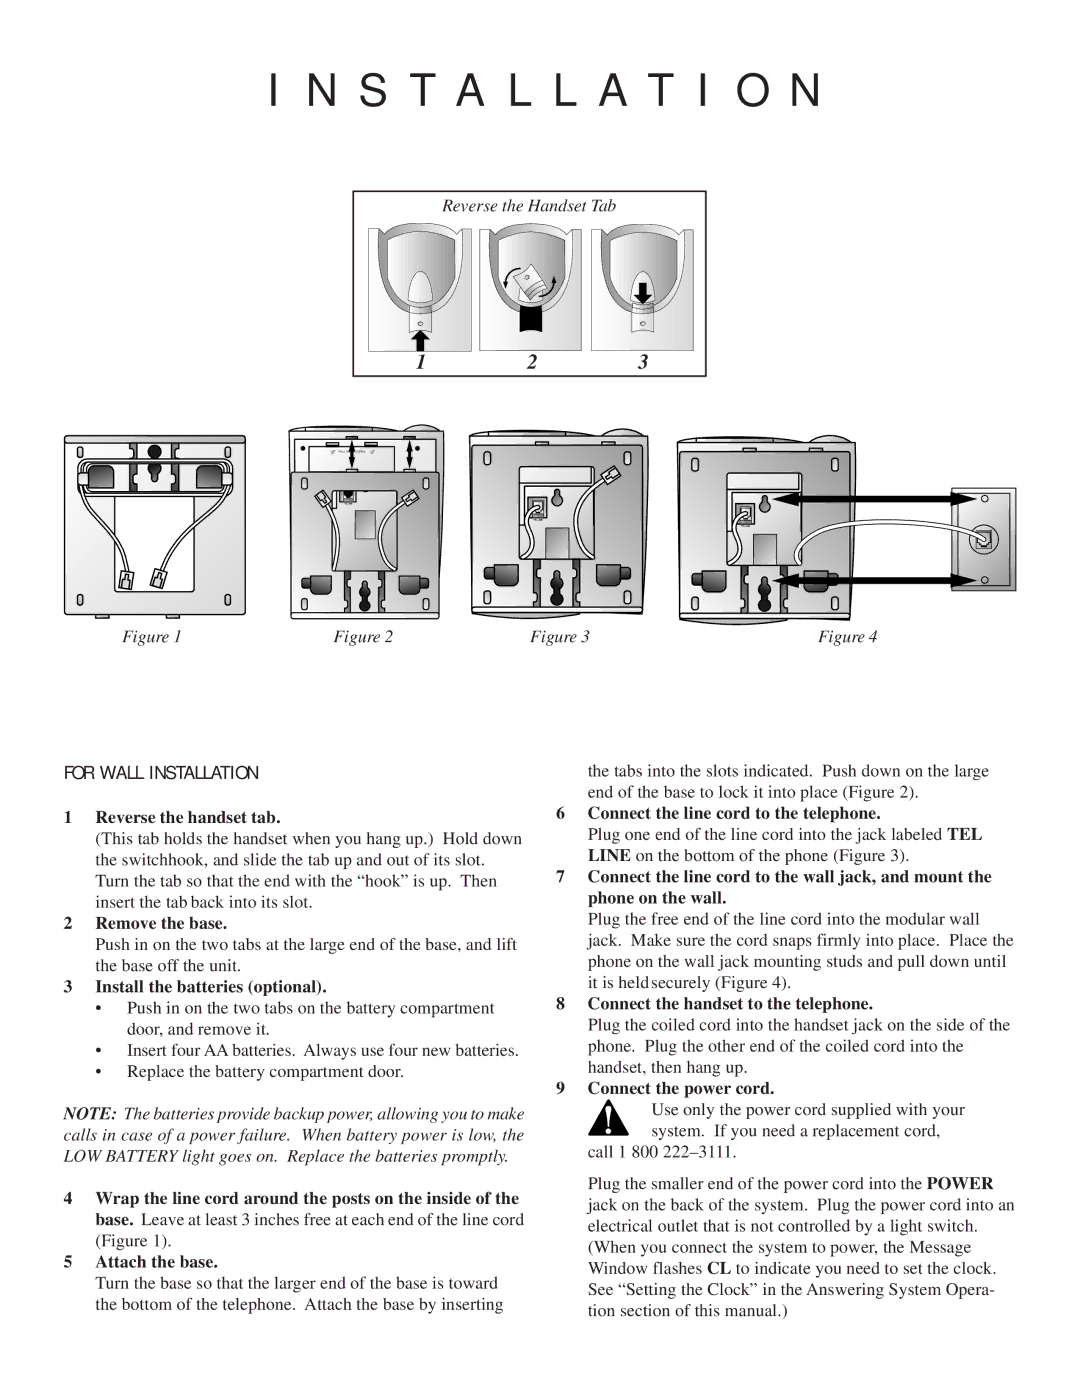
| Reverse the Handset Tab |
|
1 | 2 | 3 |
PULL TABS TO OPEN
PULL TABS TO OPEN |
PULL TABS TO OPEN |
Figure 1 | Figure 2 | Figure 3 | Figure 4 |
FOR WALL INSTALLATION
the tabs into the slots indicated. Push down on the large end of the base to lock it into place (Figure 2).
1Reverse the handset tab.
(This tab holds the handset when you hang up.) Hold down the switchhook, and slide the tab up and out of its slot. Turn the tab so that the end with the “hook” is up. Then insert the tab back into its slot.
2Remove the base.
Push in on the two tabs at the large end of the base, and lift the base off the unit.
3Install the batteries (optional).
•Push in on the two tabs on the battery compartment door, and remove it.
•Insert four AA batteries. Always use four new batteries.
•Replace the battery compartment door.
6Connect the line cord to the telephone.
Plug one end of the line cord into the jack labeled TEL LINE on the bottom of the phone (Figure 3).
7Connect the line cord to the wall jack, and mount the phone on the wall.
Plug the free end of the line cord into the modular wall jack. Make sure the cord snaps firmly into place. Place the phone on the wall jack mounting studs and pull down until it is held securely (Figure 4).
8Connect the handset to the telephone.
Plug the coiled cord into the handset jack on the side of the phone. Plug the other end of the coiled cord into the handset, then hang up.
9Connect the power cord.
NOTE: The batteries provide backup power, allowing you to make calls in case of a power failure. When battery power is low, the LOW BATTERY light goes on. Replace the batteries promptly.
4Wrap the line cord around the posts on the inside of the base. Leave at least 3 inches free at each end of the line cord (Figure 1).
5Attach the base.
Turn the base so that the larger end of the base is toward the bottom of the telephone. Attach the base by inserting
Use only the power cord supplied with your system. If you need a replacement cord,
call 1 800
Plug the smaller end of the power cord into the POWER jack on the back of the system. Plug the power cord into an electrical outlet that is not controlled by a light switch. (When you connect the system to power, the Message Window flashes CL to indicate you need to set the clock. See “Setting the Clock” in the Answering System Opera- tion section of this manual.)