Installation
Proceed to Step 2 only after the software has been correctly installed.
If correctly installed, a Utility icon (four vertical bars) should appear next to your computer’s time display. An “X” indicates that software installation was successful, but the wireless adapter is not yet activated.
Install software BEFORE installing the adapter (see Step 1 on previous page). CAUTION: Turn OFF and UNPLUG your computer before opening it.
STEP 2: Install the Wireless USB Adapter
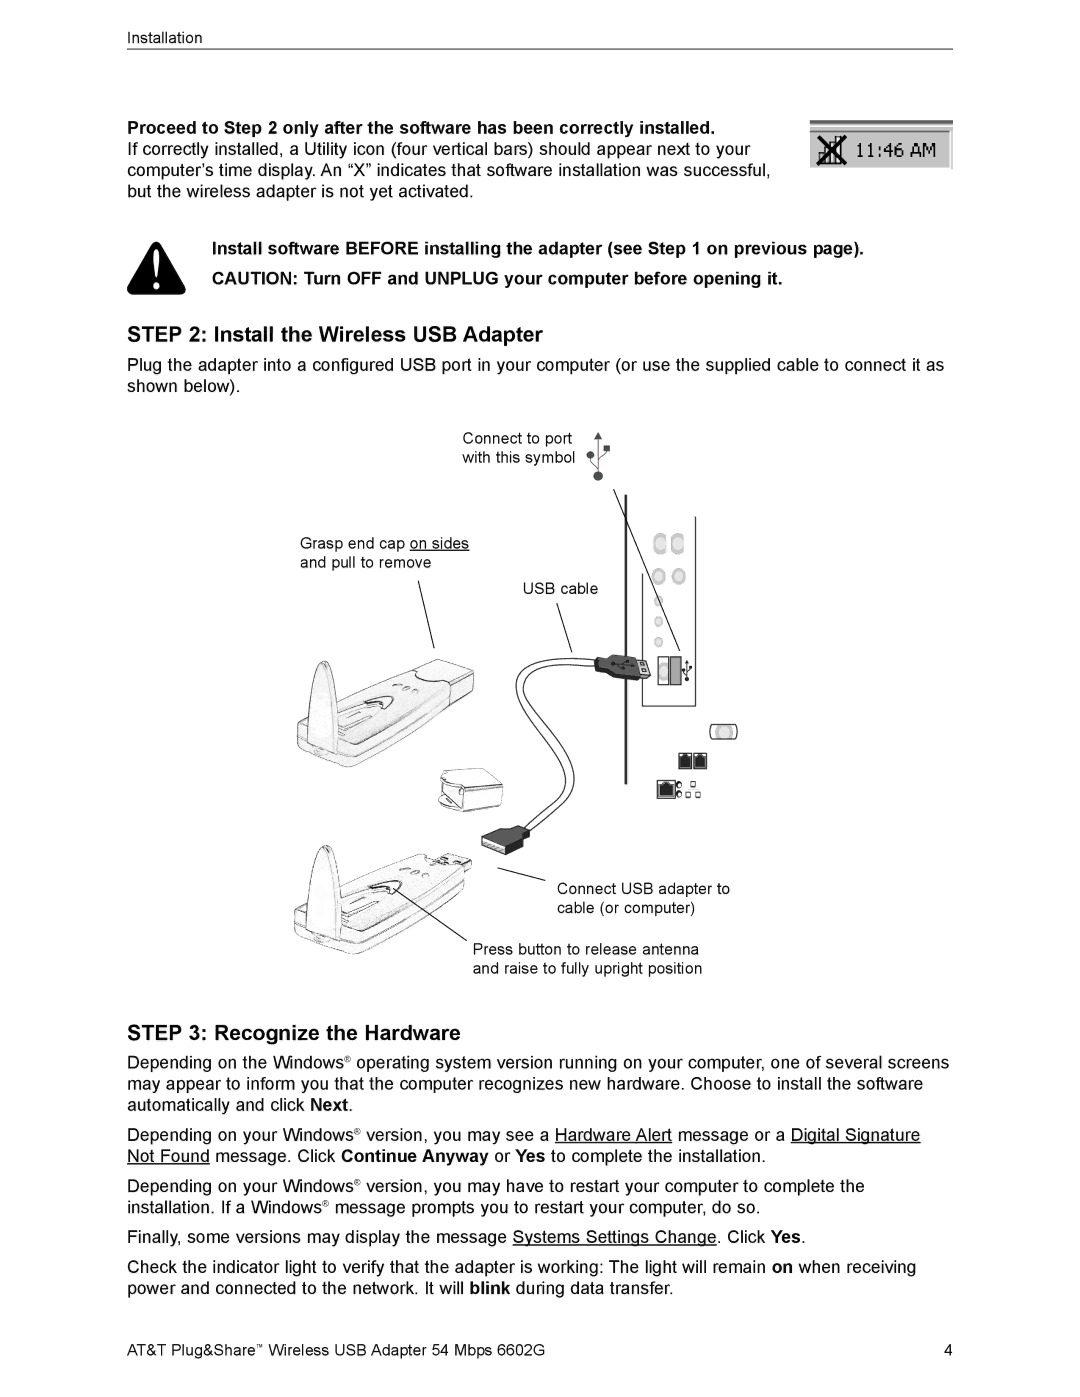
Plug the adapter into a configured USB port in your computer (or use the supplied cable to connect it as shown below).
Connect to port with this symbol
Grasp end cap on sides and pull to remove
USB cable
Connect USB adapter to cable (or computer)
Press button to release antenna and raise to fully upright position
STEP 3: Recognize the Hardware
Depending on the Windows® operating system version running on your computer, one of several screens may appear to inform you that the computer recognizes new hardware. Choose to install the software automatically and click Next.
Depending on your Windows® version, you may see a Hardware Alert message or a Digital Signature Not Found message. Click Continue Anyway or Yes to complete the installation.
Depending on your Windows® version, you may have to restart your computer to complete the installation. If a Windows® message prompts you to restart your computer, do so.
Finally, some versions may display the message Systems Settings Change. Click Yes.
Check the indicator light to verify that the adapter is working: The light will remain on when receiving power and connected to the network. It will blink during data transfer.
AT&T Plug&Share™ Wireless USB Adapter 54 Mbps 6602G | 4 |