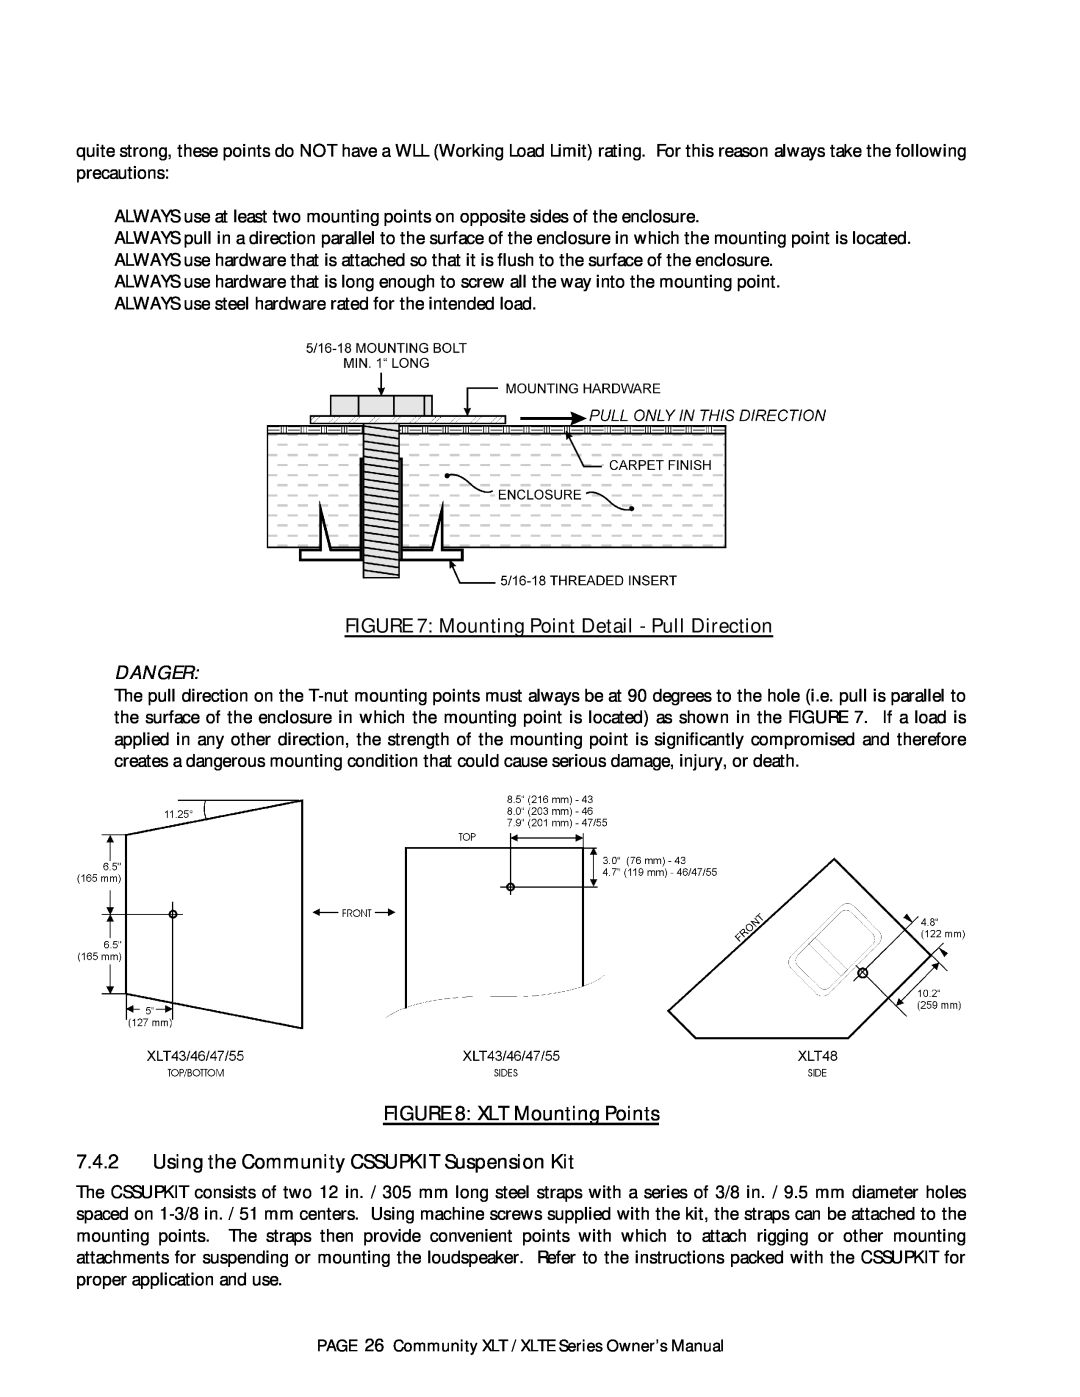
FIGURE 7: Mounting Point Detail - Pull Direction

quite strong, these points do NOT have a WLL (Working Load Limit) rating. For this reason always take the following precautions:

ALWAYS use at least two mounting points on opposite sides of the enclosure.

ALWAYS pull in a direction parallel to the surface of the enclosure in which the mounting point is located. ALWAYS use hardware that is attached so that it is flush to the surface of the enclosure.

ALWAYS use hardware that is long enough to screw all the way into the mounting point. ALWAYS use steel hardware rated for the intended load.

FIGURE 7: Mounting Point Detail - Pull Direction

DANGER:

The pull direction on the T-nut mounting points must always be at 90 degrees to the hole (i.e. pull is parallel to the surface of the enclosure in which the mounting point is located) as shown in the FIGURE 7. If a load is applied in any other direction, the strength of the mounting point is significantly compromised and therefore creates a dangerous mounting condition that could cause serious damage, injury, or death.

FIGURE 8: XLT Mounting Points

7.4.2Using the Community CSSUPKIT Suspension Kit

The CSSUPKIT consists of two 12 in. / 305 mm long steel straps with a series of 3/8 in. / 9.5 mm diameter holes spaced on 1-3/8 in. / 51 mm centers. Using machine screws supplied with the kit, the straps can be attached to the mounting points. The straps then provide convenient points with which to attach rigging or other mounting attachments for suspending or mounting the loudspeaker. Refer to the instructions packed with the CSSUPKIT for proper application and use.

PAGE 26 Community XLT / XLTE Series Owner’s Manual
Page 28
Image 28
Atlas Sound XLTE owner manual Mounting Point Detail - Pull Direction, XLT Mounting Points, Danger