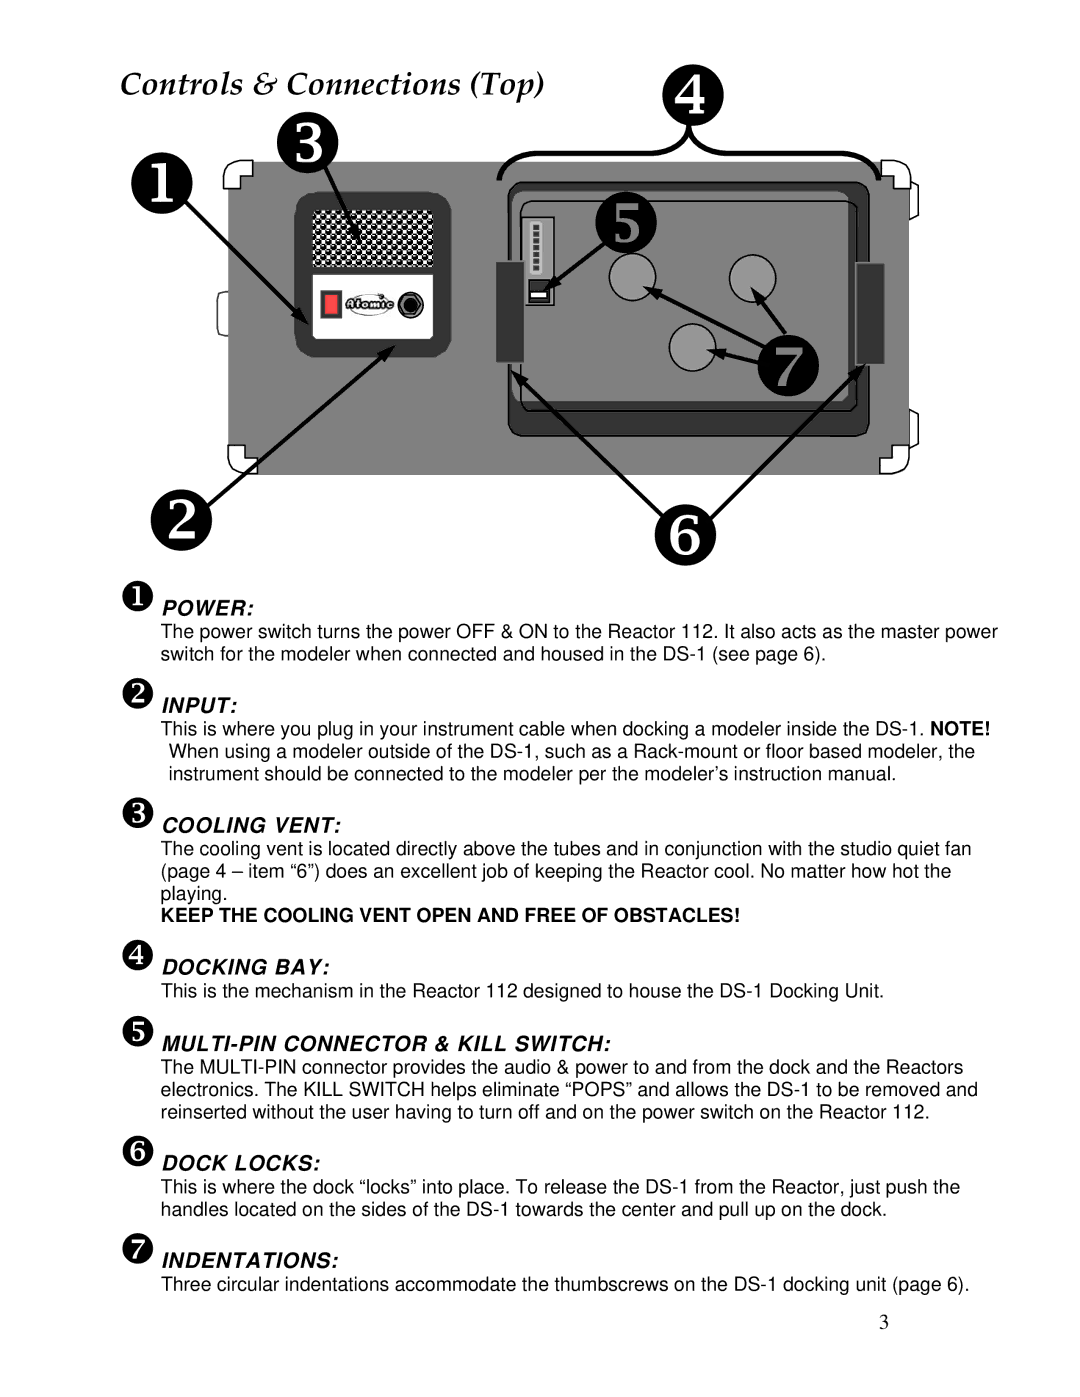
Controls & Connections (Top) | [ |
X Z | \ |
| |
| ^ |
Y ]
XPOWER:
The power switch turns the power OFF & ON to the Reactor 112. It also acts as the master power switch for the modeler when connected and housed in the
YINPUT:
This is where you plug in your instrument cable when docking a modeler inside the
ZCOOLING VENT:
The cooling vent is located directly above the tubes and in conjunction with the studio quiet fan (page 4 – item “6”) does an excellent job of keeping the Reactor cool. No matter how hot the playing.
KEEP THE COOLING VENT OPEN AND FREE OF OBSTACLES!
[DOCKING BAY:
This is the mechanism in the Reactor 112 designed to house the
\MULTI-PIN CONNECTOR & KILL SWITCH:
The
]DOCK LOCKS:
This is where the dock “locks” into place. To release the
^INDENTATIONS:
Three circular indentations accommodate the thumbscrews on the
3