Basic Set Up
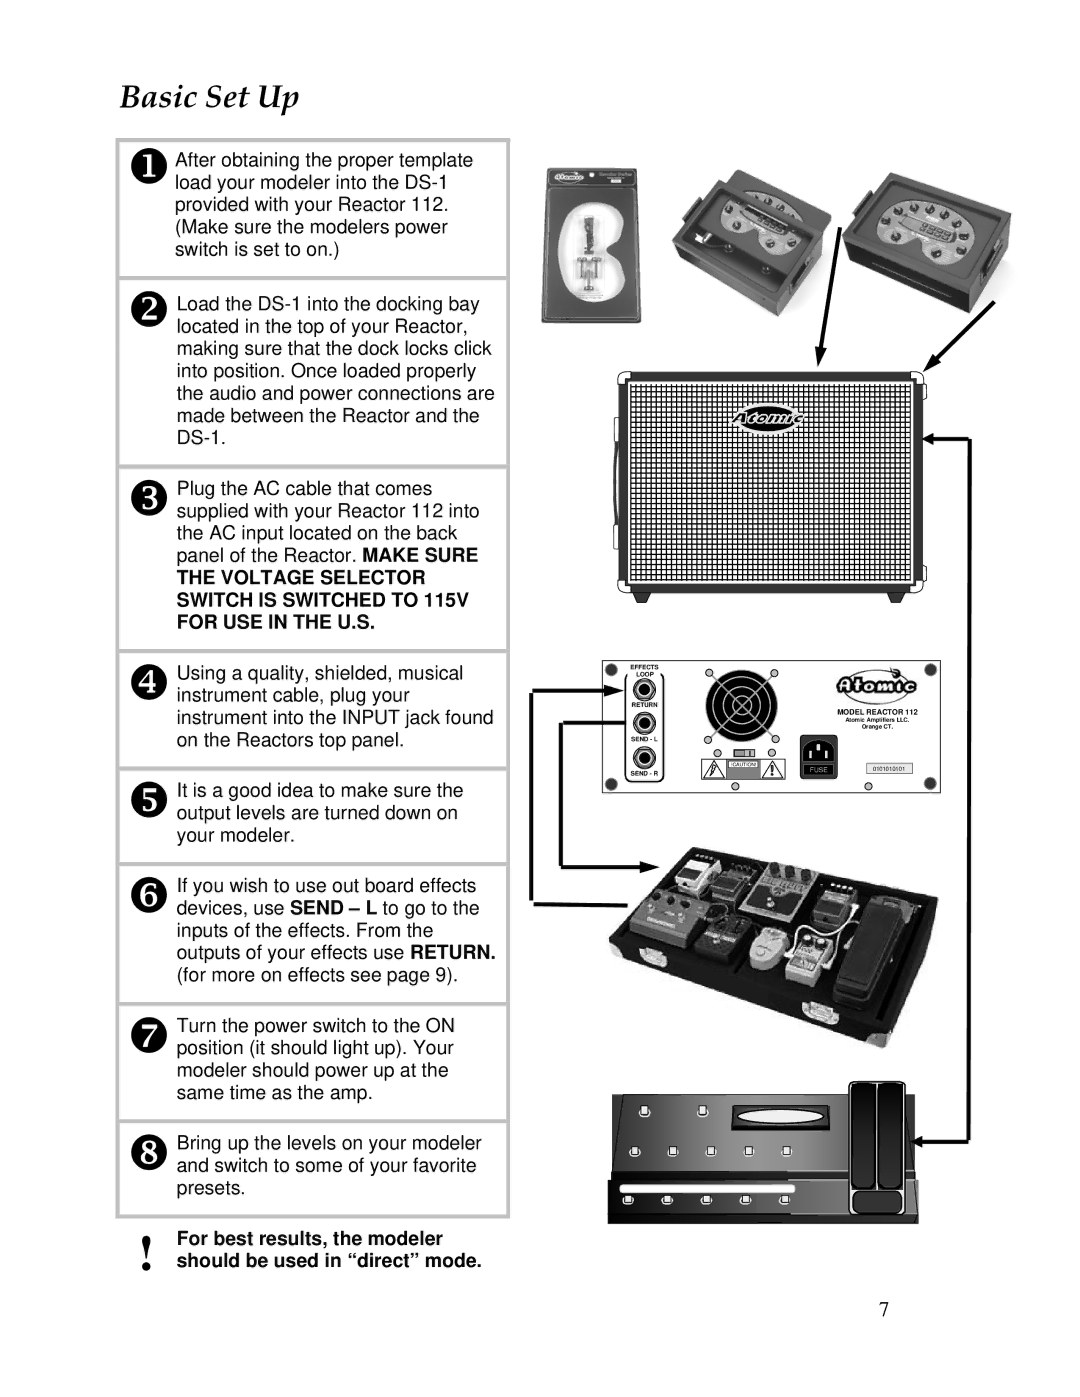
XAfter obtaining the proper template load your modeler into the
YLoad the
ZPlug the AC cable that comes supplied with your Reactor 112 into the AC input located on the back panel of the Reactor. MAKE SURE
THE VOLTAGE SELECTOR SWITCH IS SWITCHED TO 115V FOR USE IN THE U.S.
[Using a quality, shielded, musical instrument cable, plug your instrument into the INPUT jack found on the Reactors top panel.
\It is a good idea to make sure the output levels are turned down on your modeler.
]If you wish to use out board effects devices, use SEND – L to go to the inputs of the effects. From the outputs of your effects use RETURN. (for more on effects see page 9).
^Turn the power switch to the ON position (it should light up). Your modeler should power up at the same time as the amp.
_Bring up the levels on your modeler and switch to some of your favorite presets.
!For best results, the modeler should be used in “direct” mode.
EFFECTS |
|
|
LOOP |
|
|
RETURN |
| MODEL REACTOR 112 |
|
| |
|
| Atomic Amplifiers LLC. |
|
| Orange CT. |
SEND - L |
|
|
| !CAUTION! | 0101010101 |
SEND - R | FUSE | |
|
|
7
