To reduce the risk of injuries:
·Wear protective gloves when handling parts that have sharp edges to prevent cuts.
·This assembly may require help from another person to prevent handling or lifting injury.
Step 5) Assemble Grill Body to Cart:
•Remove the Bottom panel from the Grill Body.
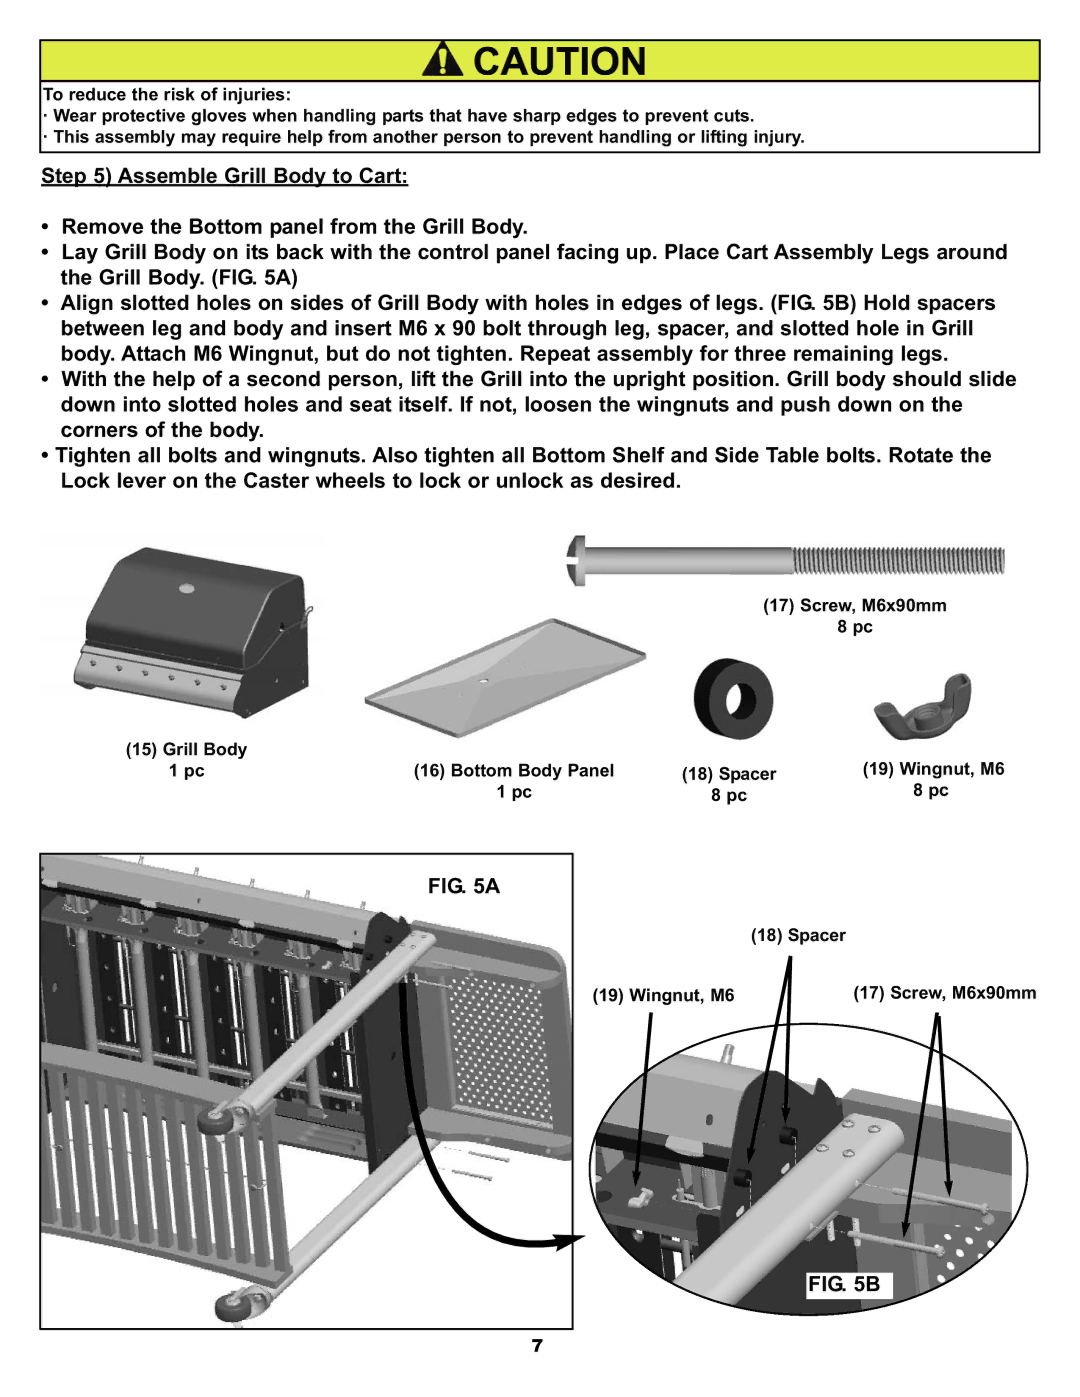
•Lay Grill Body on its back with the control panel facing up. Place Cart Assembly Legs around the Grill Body. (FIG. 5A)
•Align slotted holes on sides of Grill Body with holes in edges of legs. (FIG. 5B) Hold spacers between leg and body and insert M6 x 90 bolt through leg, spacer, and slotted hole in Grill body. Attach M6 Wingnut, but do not tighten. Repeat assembly for three remaining legs.
•With the help of a second person, lift the Grill into the upright position. Grill body should slide down into slotted holes and seat itself. If not, loosen the wingnuts and push down on the corners of the body.
•Tighten all bolts and wingnuts. Also tighten all Bottom Shelf and Side Table bolts. Rotate the Lock lever on the Caster wheels to lock or unlock as desired.
(17)Screw, M6x90mm
8 pc
(15) Grill Body |
|
|
|
1 pc | (16) Bottom Body Panel | (18) Spacer | (19) Wingnut, M6 |
| 1 pc | 8 pc | 8 pc |
FIG. 5A
(18) Spacer
|
| (17) Screw, M6x90mm |
(19) Wingnut, M6 |
| |
|
|
|
FIG. 5B
7
