10
LP Hose and Regulator
!WARNING
To reduce the risk of serious bodily injury or death from fire or explosion:
•Clean and inspect the gas hose/regulator before each use of the outdoor cooking gas appliance. The gas hose/ regulator must be replaced prior to being used, if there is evidence of excessive abrasion or wear, or if the hose is cut or leaks.
•Use only the gas hose/regulator assembly that has been supplied with this gas grill. Do not use hose/regulator from another manufacturer. Replacement gas hose/regulator assembly must be specified by this grill’s manufacturer before using.
•Always check for gas leaks when you connect and disconnect the hose/regulator to the LP Gas Cylinder, espe- cially after a period of storage (for example, over winter).
•Make sure there are no sharp bends in the hose.
•Make sure the hose/regulator does not contact any heated surfaces.
NOTE: If the hose/regulator assembly is not working properly and you need a replacement, contact Customer Ser- vice at
Be sure to have the grill model number and serial number printed on the black label, located on the back face of the bottom tube of cart base. If you need a replacement part under warranty, a proof of purchase will be nec- essary. You will be asked to forward your proof of purchase via
Connecting LP Gas Cylinder
1.Fill empty OPD LP Gas Cylinder at your local gas supplier.
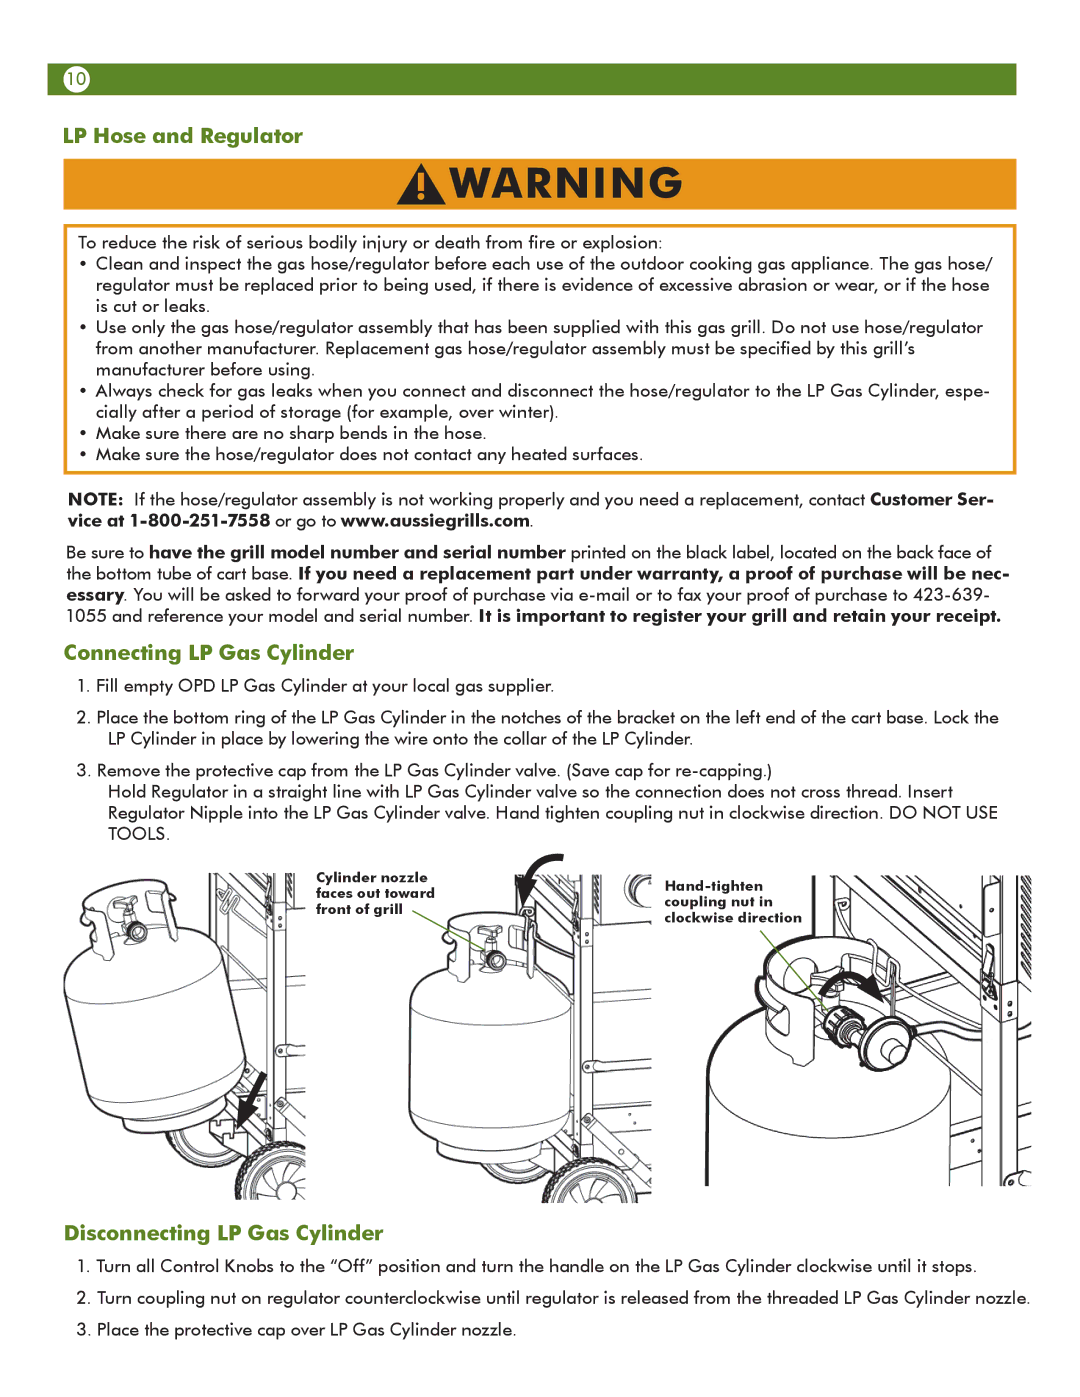
2.Place the bottom ring of the LP Gas Cylinder in the notches of the bracket on the left end of the cart base. Lock the LP Cylinder in place by lowering the wire onto the collar of the LP Cylinder.
3.Remove the protective cap from the LP Gas Cylinder valve. (Save cap for
Hold Regulator in a straight line with LP Gas Cylinder valve so the connection does not cross thread. Insert Regulator Nipple into the LP Gas Cylinder valve. Hand tighten coupling nut in clockwise direction. DO NOT USE TOOLS.
Cylinder nozzle | ||
faces out toward | ||
coupling nut in | ||
front of grill | ||
clockwise direction | ||
|
Disconnecting LP Gas Cylinder
1.Turn all Control Knobs to the “Off” position and turn the handle on the LP Gas Cylinder clockwise until it stops.
2.Turn coupling nut on regulator counterclockwise until regulator is released from the threaded LP Gas Cylinder nozzle.
3.Place the protective cap over LP Gas Cylinder nozzle.