4
Assembly Instructions
!CAUTION
PINCH HAZARD
To reduce the risk of bodily injury from pinch hazard, keep hands and fingers away from hinges, leg pivot points and moving parts. Only open the cart by gripping the top of each leg frame.
Read and follow these instructions to set up your grill.
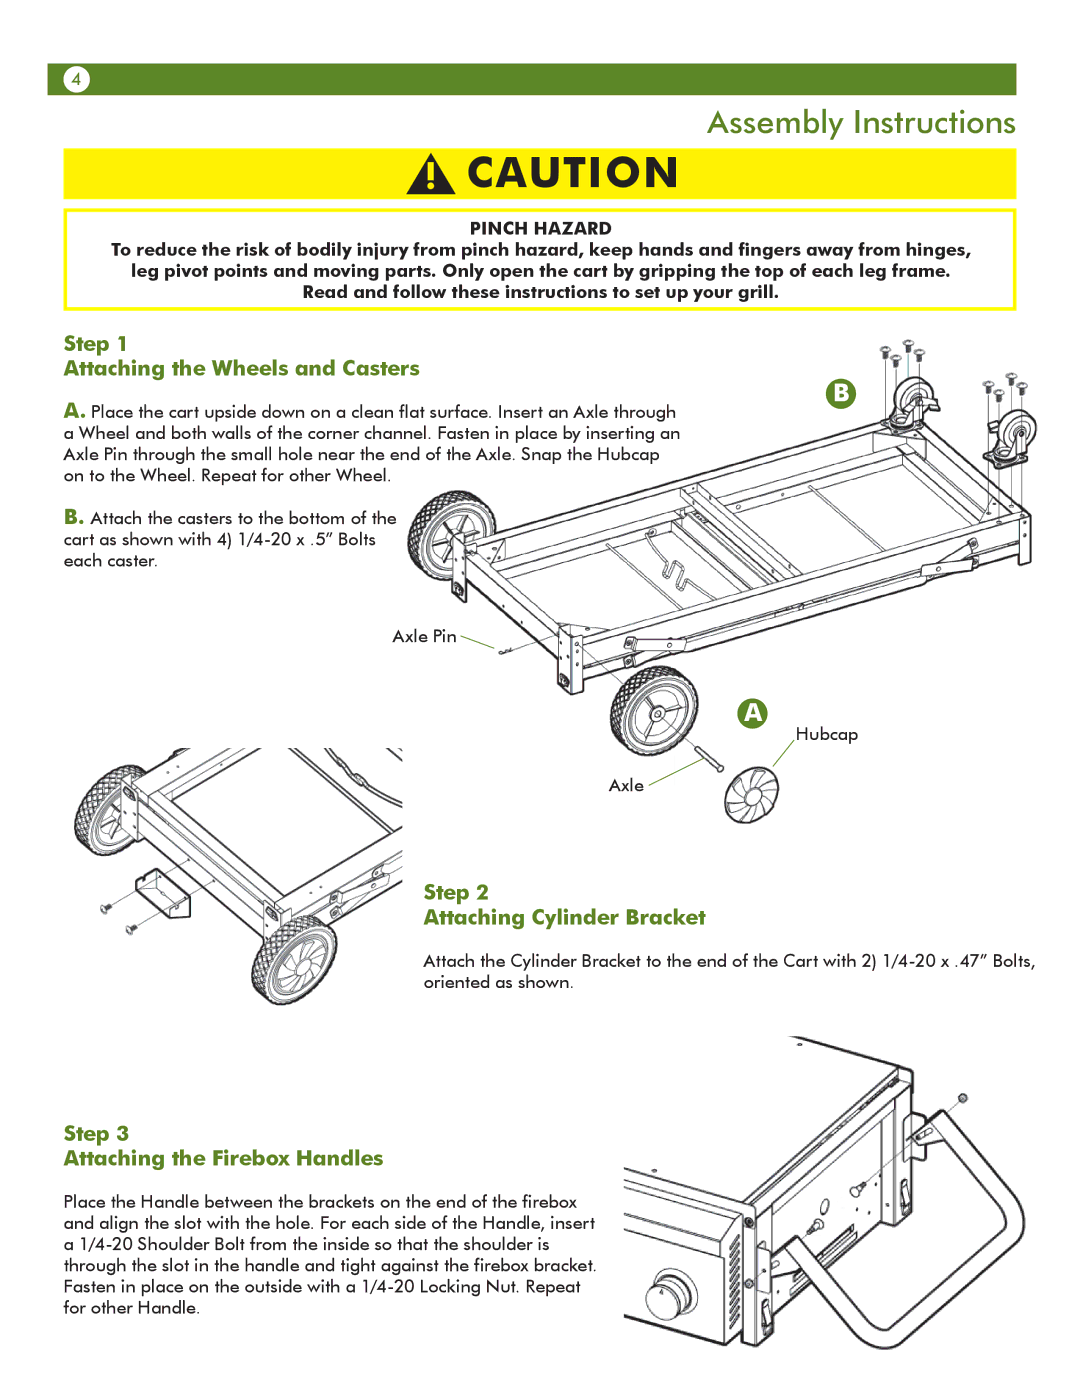
Step 1
Attaching the Wheels and Casters
A. Place the cart upside down on a clean flat surface. Insert an Axle through a Wheel and both walls of the corner channel. Fasten in place by inserting an Axle Pin through the small hole near the end of the Axle. Snap the Hubcap on to the Wheel. Repeat for other Wheel.
B. Attach the casters to the bottom of the cart as shown with 4)
Axle Pin ![]()
B
A
Hubcap
Axle ![]()
Step 2
Attaching Cylinder Bracket
Attach the Cylinder Bracket to the end of the Cart with 2)
Step 3
Attaching the Firebox Handles
Place the Handle between the brackets on the end of the firebox and align the slot with the hole. For each side of the Handle, insert a
