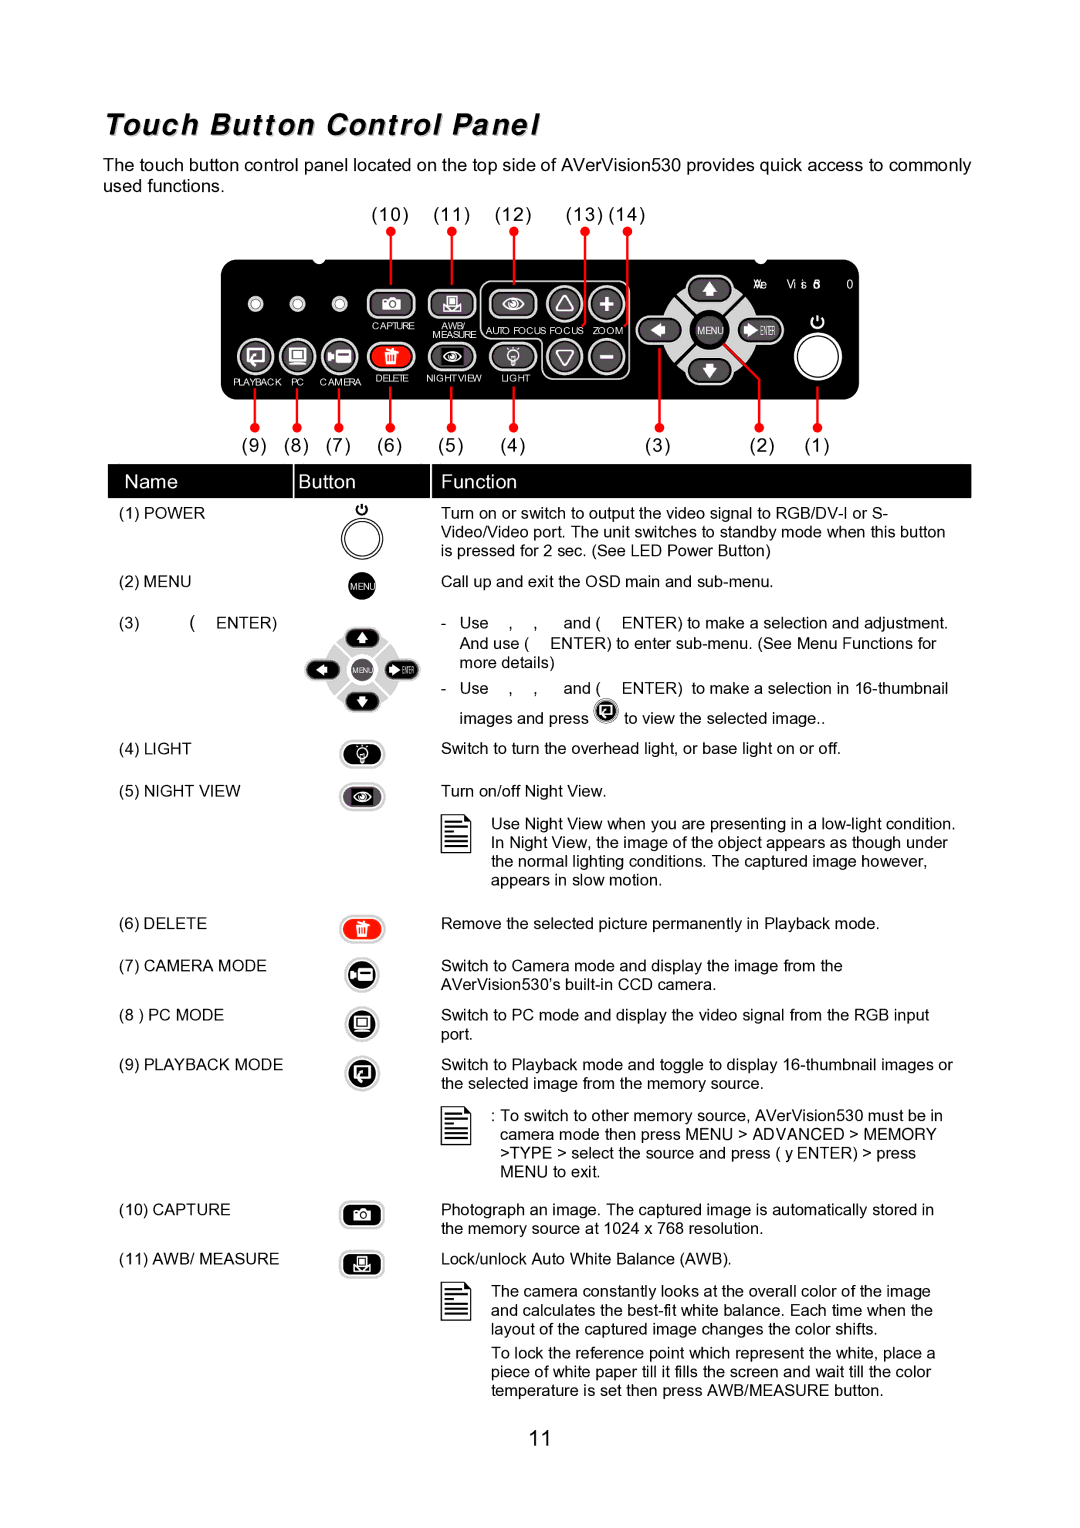
Touch Button Control Panel
The touch button control panel located on the top side of AVerVision530 provides quick access to commonly used functions.
(10) | (11) | (12) | (13) (14) |
AVerVision530
| CAPTURE | AWB/ | AUTO FOCUS FOCUS ZOOM | MENU | ENTER |
|
| MEASURE | |||
PLAYBACK PC CAMERA | DELETE | NIGHTVIEW | LIGHT |
|
|
|
|
|
|
|
(9) (8) (7) (6)
(5) | (4) | (3) | (2) | (1) |
Name
(1)POWER
(2)MENU
(3)×ØÕ(Ö ENTER)
Button
MENU
Function
Turn on or switch to output the video signal to
Call up and exit the OSD main and
- Use ×, Ø, Õ and (Ö ENTER) to make a selection and adjustment. |
And use (Ö ENTER) to enter |
MENU ![]() ENTER
ENTER
(4) LIGHT
(5) NIGHT VIEW
more details) |
- Use ×, Ø, Õ and (Ö ENTER) to make a selection in |
images and press ![]() to view the selected image..
to view the selected image..
Switch to turn the overhead light, or base light on or off.
Turn on/off Night View.
Use Night View when you are presenting in a
(6) | DELETE | Remove the selected picture permanently in Playback mode. |
(7) | CAMERA MODE | Switch to Camera mode and display the image from the |
|
| AVerVision530’s |
(8 ) PC MODE | Switch to PC mode and display the video signal from the RGB input | |
|
| port. |
(9) | PLAYBACK MODE | Switch to Playback mode and toggle to display |
|
| the selected image from the memory source. |
:To switch to other memory source, AVerVision530 must be in camera mode then press MENU > ADVANCED > MEMORY >TYPE > select the source and press (►ENTER) > press MENU to exit.
(10) | CAPTURE |
| Photograph an image. The captured image is automatically stored in |
|
|
| the memory source at 1024 x 768 resolution. |
(11) | AWB/ MEASURE |
| Lock/unlock Auto White Balance (AWB). |
|
The camera constantly looks at the overall color of the image and calculates the
To lock the reference point which represent the white, place a piece of white paper till it fills the screen and wait till the color temperature is set then press AWB/MEASURE button.
11