6.0 Remote Operation
6.1 Introduction
The Remote Operation feature allows the user to control all operations of the 4070A with a terminal or computer. Commands and responses use ASCII characters; permitting a "dumb" terminal to be used to control the 4070A.
Each key on the front panel keypad has an ASCII letter associated with it. Sending this letter to the 4070A through the serial port has the same effect as pressing that key on the keypad. In addition, there are extra commands that are only available from the terminal port. These commands let you perform such tasks as disabling the keypad, printing a help screen, resetting the 4070A, etc. Section 6.5 describes each command.
When a key is pressed on the front panel of the 4070A, its associated ASCII character is echoed out to the serial port. This enables a control program to monitor and act upon front panel key press.
6.2 Connecting
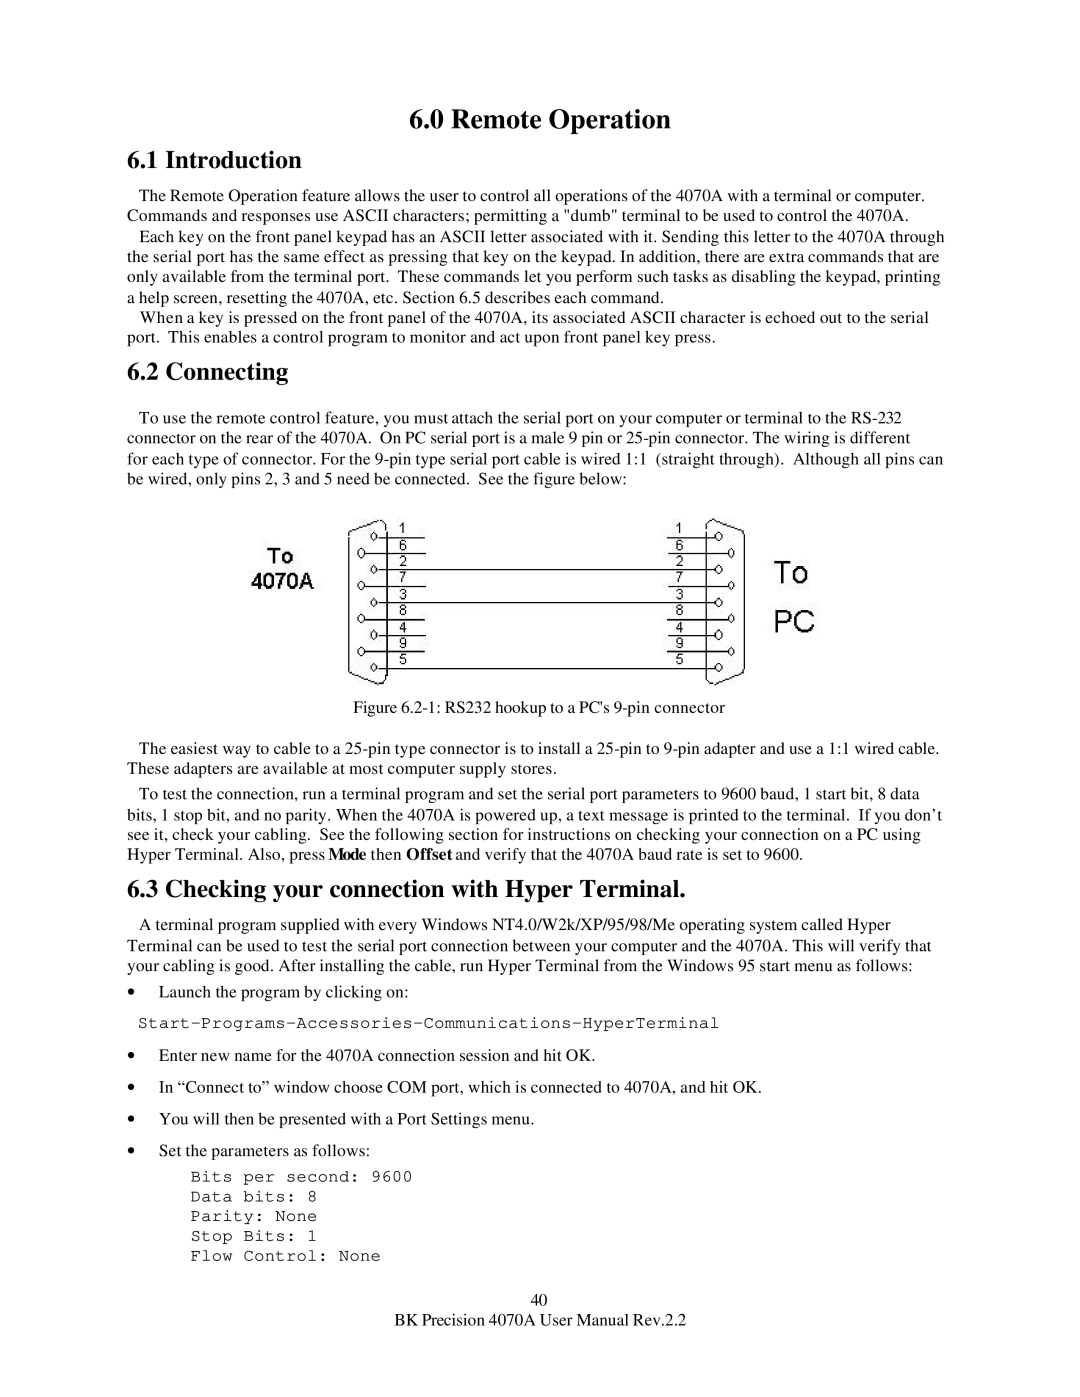
To use the remote control feature, you must attach the serial port on your computer or terminal to the
Figure 6.2-1: RS232 hookup to a PC's 9-pin connector
The easiest way to cable to a 25-pin type connector is to install a 25-pin to 9-pin adapter and use a 1:1 wired cable. These adapters are available at most computer supply stores.
To test the connection, run a terminal program and set the serial port parameters to 9600 baud, 1 start bit, 8 data bits, 1 stop bit, and no parity. When the 4070A is powered up, a text message is printed to the terminal. If you don’t see it, check your cabling. See the following section for instructions on checking your connection on a PC using Hyper Terminal. Also, press Mode then Offset and verify that the 4070A baud rate is set to 9600.
6.3 Checking your connection with Hyper Terminal.
A terminal program supplied with every Windows NT4.0/W2k/XP/95/98/Me operating system called Hyper Terminal can be used to test the serial port connection between your computer and the 4070A. This will verify that your cabling is good. After installing the cable, run Hyper Terminal from the Windows 95 start menu as follows:
∙Launch the program by clicking on:
∙Enter new name for the 4070A connection session and hit OK.
∙In “Connect to” window choose COM port, which is connected to 4070A, and hit OK.
∙You will then be presented with a Port Settings menu.
∙Set the parameters as follows:
Bits per second: 9600
Data bits: 8
Parity: None
Stop Bits: 1
Flow Control: None
40
BK Precision 4070A User Manual Rev.2.2
