Figure 16

Figure 17

Figure 18

Figure 19

6.1f. Replacing the thermometer.

Required: Crescent or standard 3/4" wrench

1.Remove front panel as found in section 6-1b.

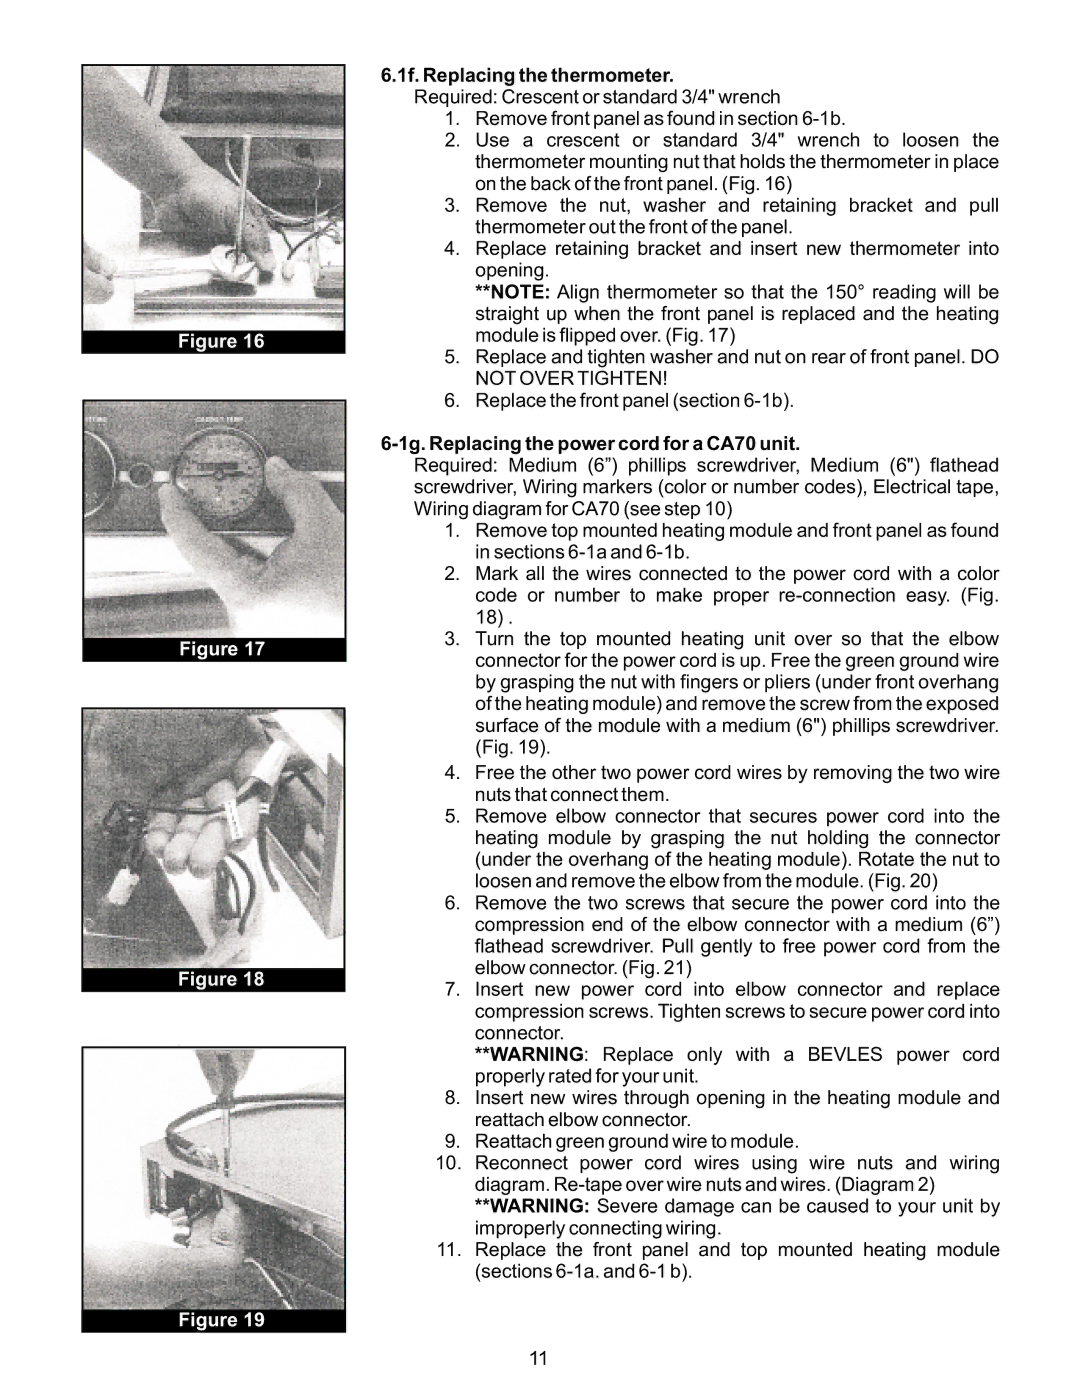
2.Use a crescent or standard 3/4" wrench to loosen the thermometer mounting nut that holds the thermometer in place on the back of the front panel. (Fig. 16)

3.Remove the nut, washer and retaining bracket and pull thermometer out the front of the panel.

4.Replace retaining bracket and insert new thermometer into opening.

**NOTE: Align thermometer so that the 150° reading will be straight up when the front panel is replaced and the heating module is flipped over. (Fig. 17)

5.Replace and tighten washer and nut on rear of front panel. DO NOT OVER TIGHTEN!

6.Replace the front panel (section 6-1b).

6-1g. Replacing the power cord for a CA70 unit.

Required: Medium (6”) phillips screwdriver, Medium (6") flathead screwdriver, Wiring markers (color or number codes), Electrical tape, Wiring diagram for CA70 (see step 10)

1.Remove top mounted heating module and front panel as found in sections 6-1a and 6-1b.

2.Mark all the wires connected to the power cord with a color code or number to make proper re-connection easy. (Fig.

18).

3.Turn the top mounted heating unit over so that the elbow connector for the power cord is up. Free the green ground wire by grasping the nut with fingers or pliers (under front overhang of the heating module) and remove the screw from the exposed surface of the module with a medium (6") phillips screwdriver. (Fig. 19).

4.Free the other two power cord wires by removing the two wire nuts that connect them.

5.Remove elbow connector that secures power cord into the heating module by grasping the nut holding the connector (under the overhang of the heating module). Rotate the nut to loosen and remove the elbow from the module. (Fig. 20)

6.Remove the two screws that secure the power cord into the compression end of the elbow connector with a medium (6”) flathead screwdriver. Pull gently to free power cord from the elbow connector. (Fig. 21)

7.Insert new power cord into elbow connector and replace compression screws. Tighten screws to secure power cord into connector.

**WARNING: Replace only with a BEVLES power cord properly rated for your unit.

8.Insert new wires through opening in the heating module and reattach elbow connector.

9.Reattach green ground wire to module.

10.Reconnect power cord wires using wire nuts and wiring diagram. Re-tape over wire nuts and wires. (Diagram 2) **WARNING:11Severe damage can be caused to your unit by improperly connecting wiring.

11.Replace the front panel and top mounted heating module (sections 6-1a. and 6-1 b).

Page 11
Image 11
Bakers Pride Oven CA43-CV7 or CV13, CS43-CHUS6 1f. Replacing the thermometer, 1g. Replacing the power cord for a CA70 unit

CA43-CVMP6, CA34-CV9, CA43-CV7 or CV13, CA43-CV9, CS43-CVMP6-SB specifications

The Bakers Pride Oven series, including models CA70-CVMP12, CS43-CHUS6, CS34-CH9, CA34-CVMP4, and CS61-CVMP12-SB, exemplifies the pinnacle of commercial baking technology. Known for their reliability and efficiency, these ovens are tailored for high-volume kitchen environments, making them a staple in pizzerias, bakeries, and restaurants.

One of the standout features of the Bakers Pride ovens is their exceptional heat retention and distribution. With advanced construction materials and design, these ovens enable even baking, ensuring consistent results across multiple racks. This is especially crucial for establishments that prioritize uniformity in their baked goods, from crispy pizzas to perfectly browned bread.

The CA70-CVMP12 model boasts dual pizza chambers that provide flexibility for simultaneous baking of different types of products. Its high-temperature capabilities are perfect for Neapolitan-style pizzas, reaching temperatures that ensure a quick cook time without sacrificing quality. The unit's stainless steel construction not only enhances durability but also allows for easy cleaning and maintenance.

Meanwhile, the CS43-CHUS6 and CS34-CH9 are equipped with features such as digital controls and programmable settings, allowing operators to customize baking cycles to suit specific recipes. This technology is particularly advantageous for busy kitchens that need to maintain precision while optimizing workflow efficiency. With the ability to save and replicate settings, these ovens ensure that each dish meets exacting quality standards.

The CA34-CVMP4 model specializes in versatility, accommodating various types of baking needs from breads to pastries. Its compact design does not compromise on performance, making it suitable for smaller kitchens without sacrificing output. The innovative airflow system enhances baking efficiency, ensuring that heat is evenly distributed throughout the chamber.

Lastly, the CS61-CVMP12-SB incorporates advanced thermal efficiency, which translates to reduced energy consumption and lower operating costs. This environmentally conscious design does not compromise performance, making it an ideal choice for establishments looking to balance sustainability with productivity.

Overall, the Bakers Pride Oven series is a testament to innovation and craftsmanship in the baking industry. With their blend of advanced features, flexible configurations, and robust build quality, these ovens are engineered to meet the demanding needs of modern commercial kitchens, ensuring that chefs and bakers can deliver exceptional results every time.