English
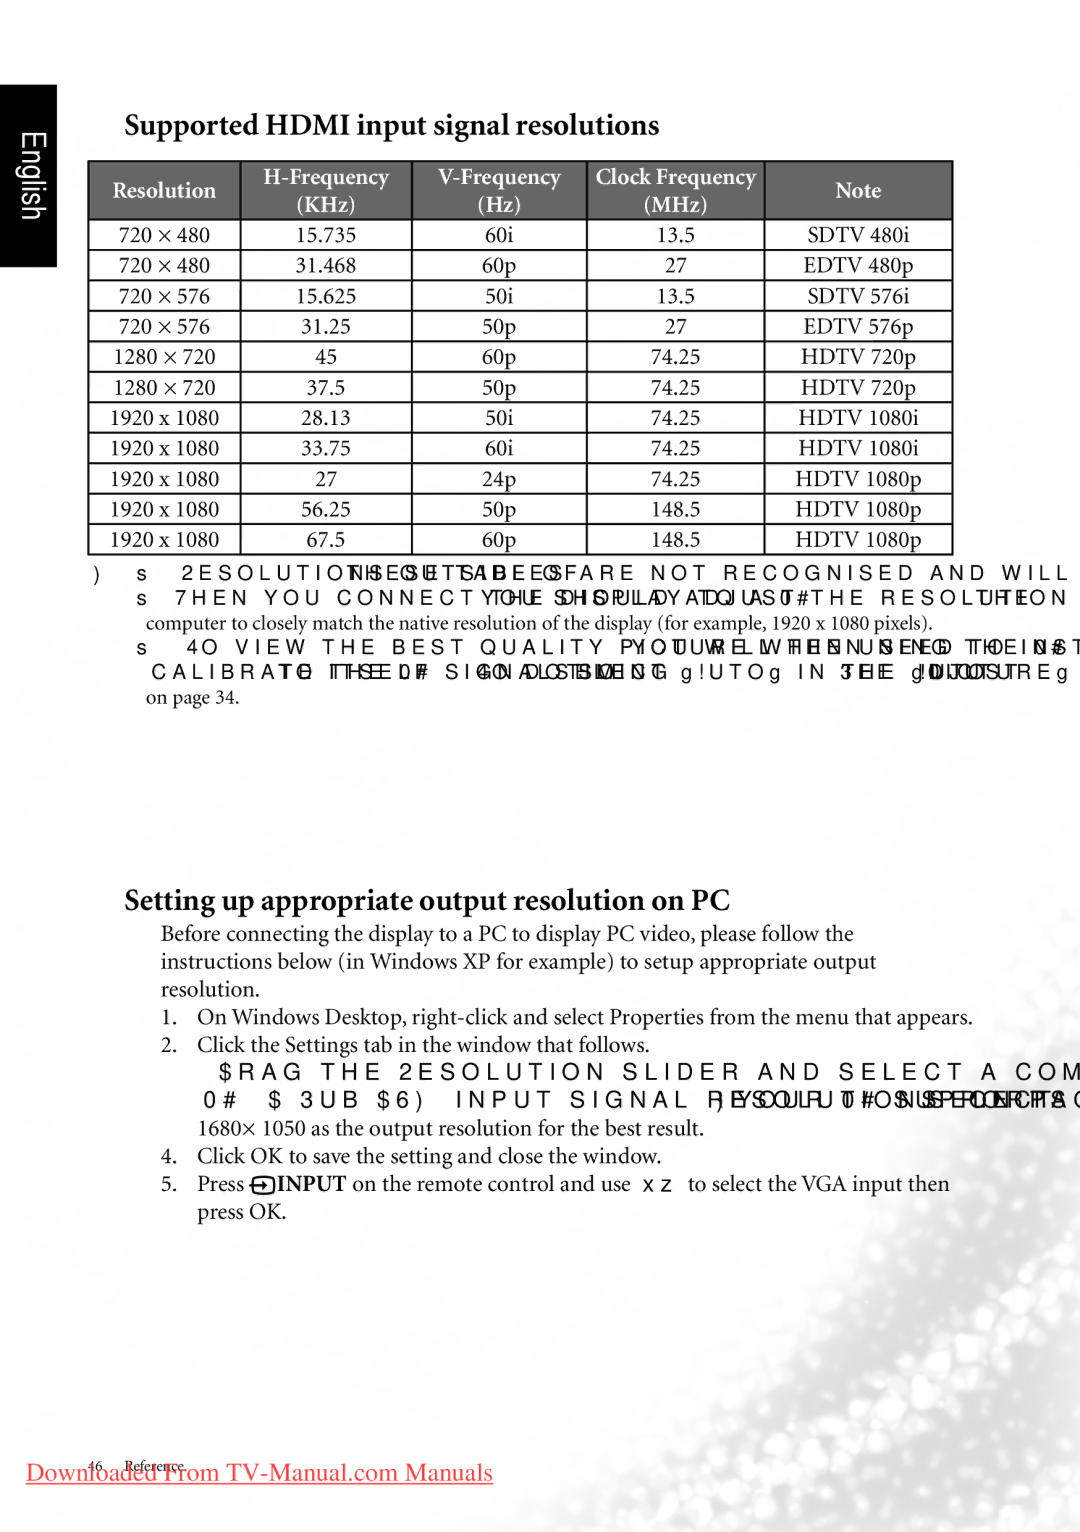
Supported HDMI input signal resolutions
Resolution | Clock Frequency | Note | |||
(KHz) | (Hz) | (MHz) | |||
|
| ||||
720 × 480 | 15.735 | 60i | 13.5 | SDTV 480i | |
720 × 480 | 31.468 | 60p | 27 | EDTV 480p | |
720 × 576 | 15.625 | 50i | 13.5 | SDTV 576i | |
720 × 576 | 31.25 | 50p | 27 | EDTV 576p | |
1280 × 720 | 45 | 60p | 74.25 | HDTV 720p | |
1280 × 720 | 37.5 | 50p | 74.25 | HDTV 720p | |
1920 x 1080 | 28.13 | 50i | 74.25 | HDTV 1080i | |
1920 x 1080 | 33.75 | 60i | 74.25 | HDTV 1080i | |
1920 x 1080 | 27 | 24p | 74.25 | HDTV 1080p | |
1920 x 1080 | 56.25 | 50p | 148.5 | HDTV 1080p | |
1920 x 1080 | 67.5 | 60p | 148.5 | HDTV 1080p |
• Resolutions outside of these tables are not recognised and will not be displayed.
•When you connect the display to a PC, you should adjust the resolution in the display properties of the computer to closely match the native resolution of the display (for example, 1920 x 1080 pixels).
•To view the best quality picture when using the PC input, you will then need to instruct the display to calibrate itself to the PC signal timing. To do so, select 'Auto' in the 'Picture' menu. See "Auto Adjust" on page 34.
Setting up appropriate output resolution on PC
Before connecting the display to a PC to display PC video, please follow the instructions below (in Windows XP for example) to setup appropriate output resolution.
1.On Windows Desktop,
2.Click the Settings tab in the window that follows.
3.Drag the Resolution slider and select a compatible resolution according to "Supported PC
1680× 1050 as the output resolution for the best result.
4.Click OK to save the setting and close the window.
5.Press![]() INPUT on the remote control and use ▲▼ to select the VGA input then press OK.
INPUT on the remote control and use ▲▼ to select the VGA input then press OK.
46 Reference
Downloaded From
