Using the menus
The projector is equipped with
There are 17 different OSD menu languages. See "System setup: Basic menu" on page 45 for details.
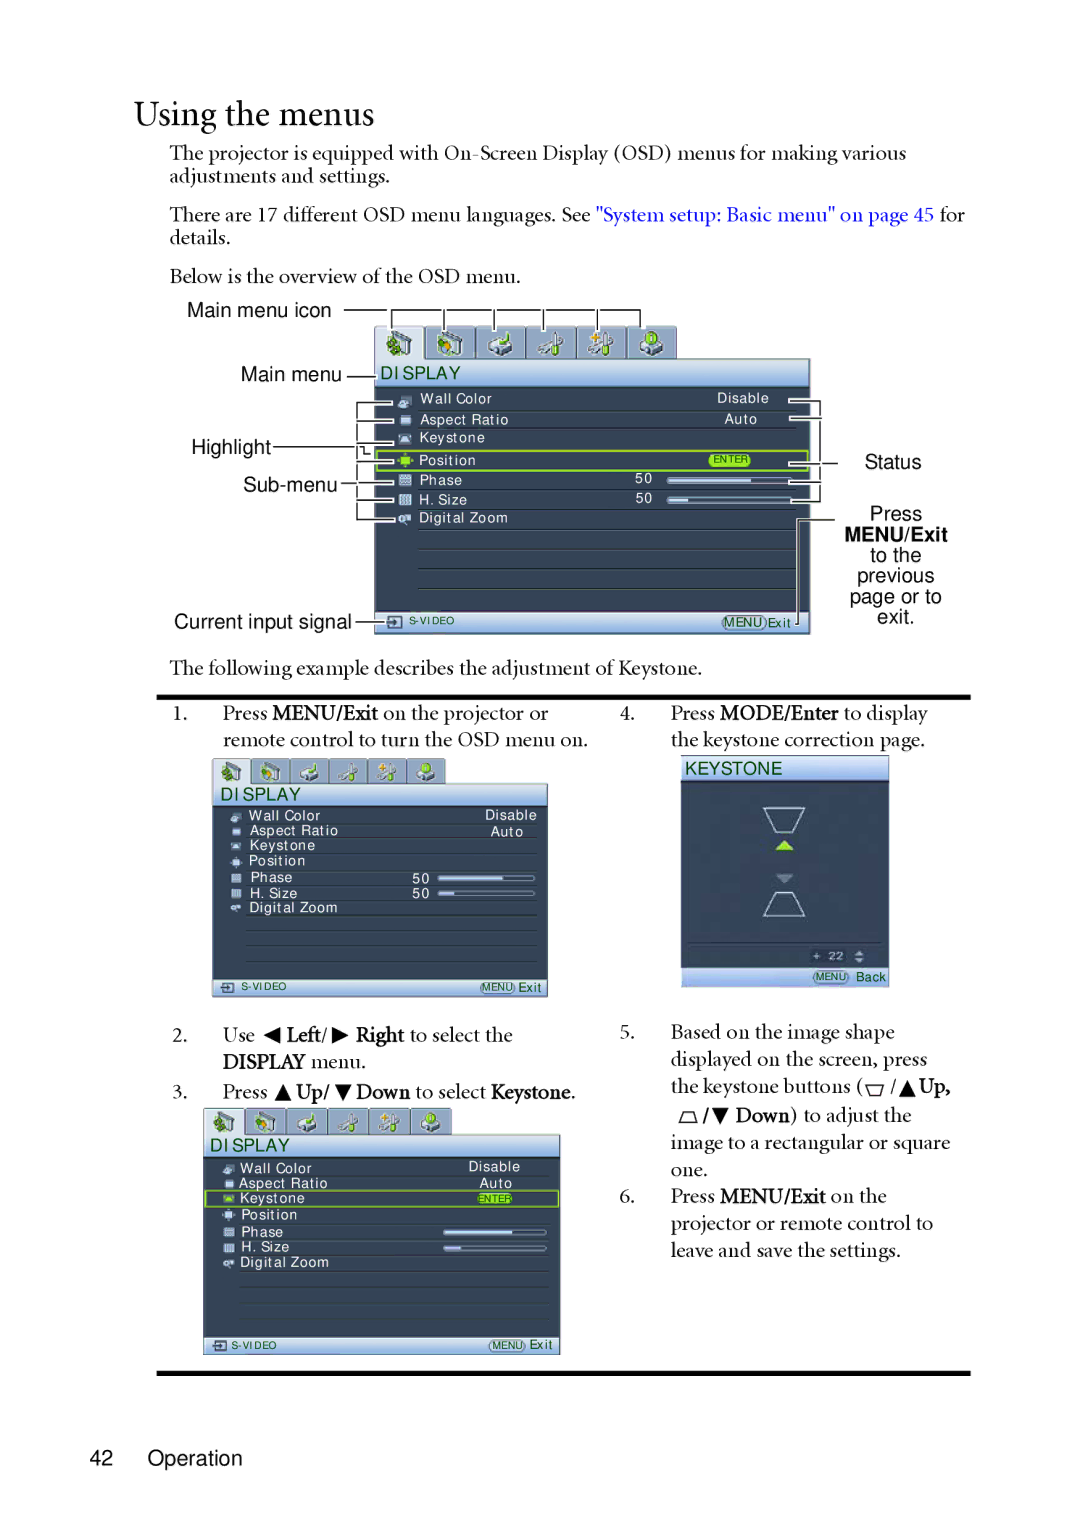
Below is the overview of the OSD menu.
Main menu icon
Main menu |
|
|
|
| DISPLAY | |||||
|
|
|
| |||||||
|
|
|
|
|
|
|
|
|
| Wall Color |
|
|
|
|
|
|
|
|
|
| Aspect Ratio |
|
|
|
|
|
|
|
|
|
| |
Highlight |
|
|
|
|
|
|
|
|
| Keystone |
|
|
|
|
|
|
|
|
|
| Position |
|
|
|
|
|
|
|
|
|
| |
|
|
|
|
|
|
|
| Phase | ||
|
|
|
|
|
|
| ||||
|
|
|
|
|
|
|
| |||
|
|
|
|
| H. Size | |||||
|
|
|
|
|
|
|
|
|
| Digital Zoom |
Current input signal |
|
|
| |||||||
|
|
| ||||||||
|
|
|
|
|
|
|
|
|
| |
Disable
Auto
ENTER
50
50
MENU Exit
Status
Press
MENU/Exit
to the
previous
page or to
exit.
The following example describes the adjustment of Keystone.
1.Press MENU/Exit on the projector or remote control to turn the OSD menu on.
4.Press MODE/Enter to display the keystone correction page.
| KEYSTONE |
|
DISPLAY |
|
|
Wall Color | Disable |
|
Aspect Ratio | Auto |
|
Keystone |
|
|
Position |
|
|
Phase | 50 |
|
H. Size | 50 |
|
Digital Zoom |
|
|
| MENU | Back |
MENU Exit |
|
2.Use  Left/
Left/  Right to select the DISPLAY menu.
3.Press ![]() Up/
Up/ ![]() Down to select Keystone.
Down to select Keystone.
DISPLAY
Wall Color | Disable |
Aspect Ratio | Auto |
Keystone | ENTER |
Position |
|
Phase
H.Size Digital Zoom
5.Based on the image shape displayed on the screen, press the keystone buttons (![]() /
/![]() Up,
Up, ![]() /
/![]() Down) to adjust the image to a rectangular or square one.
Down) to adjust the image to a rectangular or square one.
6.Press MENU/Exit on the projector or remote control to leave and save the settings.
MENU Exit | |
|
|