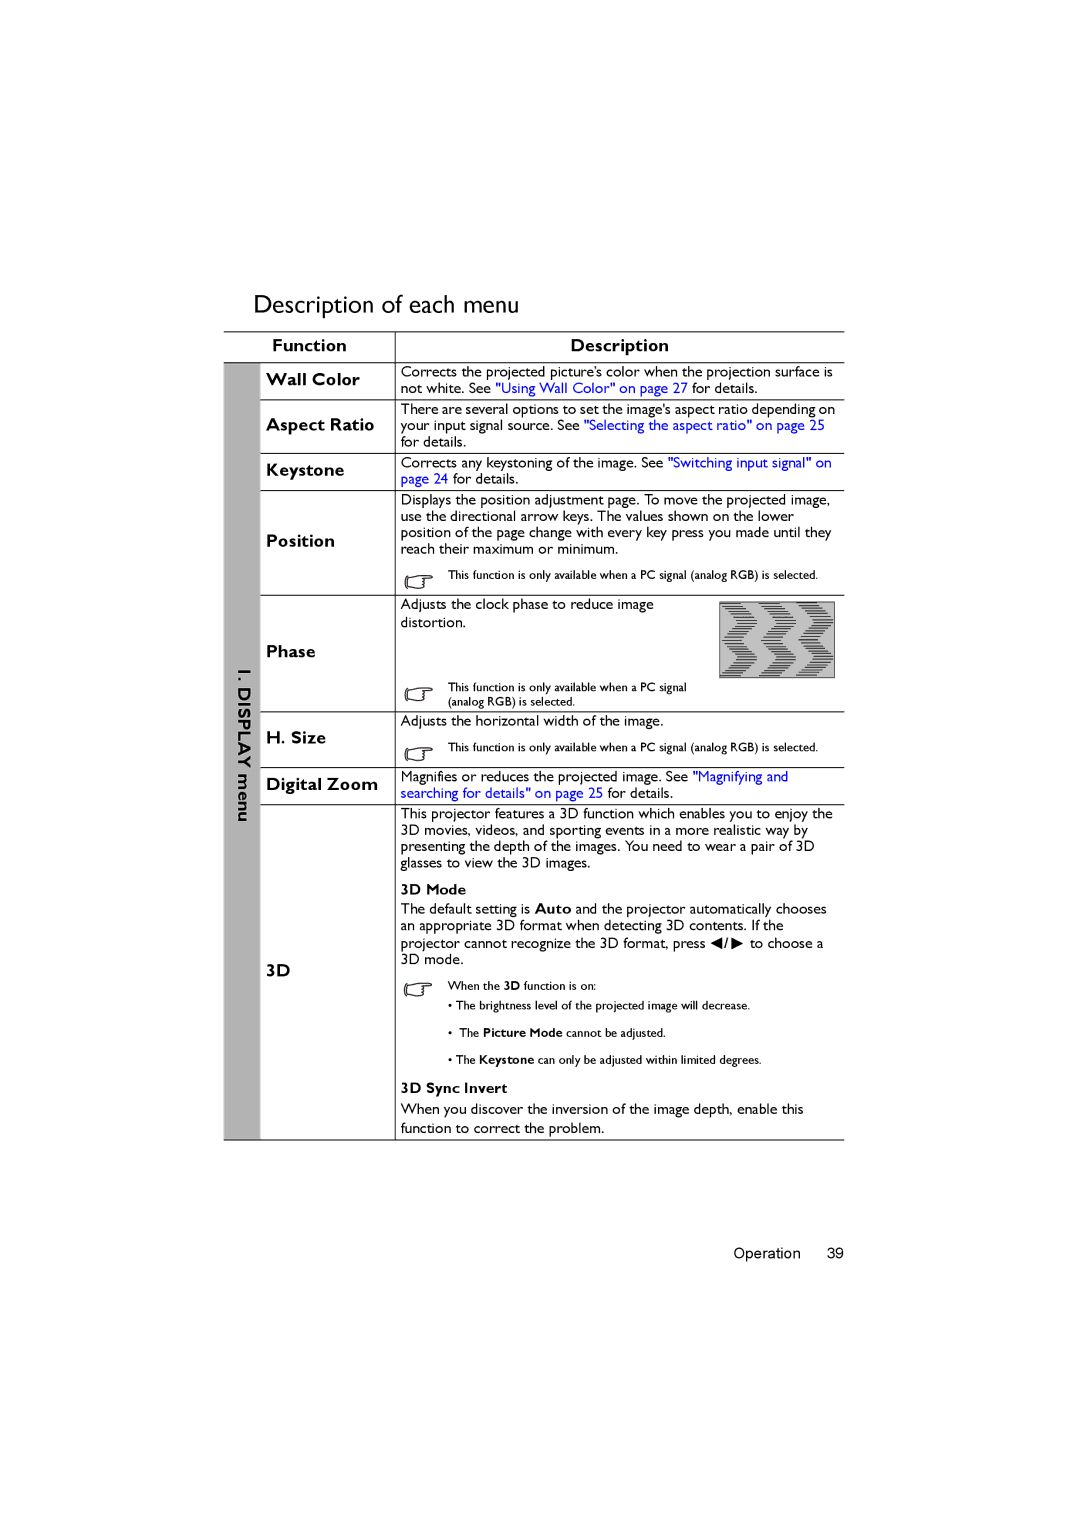
Description of each menu
1. DISPLAY menu
Function | Description | |
Wall Color | Corrects the projected picture’s color when the projection surface is | |
not white. See "Using Wall Color" on page 27 for details. | ||
| ||
Aspect Ratio | There are several options to set the image's aspect ratio depending on | |
your input signal source. See "Selecting the aspect ratio" on page 25 | ||
| for details. | |
Keystone | Corrects any keystoning of the image. See "Switching input signal" on | |
page 24 for details. | ||
| ||
| Displays the position adjustment page. To move the projected image, | |
| use the directional arrow keys. The values shown on the lower | |
Position | position of the page change with every key press you made until they | |
reach their maximum or minimum. | ||
| ||
| This function is only available when a PC signal (analog RGB) is selected. | |
|
| |
| Adjusts the clock phase to reduce image | |
| distortion. | |
Phase |
| |
| This function is only available when a PC signal | |
| (analog RGB) is selected. | |
H. Size | Adjusts the horizontal width of the image. | |
This function is only available when a PC signal (analog RGB) is selected. | ||
| ||
|
| |
Digital Zoom | Magnifies or reduces the projected image. See "Magnifying and | |
searching for details" on page 25 for details. | ||
| ||
| This projector features a 3D function which enables you to enjoy the | |
| 3D movies, videos, and sporting events in a more realistic way by | |
| presenting the depth of the images. You need to wear a pair of 3D | |
| glasses to view the 3D images. | |
| 3D Mode | |
| The default setting is Auto and the projector automatically chooses | |
| an appropriate 3D format when detecting 3D contents. If the | |
| projector cannot recognize the 3D format, press / to choose a | |
3D | 3D mode. | |
When the 3D function is on: | ||
| ||
| • The brightness level of the projected image will decrease. | |
| • The Picture Mode cannot be adjusted. | |
| • The Keystone can only be adjusted within limited degrees. | |
| 3D Sync Invert | |
| When you discover the inversion of the image depth, enable this | |
| function to correct the problem. | |
|
|
Operation 39
