Functional Description
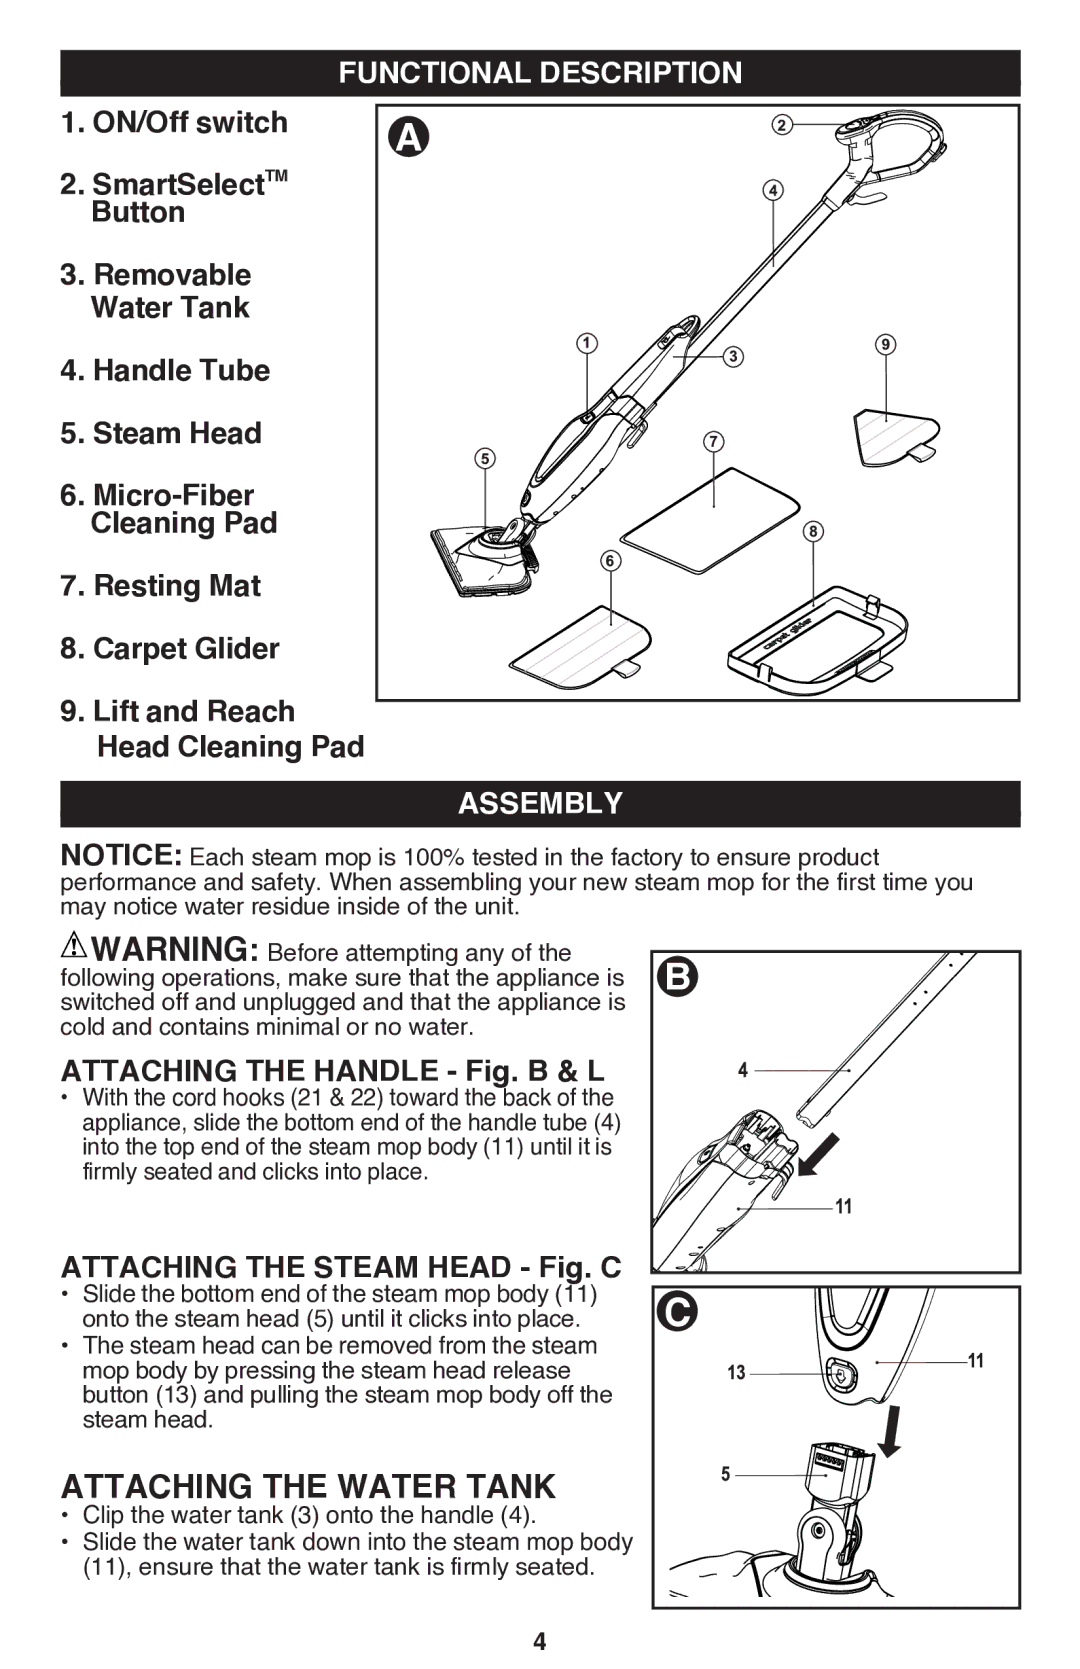
1.ON/Off switch
2.SmartSelectTM Button
3.Removable Water Tank
4.Handle Tube
5.Steam Head
6.
7.Resting Mat
8.Carpet Glider
9.Lift and Reach Head Cleaning Pad
A |
Assembly |
NOTICE: Each steam mop is 100% tested in the factory to ensure product performance and safety. When assembling your new steam mop for the first time you may notice water residue inside of the unit.
![]() WARNING: Before attempting any of the B following operations, make sure that the appliance is switched off and unplugged and that the appliance is cold and contains minimal or no water.
WARNING: Before attempting any of the B following operations, make sure that the appliance is switched off and unplugged and that the appliance is cold and contains minimal or no water.
Attaching the handle - Fig. B & L
• With the cord hooks (21 & 22) toward the back of the appliance, slide the bottom end of the handle tube (4) into the top end of the steam mop body (11) until it is firmly seated and clicks into place.
Attaching the steam head - Fig. C
• Slide the bottom end of the steam mop body (11) C onto the steam head (5) until it clicks into place.
• The steam head can be removed from the steam mop body by pressing the steam head release button (13) and pulling the steam mop body off the steam head.
Attaching the water tank
• Clip the water tank (3) onto the handle (4).
• Slide the water tank down into the steam mop body (11), ensure that the water tank is firmly seated.
4