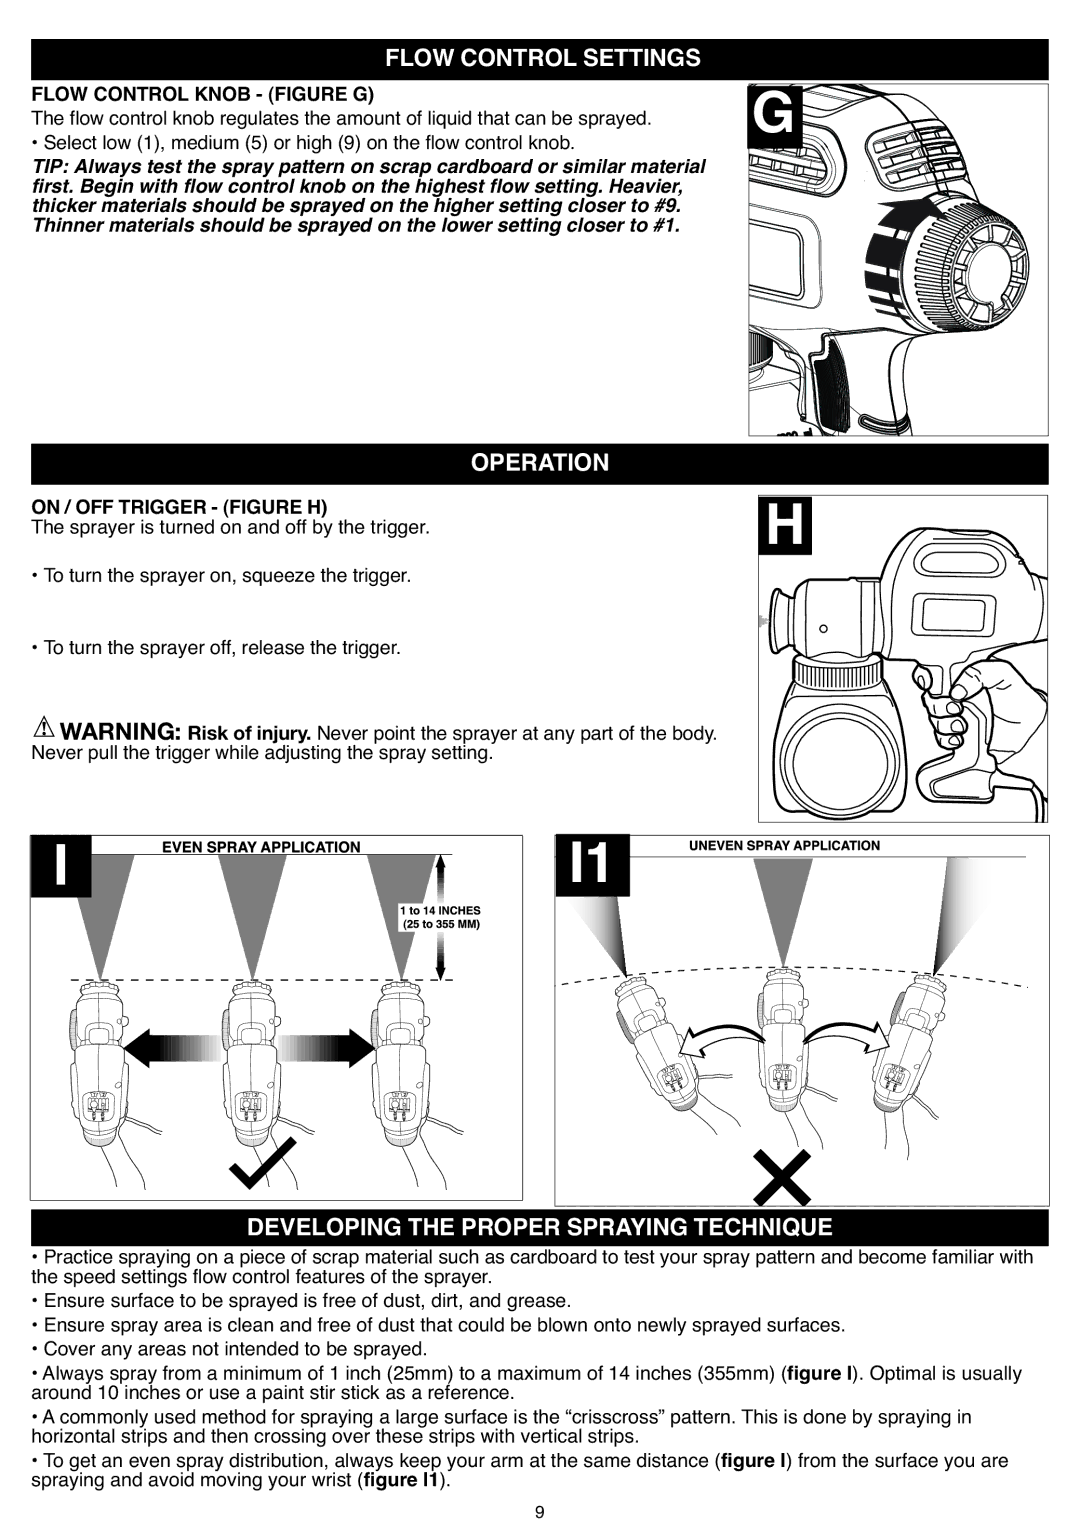
FLOW CONTROL KNOB - (FIGURE G) FLOW CONTROL SETTINGS | G |
The flow control knob regulates the amount of liquid that can be sprayed. | |
• Select low (1), medium (5) or high (9) on the flow control knob. | |
TIP: Always test the spray pattern on scrap cardboard or similar material |
|
first. Begin with flow control knob on the highest flow setting. Heavier, |
|
thicker materials should be sprayed on the higher setting closer to #9. |
|
Thinner materials should be sprayed on the lower setting closer to #1. |
|
OPERATION | H |
ON / OFF TRIGGER - (FIGURE H) | |
The sprayer is turned on and off by the trigger. | |
• To turn the sprayer on, squeeze the trigger. |
• To turn the sprayer off, release the trigger.
Never point the sprayer at any part of the body.
NeverWARNING:pull the triggerRiskwhileof injuryadjusting. the spray setting.
DEVELOPING THE PROPER SPRAYINGTECHNIQUE | |
• Practice spraying on a piece of scrap material such as cardboard to test your spray pattern and become familiar with | |
the speed settings flow control features of the sprayer. |
|
• Ensure surface to be sprayed is free of dust, dirt, and grease. | |
• Ensure spray area is clean and free of dust that could be blown onto newly sprayed surfaces. | |
• Cover any areas not intended to be sprayed. |
|
• Always spray from a minimum of 1 inch (25mm) to a maximum of 14 inches (355mm) (figure I). Optimal is usually | |
around 10 inches or use a paint stir stick as a reference. |
|
• A commonly used method for spraying a large surface is the “crisscross” pattern. This is done by spraying in | |
horizontal strips and then crossing over these strips with vertical strips. | |
• To get an even spray distribution, always keep your arm at the same distance (figure I) from the surface you are | |
spraying and avoid moving your wrist (figure I1). | 9 |
| |