• Maintain smooth and consistent speed which will help avoid inconsistencies. Begin spraying after the pass has | |
begun and release trigger before stopping the pass. |
|
• Avoid spraying too heavily in any one area. Several lighter coats are better than one heavy coat which can lead to | |
running and dripping. Remember that the flow control knob regulates the amount of liquid that can be sprayed. Turning | |
the flow knob counterclockwise increases the flow of liquid. Turning the knob clockwise decreases the flow of liquid. If | |
runs or drips do occur, have a dry paint brush on hand to smooth them out. | |
WARNING: ELECTRIC SHOCK HAZARD. When spraying overhead, never tip the sprayer more than | |
45 degrees. The material being sprayed could leak into the motor housing. | |
TIP: If the atomizer valve is not seated prop- |
|
erly, spray material will leak from behind the |
|
spray nozzle. If |
|
material is leaking, turn off and unplug |
|
sprayer from power source immediately. |
|
Follow these steps to correct the problem: |
|
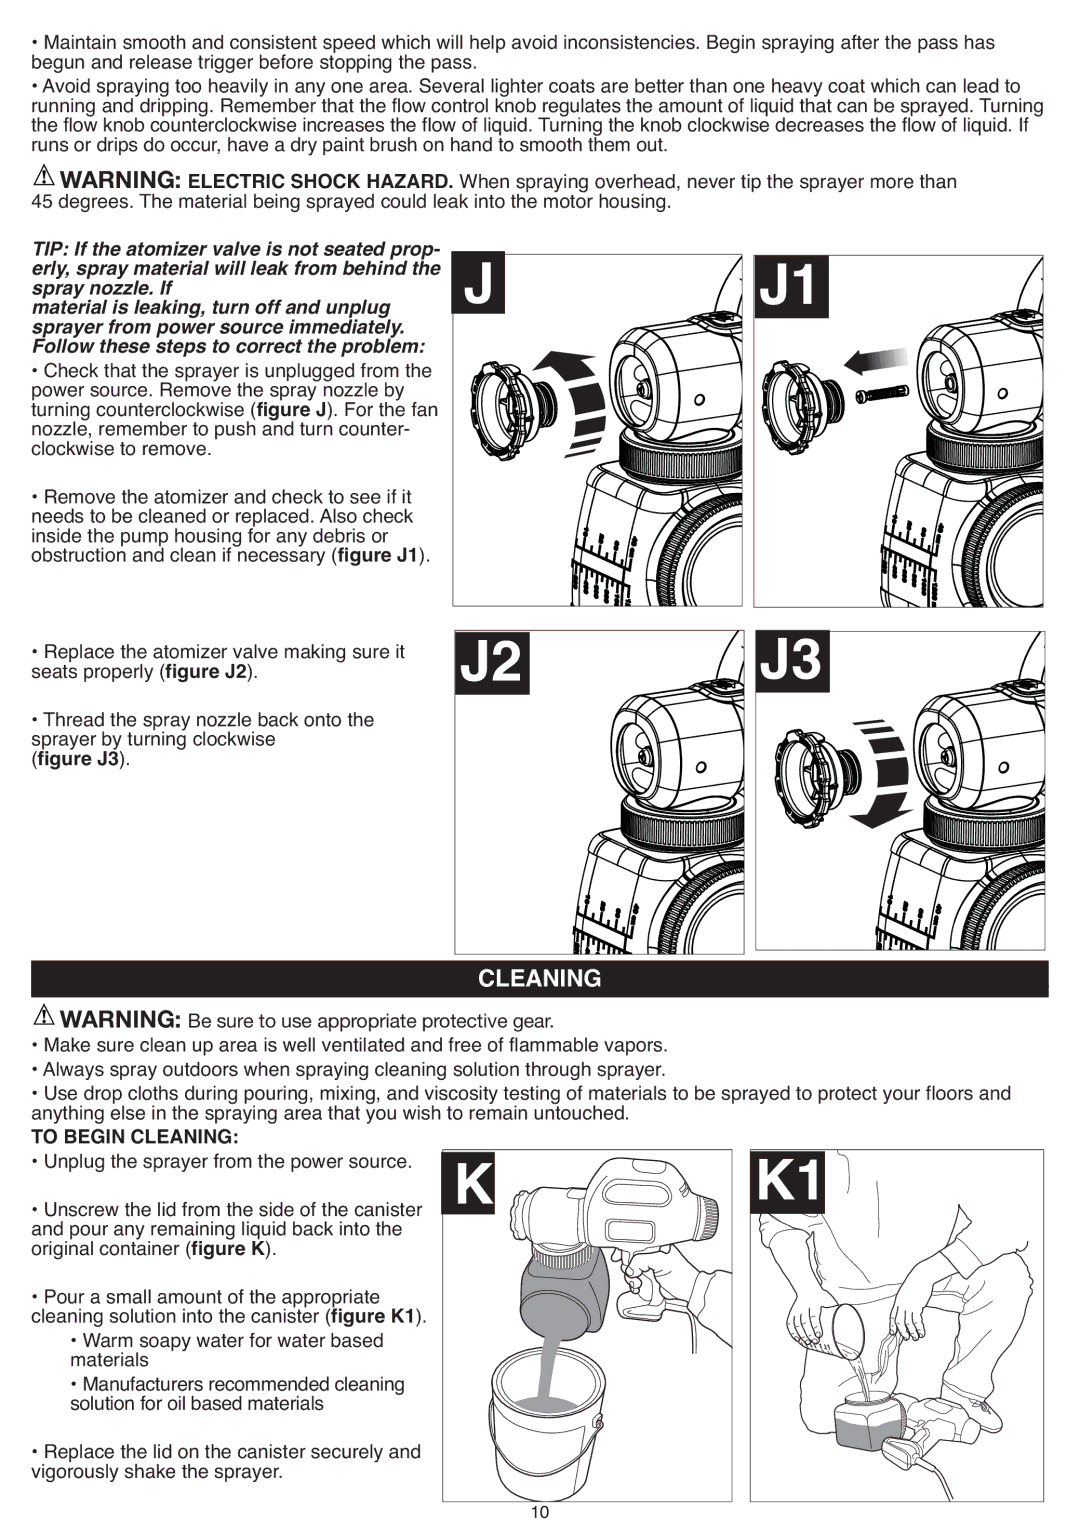
• Check that the sprayer is unplugged from the |
|
power source. Remove the spray nozzle by |
|
turning counterclockwise (figure J). For the fan |
|
nozzle, remember to push and turn counter- |
|
clockwise to remove. |
|
• Remove the atomizer and check to see if it |
|
needs to be cleaned or replaced. Also check |
|
inside the pump housing for any debris or |
|
obstruction and clean if necessary (figure J1). | 2 |
• Replace the atomizer valve making sure it | |
seats properly (figure J2). | |
• Thread the spray nozzle back onto the | |
sprayer by turning clockwise |
|
(figure J3). |
|
CLEANING


•![]() MakeWARNING:sure cleanBeup sureareatois usewellappropriateventilated andprotfreectiveof flammablegear. vapors.
MakeWARNING:sure cleanBeup sureareatois usewellappropriateventilated andprotfreectiveof flammablegear. vapors.
•Always spray outdoors when spraying cleaning solution through sprayer.
•Use drop cloths during pouring, mixing, and viscosity testing of materials to be sprayed to protect your floors and anything else in the spraying area that you wish to remain untouched.
TO BEGIN CLEANING:
•Unplug the sprayer from the power source.
• Unscrew the lid from the side of the canister and pour any remaining liquid back into the original container (figure K).
• Pour a small amount of the appropriate cleaning solution into the canister (figure K1).
• Warm soapy water for water based materials
• Manufacturers recommended cleaning solution for oil based materials
• Replace the lid on the canister securely and vigorously shake the sprayer.
10