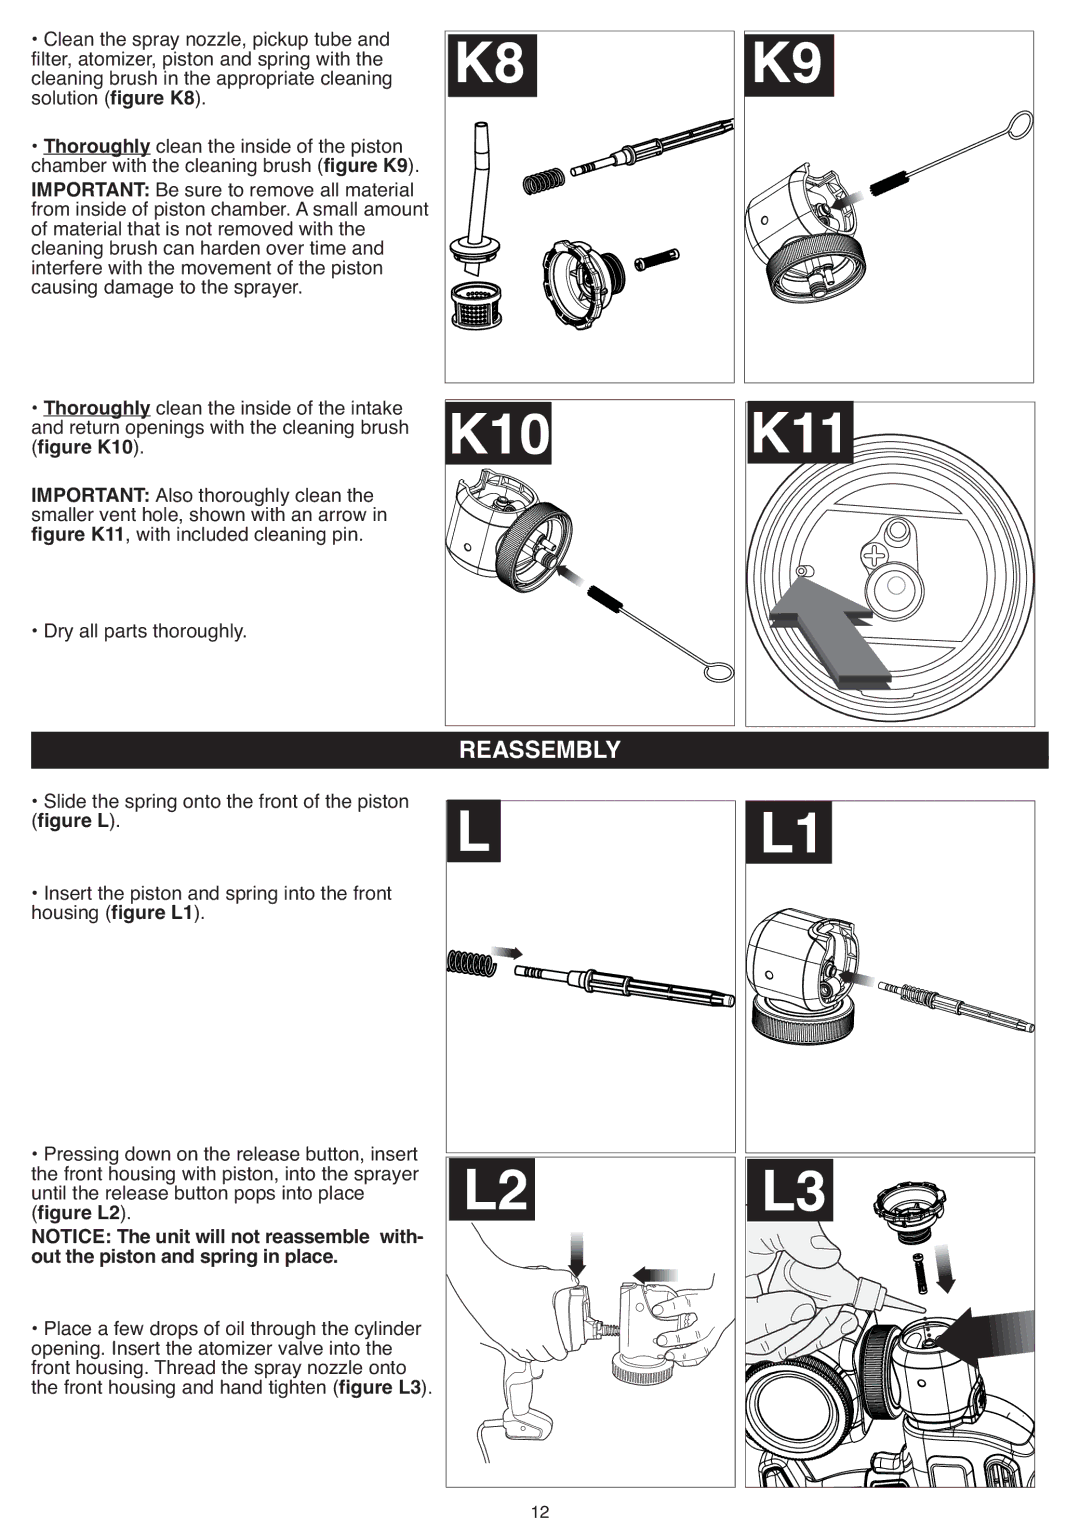
•Clean the spray nozzle, pickup tube and filter, atomizer, piston and spring with the cleaning brush in the appropriate cleaning solution (figure K8).
•Thoroughly clean the inside of the piston chamber with the cleaning brush (figure K9). IMPORTANT: Be sure to remove all material from inside of piston chamber. A small amount of material that is not removed with the cleaning brush can harden over time and interfere with the movement of the piston causing damage to the sprayer.
•Thoroughly clean the inside of the intake and return openings with the cleaning brush (figure K10).
IMPORTANT: Also thoroughly clean the smaller vent hole, shown with an arrow in figure K11, with included cleaning pin.
• Dry all parts thoroughly.
K8 |
REASSEMBLY |
K9 |
• Slide the spring onto the front of the piston (figure L).
• Insert the piston and spring into the front housing (figure L1).
• Pressing down on the release button, insert the front housing with piston, into the sprayer until the release button pops into place (figure L2).
NOTICE: The unit will not reassemble with- out the piston and spring in place.
•Place a few drops of oil through the cylinder opening. Insert the atomizer valve into the front housing. Thread the spray nozzle onto the front housing and hand tighten (figure L3).
L2 | L3 |
12