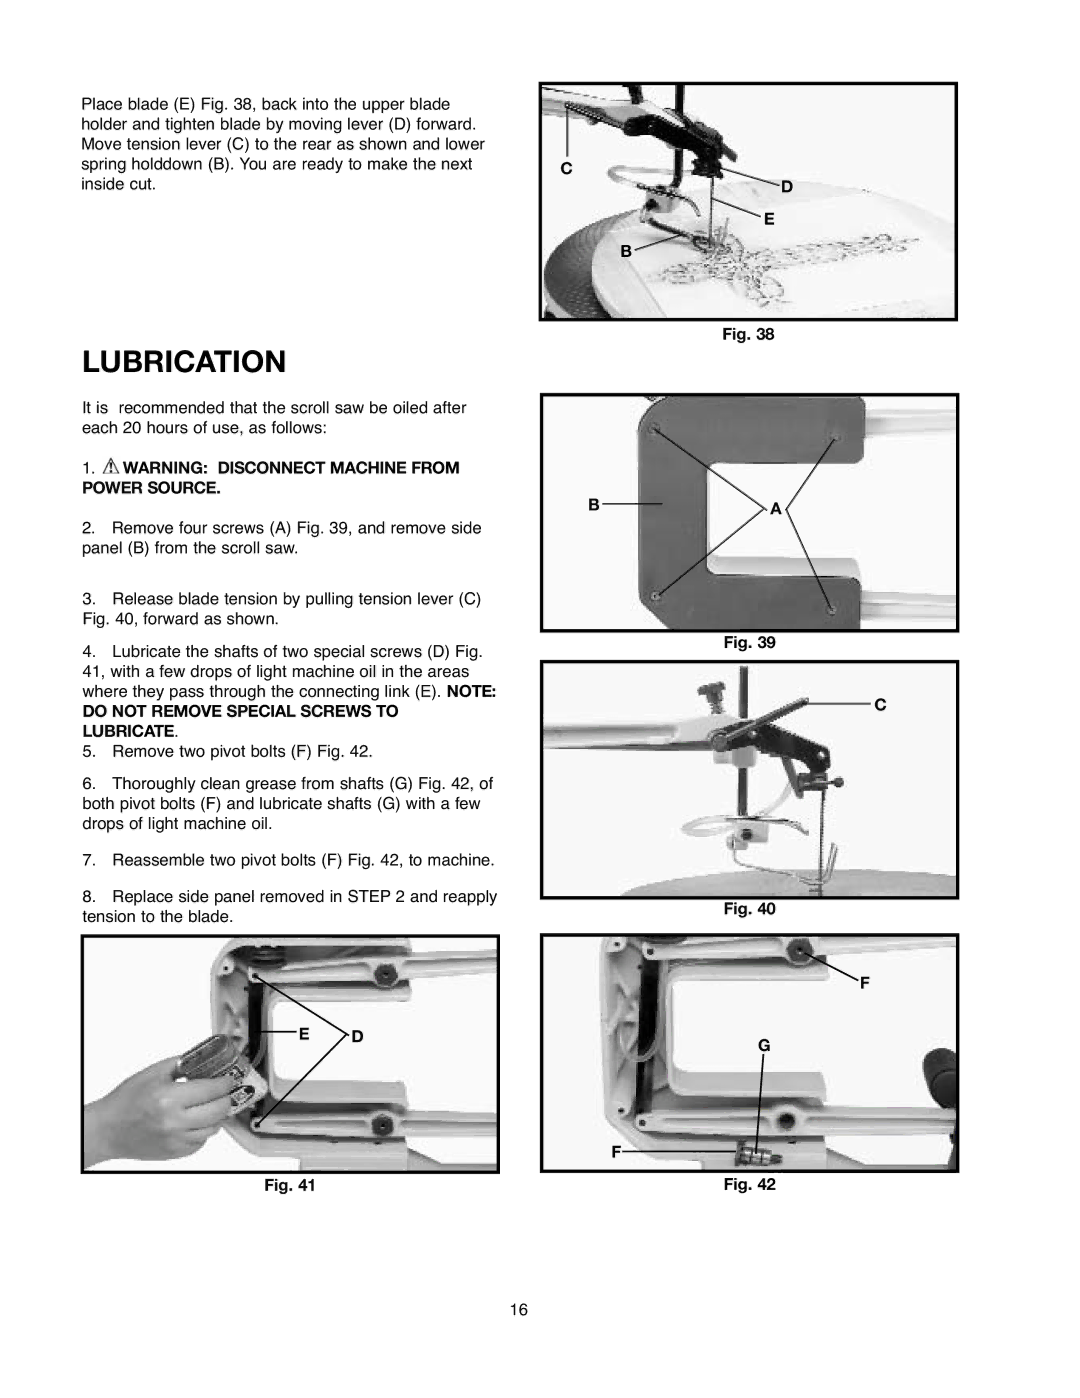
Place blade (E) Fig. 38, back into the upper blade holder and tighten blade by moving lever (D) forward. Move tension lever (C) to the rear as shown and lower spring holddown (B). You are ready to make the next inside cut.
LUBRICATION
It is recommended that the scroll saw be oiled after each 20 hours of use, as follows:
1.![]() WARNING: DISCONNECT MACHINE FROM POWER SOURCE.
WARNING: DISCONNECT MACHINE FROM POWER SOURCE.
2.Remove four screws (A) Fig. 39, and remove side panel (B) from the scroll saw.
3.Release blade tension by pulling tension lever (C) Fig. 40, forward as shown.
4.Lubricate the shafts of two special screws (D) Fig. 41, with a few drops of light machine oil in the areas where they pass through the connecting link (E). NOTE:
DO NOT REMOVE SPECIAL SCREWS TO LUBRICATE.
5.Remove two pivot bolts (F) Fig. 42.
6.Thoroughly clean grease from shafts (G) Fig. 42, of both pivot bolts (F) and lubricate shafts (G) with a few drops of light machine oil.
7.Reassemble two pivot bolts (F) Fig. 42, to machine.
8.Replace side panel removed in STEP 2 and reapply tension to the blade.
E D
Fig. 41
C
D
E
B
Fig. 38
BA
Fig. 39
C
Fig. 40
F
G
F
Fig. 42
16