
GH610 specifications
The Black & Decker GH610 String Trimmer is a versatile and powerful garden tool designed to tackle a variety of trimming and edging tasks in residential gardens. With its lightweight design and user-friendly features, it is an excellent choice for homeowners looking to maintain their lawns efficiently.One of the standout features of the GH610 is its 6.5 amp motor, which provides ample power for cutting through even the toughest grass and weeds. This robust motor allows the trimmer to deliver a cutting swath of 14 inches, making it ideal for larger areas without the need for extensive trimming time. The additional power ensures that users can quickly finish their trimming tasks, leaving more time for enjoyment in the garden.
Equipped with a dual-line feed, the GH610 allows for continuous use without interruptions. The trimmer automatically feeds the line as needed, ensuring a consistent cutting experience. The 0.065-inch line diameter is capable of handling heavy growth, making it effective for both basic lawn care and more demanding landscaping tasks.
The GH610's ergonomic design significantly enhances user comfort. The adjustable handle allows users to customize the grip to their needs, reducing fatigue during extended use. Additionally, it features an automatic height adjustment system, ensuring optimal positioning for users of different heights. This consideration for user ergonomics makes the GH610 a favorite among homeowners who require a tool that balances power with comfort.
Another noteworthy characteristic of the Black & Decker GH610 is its easy storage capability. The trimmer features a collapsible design that allows for efficient storage in small spaces. Whether placed in a garage or a shed, the compact design is particularly beneficial for those with limited storage options.
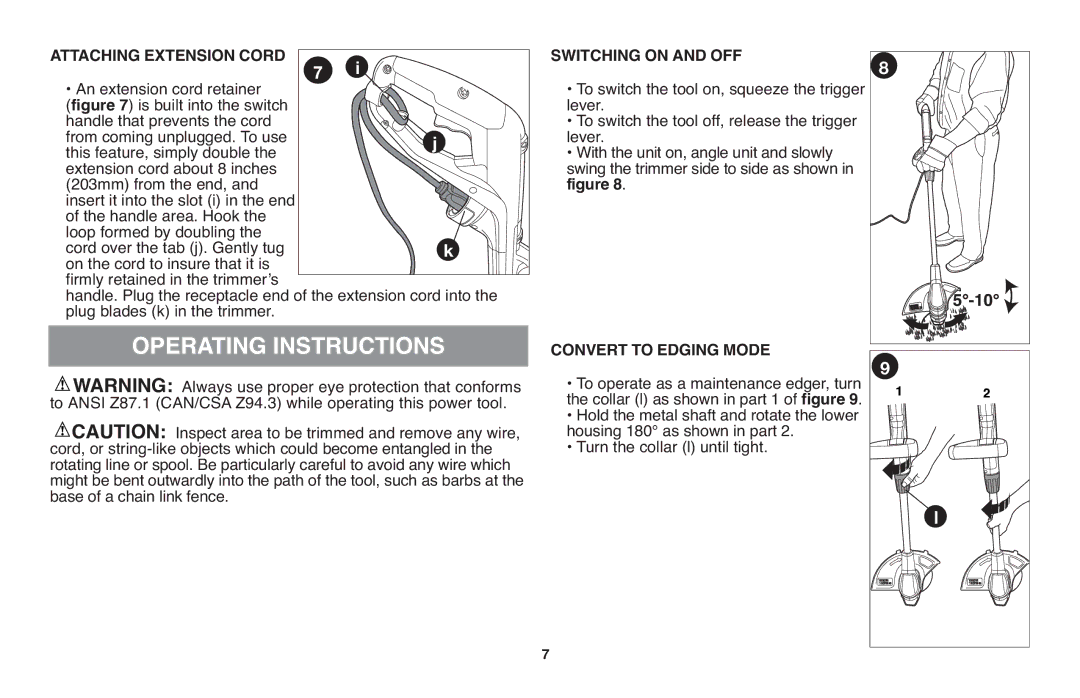
Furthermore, the GH610 incorporates cutting-edge technologies to enhance its operation. The built-in cord retention system prevents accidental disconnections during use, allowing for uninterrupted trimming tasks. This thoughtful design feature ensures that users can focus on their work without the hassle of re-plugging the trimmer.
In conclusion, the Black & Decker GH610 String Trimmer combines power, user comfort, and innovative features to create an ideal tool for lawn maintenance. With its impressive motor, adjustable handle, and automatic line feed, this trimmer stands out as a reliable choice for tackling a variety of gardening tasks efficiently.