Section 2. Configuration
2.3 LCD Panel Configuration
The LCD Panel on the CL608e/CL612e is used in conjunction with the LINE and FEED switches by the operator to manually enter printer configuration settings. Many of the settings can also be controlled via software commands and in the case of conflict between software and control panel settings, the printer will always use the last valid setting. If you load a label job that includes software settings and then enter a new setting via the LCD Panel, the manually set values will be used by the printer. If you set the values manually and then download a job with software settings, the software settings will be used.
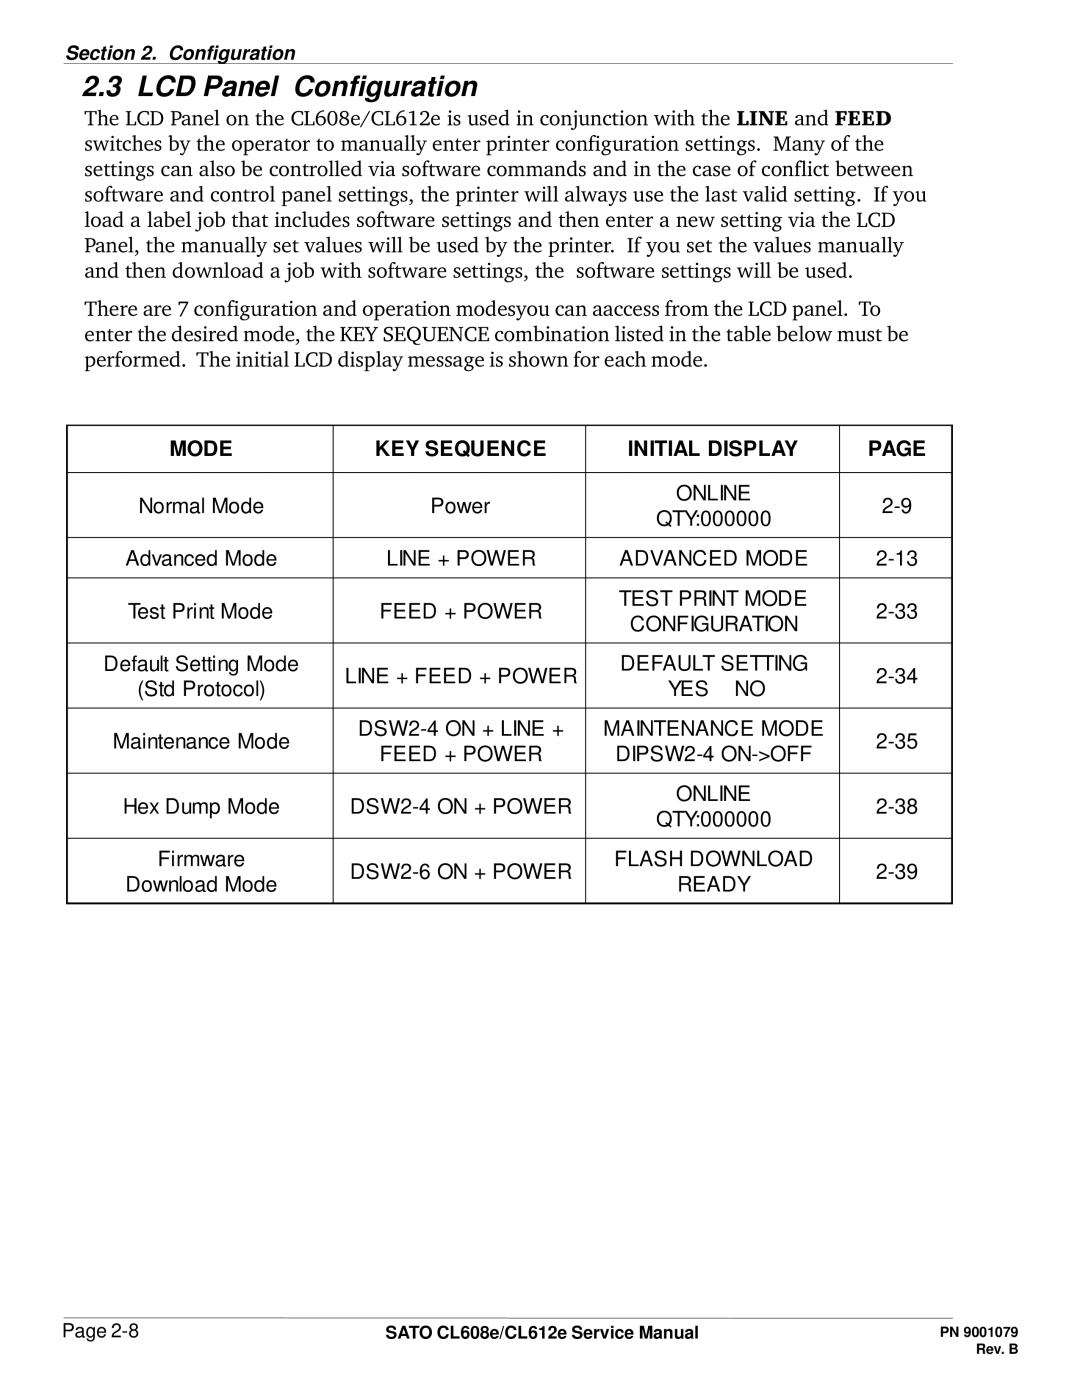
There are 7 configuration and operation modesyou can aaccess from the LCD panel. To enter the desired mode, the KEY SEQUENCE combination listed in the table below must be performed. The initial LCD display message is shown for each mode.
MODE | KEY SEQUENCE | INITIAL DISPLAY | PAGE | |
|
|
|
| |
Normal Mode | Power | ONLINE | ||
QTY:000000 | ||||
|
|
| ||
|
|
|
| |
Advanced Mode | LINE + POWER | ADVANCED MODE | ||
|
|
|
| |
Test Print Mode | FEED + POWER | TEST PRINT MODE | ||
CONFIGURATION | ||||
|
|
| ||
|
|
|
| |
Default Setting Mode | LINE + FEED + POWER | DEFAULT SETTING | ||
(Std Protocol) | YES NO | |||
|
| |||
|
|
|
| |
Maintenance Mode | MAINTENANCE MODE | |||
FEED + POWER | ||||
|
| |||
|
|
|
| |
Hex Dump Mode | ONLINE | |||
QTY:000000 | ||||
|
|
| ||
|
|
|
| |
Firmware | FLASH DOWNLOAD | |||
Download Mode | READY | |||
|
| |||
|
|
|
|
Page | SATO CL608e/CL612e Service Manual |
