Section 9. Optional Accessories
Set Calendar
After the Real Time Chip has been installed you must enter the Advance Mode to set the Calendar. Several steps are necessary in the Advanced Mode to get to the Calendar screen. For a full description of the steps in the Advanced mode leading to the Calendar screen refer to the Section 2 in the Service Manual.
The following steps will take you to the Calendar screen where you can input the settings:
To Enter Advanced Mode:
STEP | PROCEDURE |
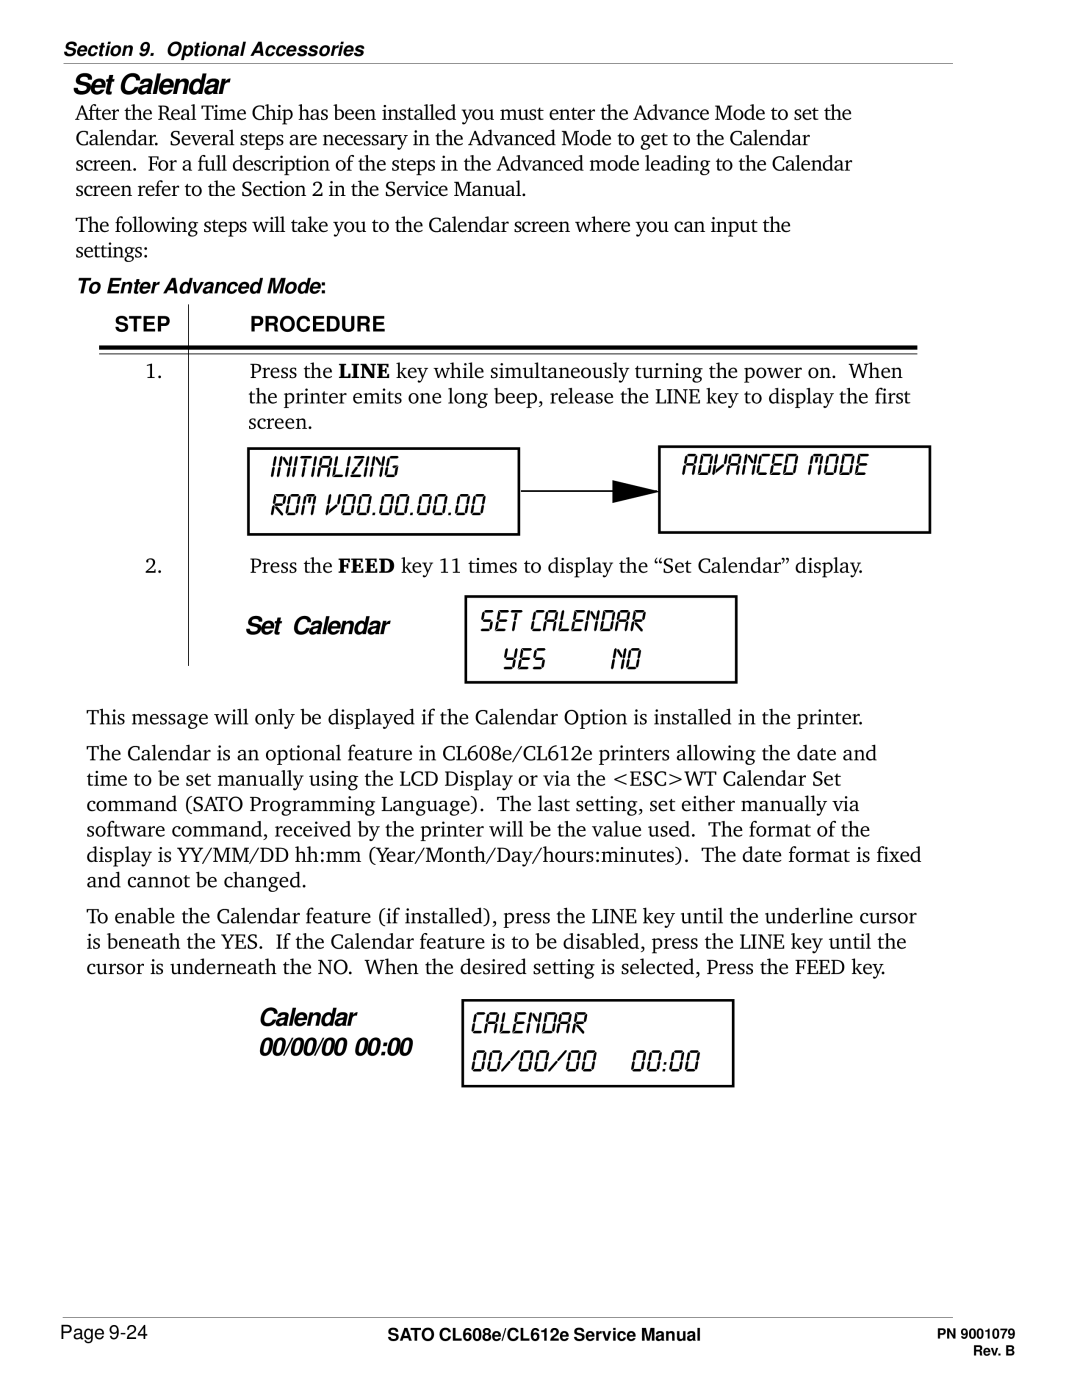
1.Press the LINE key while simultaneously turning the power on. When the printer emits one long beep, release the LINE key to display the first screen.
initializing |
| advanced mode |
rom v00.00.00.00 |
|
|
|
| |
|
|
|
|
|
|
2.Press the FEED key 11 times to display the “Set Calendar” display.
Set Calendar | set calendar | |
| yes | no |
|
|
|
This message will only be displayed if the Calendar Option is installed in the printer.
The Calendar is an optional feature in CL608e/CL612e printers allowing the date and time to be set manually using the LCD Display or via the <ESC>WT Calendar Set command (SATO Programming Language). The last setting, set either manually via software command, received by the printer will be the value used. The format of the display is YY/MM/DD hh:mm (Year/Month/Day/hours:minutes). The date format is fixed and cannot be changed.
To enable the Calendar feature (if installed), press the LINE key until the underline cursor is beneath the YES. If the Calendar feature is to be disabled, press the LINE key until the cursor is underneath the NO. When the desired setting is selected, Press the FEED key.
Calendar 00/00/00 00:00
calendar 00/00/00 00:00
Page | SATO CL608e/CL612e Service Manual |