
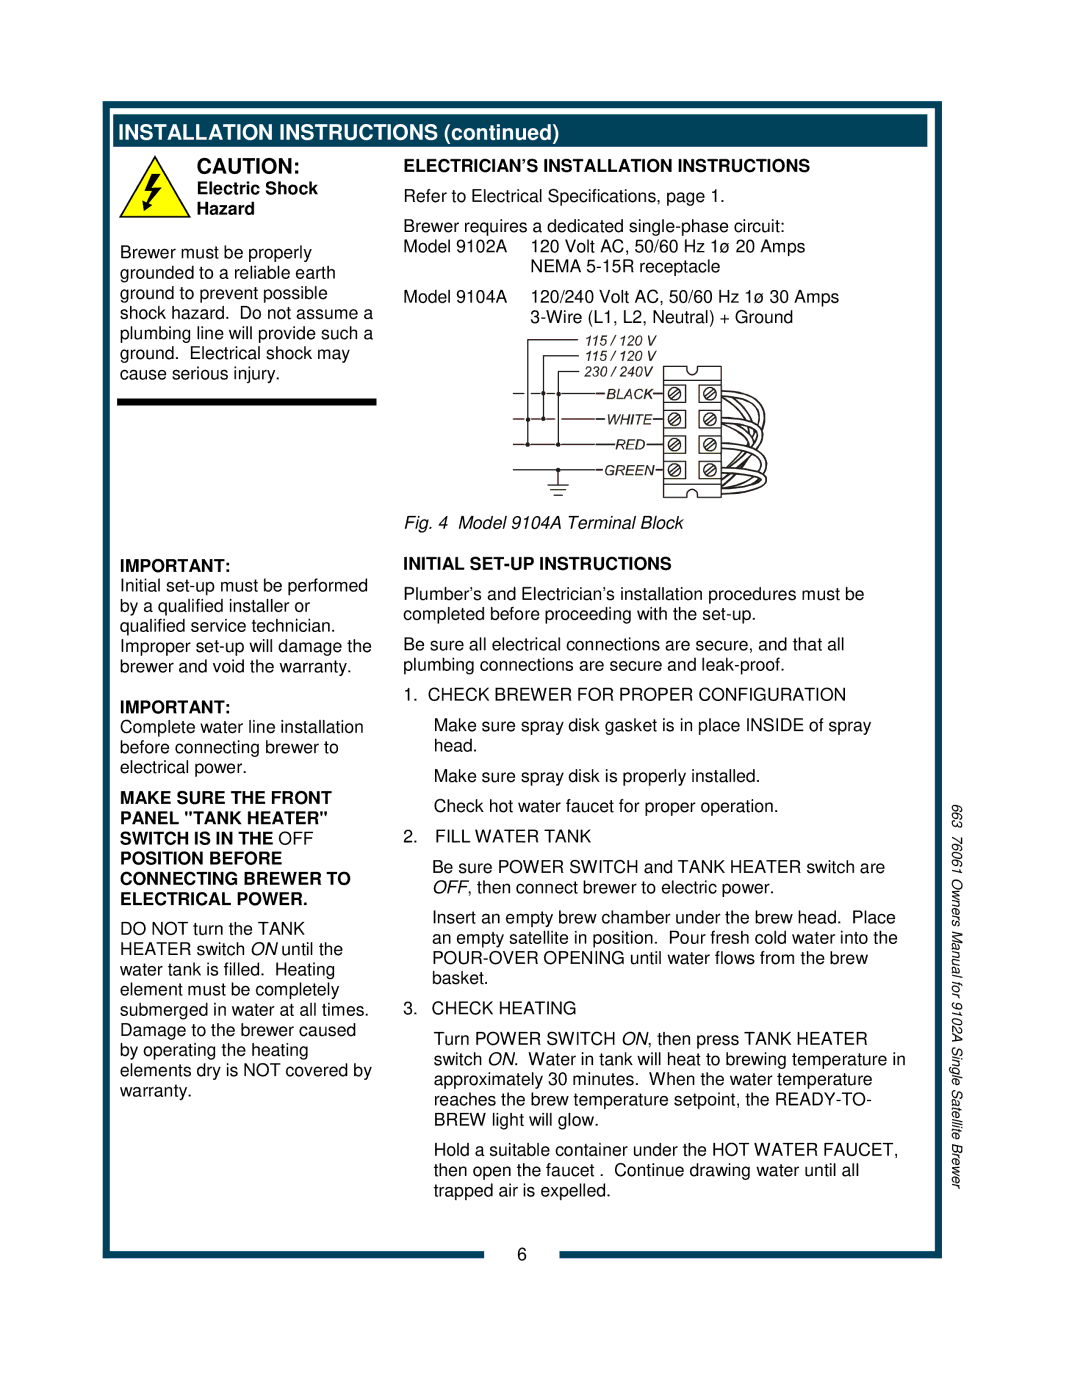
9104A, 9102A specifications
Bloomfield 9104A and 9102A are two latest innovations in the realm of advanced manufacturing equipment, specifically designed for high efficiency and precision in various industrial applications. These models stand out due to their unique features, state-of-the-art technologies, and robust characteristics, making them suitable for both small-scale operations and large industrial setups.The Bloomfield 9104A is tailored for a wide array of applications, offering improved performance metrics compared to its predecessors. One of its standout features is the enhanced processing speed, which reduces production time significantly. This is largely due to its advanced control system, which integrates real-time data analytics and machine learning algorithms. This enables predictive maintenance, minimizing downtime and ensuring smoother operational flow.
On the other hand, the Bloomfield 9102A is optimized for versatility and user-friendliness. It boasts an intuitive interface that allows operators to adjust settings with ease, enhancing overall productivity. The unit is designed to handle a variety of materials, demonstrating its flexibility in manufacturing processes. Its compact design does not compromise performance, making it ideal for facilities with limited space.
Both models employ cutting-edge technologies that cater to modern manufacturing requirements. The inclusion of IoT connectivity allows for seamless integration into smart factories. This feature enables remote monitoring and control, as well as the capability to gather performance data for further analysis and optimization.
As for characteristics, durability and reliability are key aspects of both models. Built with high-quality materials and components, they are designed to withstand the rigors of continuous operation. Additionally, the energy-efficient designs contribute to lower operational costs and a reduced carbon footprint, fulfilling the growing demand for sustainable manufacturing solutions.
In summary, Bloomfield 9104A and 9102A represent the next generation of manufacturing equipment, equipped with advanced technologies that enhance operational efficiency, versatility, and sustainability. Their unique features and robust designs make them valuable assets for any industrial operation, paving the way for future innovations in the manufacturing sector.