Adjustment instructions
Brake pad holders have a front and rear. If the holder is facing the wrong direction, the pad could slide from the holder when the brake is applied. Make sure the Bontrager logo on the brake shoe holder is facing up and that the open end of the holder faces the rear of the bicycle.
To adjust the brakes
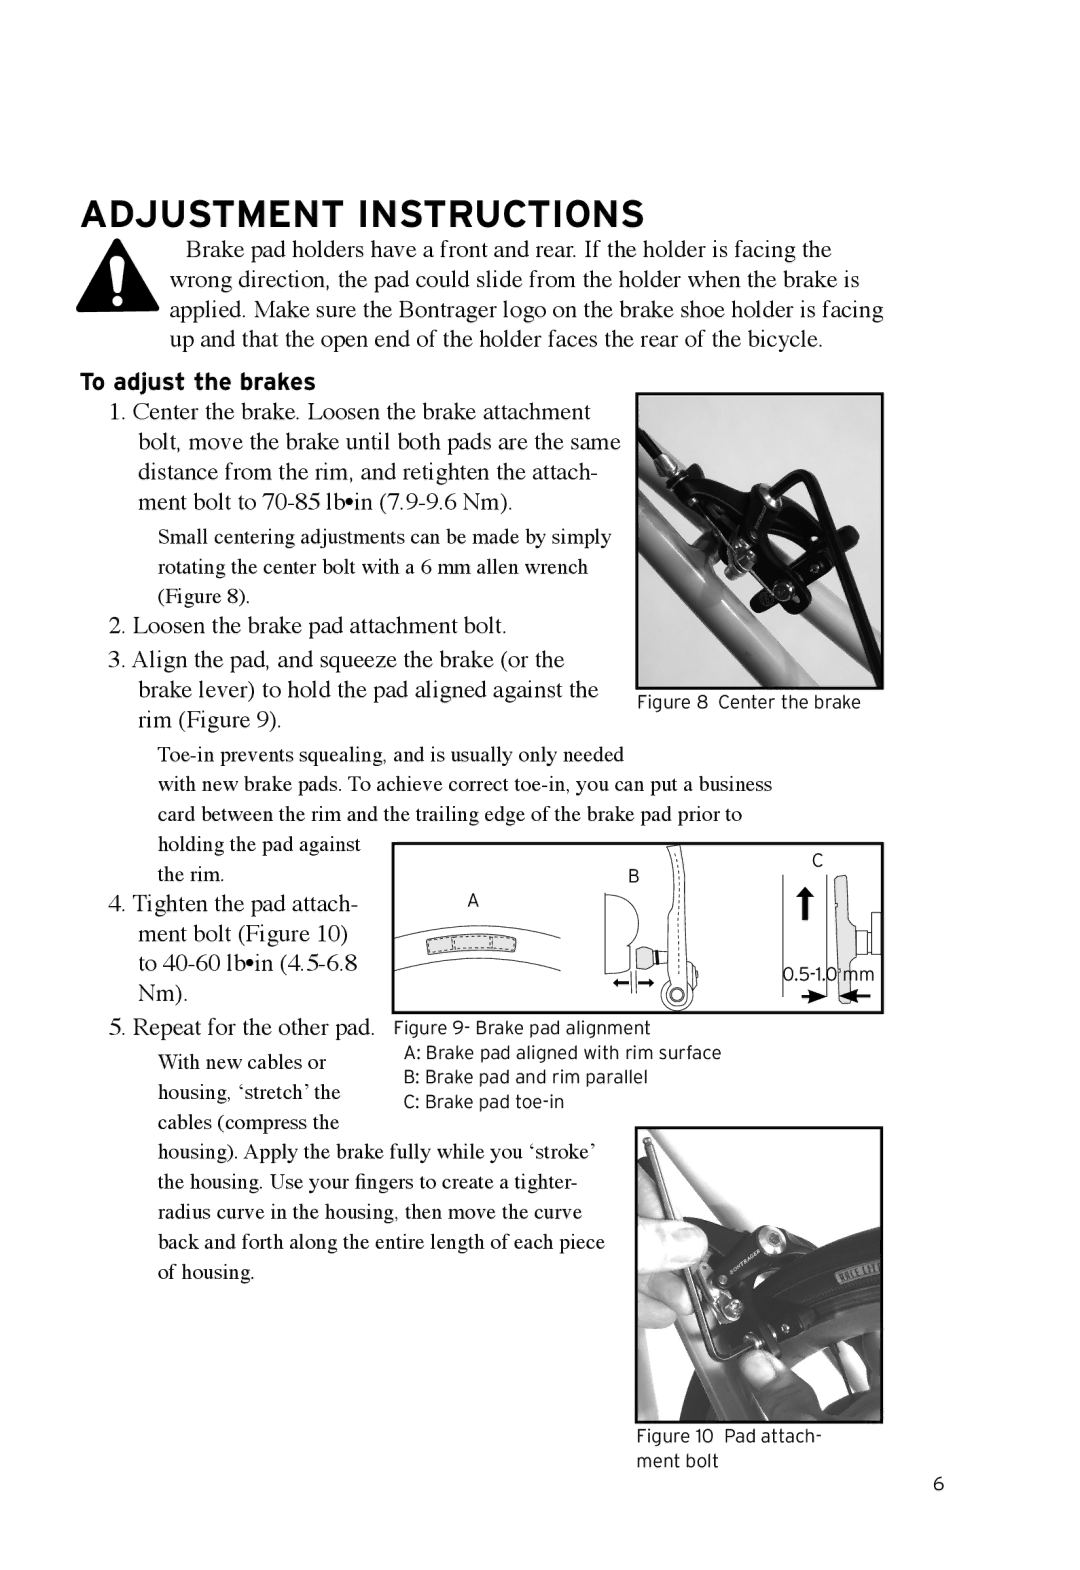
1. Center the brake. Loosen the brake attachment bolt, move the brake until both pads are the same distance from the rim, and retighten the attach- ment bolt to
Small centering adjustments can be made by simply rotating the center bolt with a 6 mm allen wrench (Figure 8).
2. Loosen the brake pad attachment bolt.
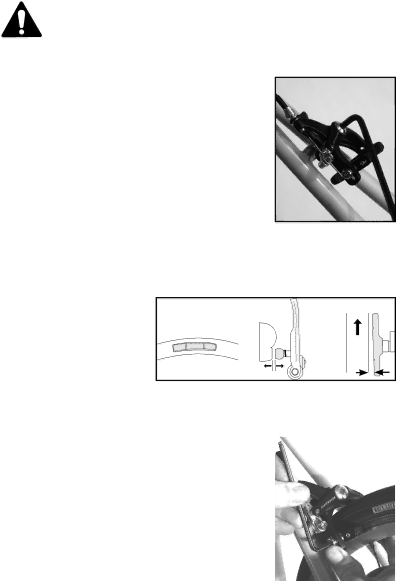
3. Align the pad, and squeeze the brake (or the
brake lever) to hold the pad aligned against the Figure 8 Center the brake rim (Figure 9).
|
| ||
with new brake pads. To achieve correct |
| ||
card between the rim and the trailing edge of the brake pad prior to |
| ||
holding the pad against |
| C | |
the rim. | B | ||
| |||
4. Tighten the pad attach- | A |
| |
ment bolt (Figure 10) |
|
| |
to |
| ||
Nm). |
|
| |
5. Repeat for the other pad. Figure 9- Brake pad alignment
With new cables or | A: Brake pad aligned with rim surface | ||
B: Brake pad and rim parallel | |||
housing, ‘stretch’ the | |||
C: Brake pad | |||
cables (compress the |
|
| |
housing). Apply the brake fully while you ‘stroke’ |
| ||
the housing. Use your fingers to create a tighter- |
| ||
radius curve in the housing, then move the curve |
| ||
back and forth along the entire length of each piece |
| ||
of housing. |
|
| |
|
|
| |