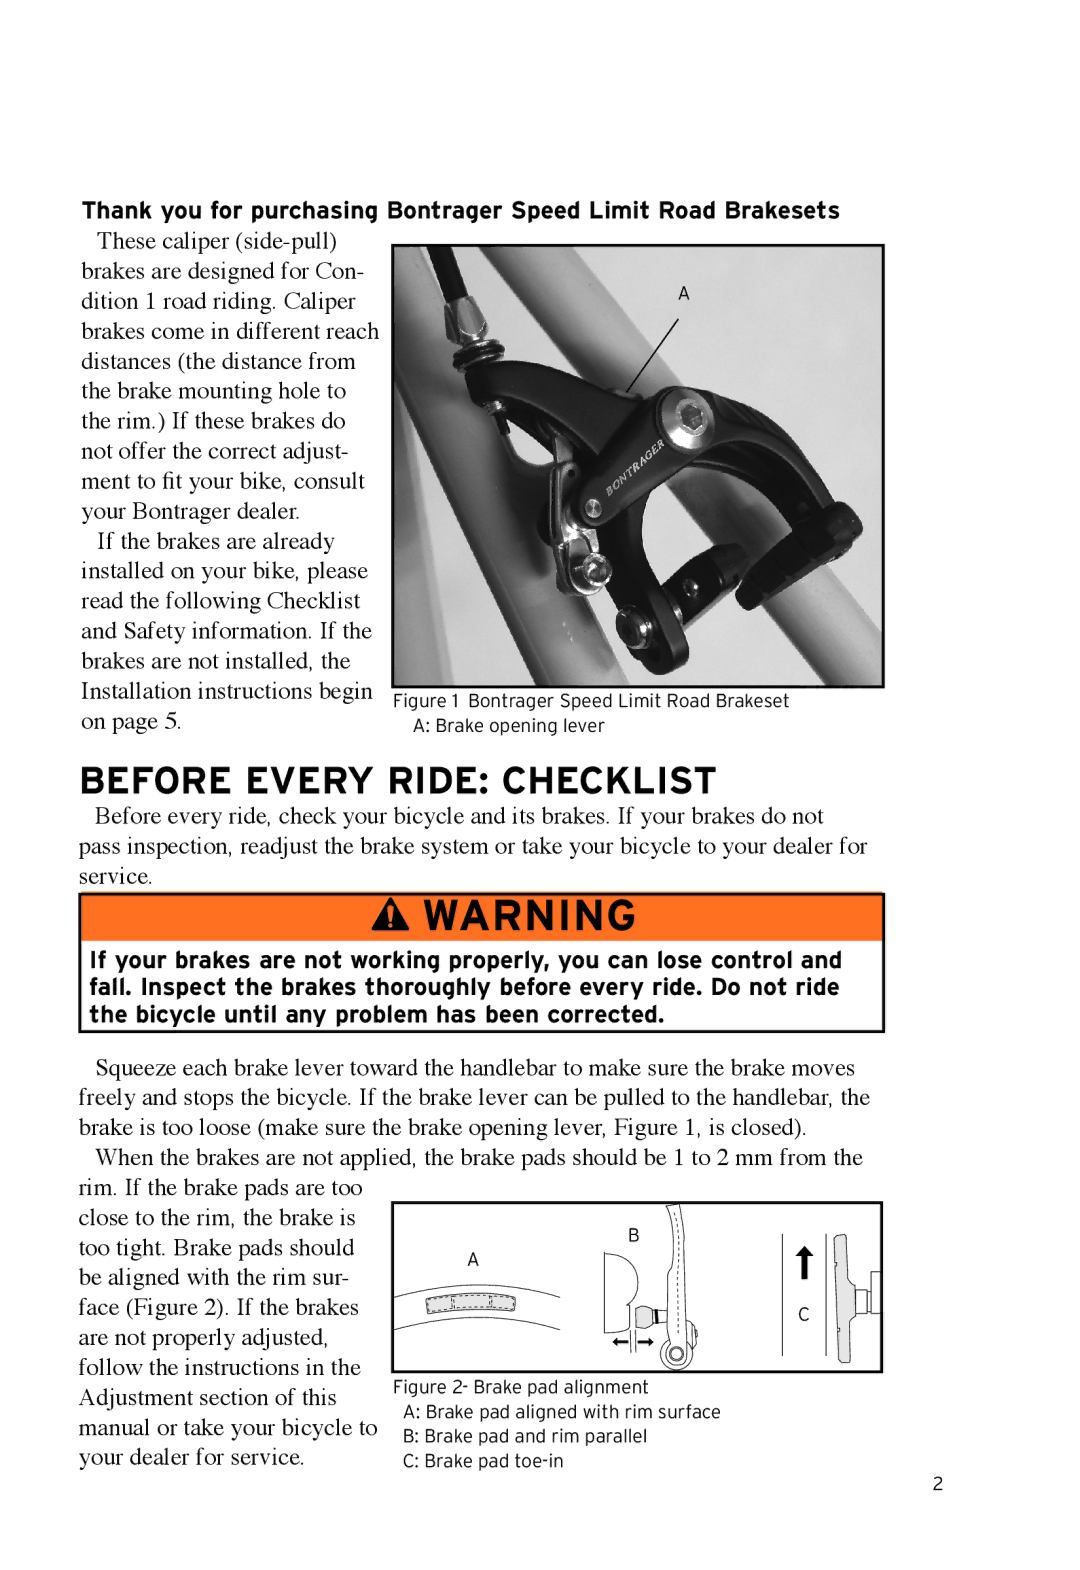
Thank you for purchasing Bontrager Speed Limit Road Brakesets These caliper
brakes are designed for Con- dition 1 road riding. Caliper brakes come in different reach distances (the distance from the brake mounting hole to the rim.) If these brakes do not offer the correct adjust- ment to fit your bike, consult your Bontrager dealer.
If the brakes are already installed on your bike, please read the following Checklist and Safety information. If the brakes are not installed, the Installation instructions begin on page 5.
Before every ride: Checklist
Before every ride, check your bicycle and its brakes. If your brakes do not pass inspection, readjust the brake system or take your bicycle to your dealer for service.
![]() WARNING
WARNING
If your brakes are not working properly, you can lose control and fall. Inspect the brakes thoroughly before every ride. Do not ride the bicycle until any problem has been corrected.
Squeeze each brake lever toward the handlebar to make sure the brake moves |
| |||||||
freely and stops the bicycle. If the brake lever can be pulled to the handlebar, the |
| |||||||
brake is too loose (make sure the brake opening lever, Figure 1, is closed). |
| |||||||
When the brakes are not applied, the brake pads should be 1 to 2 mm from the |
| |||||||
rim. If the brake pads are too |
|
|
|
|
|
|
|
|
close to the rim, the brake is | B |
|
|
|
|
|
|
|
too tight. Brake pads should |
|
|
|
|
|
|
| |
|
|
| ||||||
A |
|
|
|
|
|
|
| |
be aligned with the rim sur- |
|
|
|
|
|
|
|
|
|
|
|
|
|
|
|
| |
face (Figure 2). If the brakes |
|
| C |
|
|
|
|
|
|
|
|
|
|
|
| ||
are not properly adjusted, |
|
|
|
|
|
|
|
|
follow the instructions in the |
|
|
|
|
|
|
|
|
Adjustment section of this | Figure 2- Brake pad alignment |
| ||||||
A: Brake pad aligned with rim surface |
| |||||||
manual or take your bicycle to |
| |||||||
B: Brake pad and rim parallel |
| |||||||
your dealer for service. | C: Brake pad |
| ||||||