Manuals
/
Boston Acoustics
/
Home Audio
/
Speaker
Boston Acoustics
VSi 580T2 All Installations, Todas las instalaciones, Toutes installations, Nota
Models:
VSi 580T2
1
15
21
21
Download
21 pages
13.75 Kb
12
13
14
15
16
17
18
19
Specification
Install
Diagram #2
Guía de configuración
Placement / Location Tips
Power Handling/Hörpegel
Page 15
Image 15
Page 14
Page 16
Page 15
Image 15
Page 14
Page 16
Contents
VSi 580T2 HSi 470T2
Quick Reference
Guía de configuración
Configuration Guide
de configuration rapide
Introduction
Contents
Contenido
Sommaire
Merci
Specifications
Thank you
¡Gracias
Included
Placement / Location Tips
Conseils d’installation / d’emplacement
Hinweise zum optimalen Installationsort
Altavoz ambiental
Diffuse Mode T2 Dispersion Pattern
Surround Speaker
Direct/Diffuse Operation
Option für Surround Installation
Surround Placement Option #1
Surround Placement Option #2
Surround Placement Option #1
Surround Placement Option #4
Surround Placement Option #3
Surround Placement Option #4
Surround Placement Option #3
Surround Placement Option #6
Surround Placement Option #5
Surround Placement Option #6
Surround Placement Option #5
Sugerencias sobre la instalación
Installation Tips
Conseils d’installation
Tips zur optimalen Installation
Damp Locations
Emplacements humides
Feuchte Installationsorte
Bass Management
Cableado
Wiring
Diagram #2
Single Stereo Speaker
Enceinte Surround
Diagram #3
Surround Speaker
Altavoz ambiental
Instrucciones de instalación
Installation Instructions
Instructions d’installation
Anleitungen zur Installation
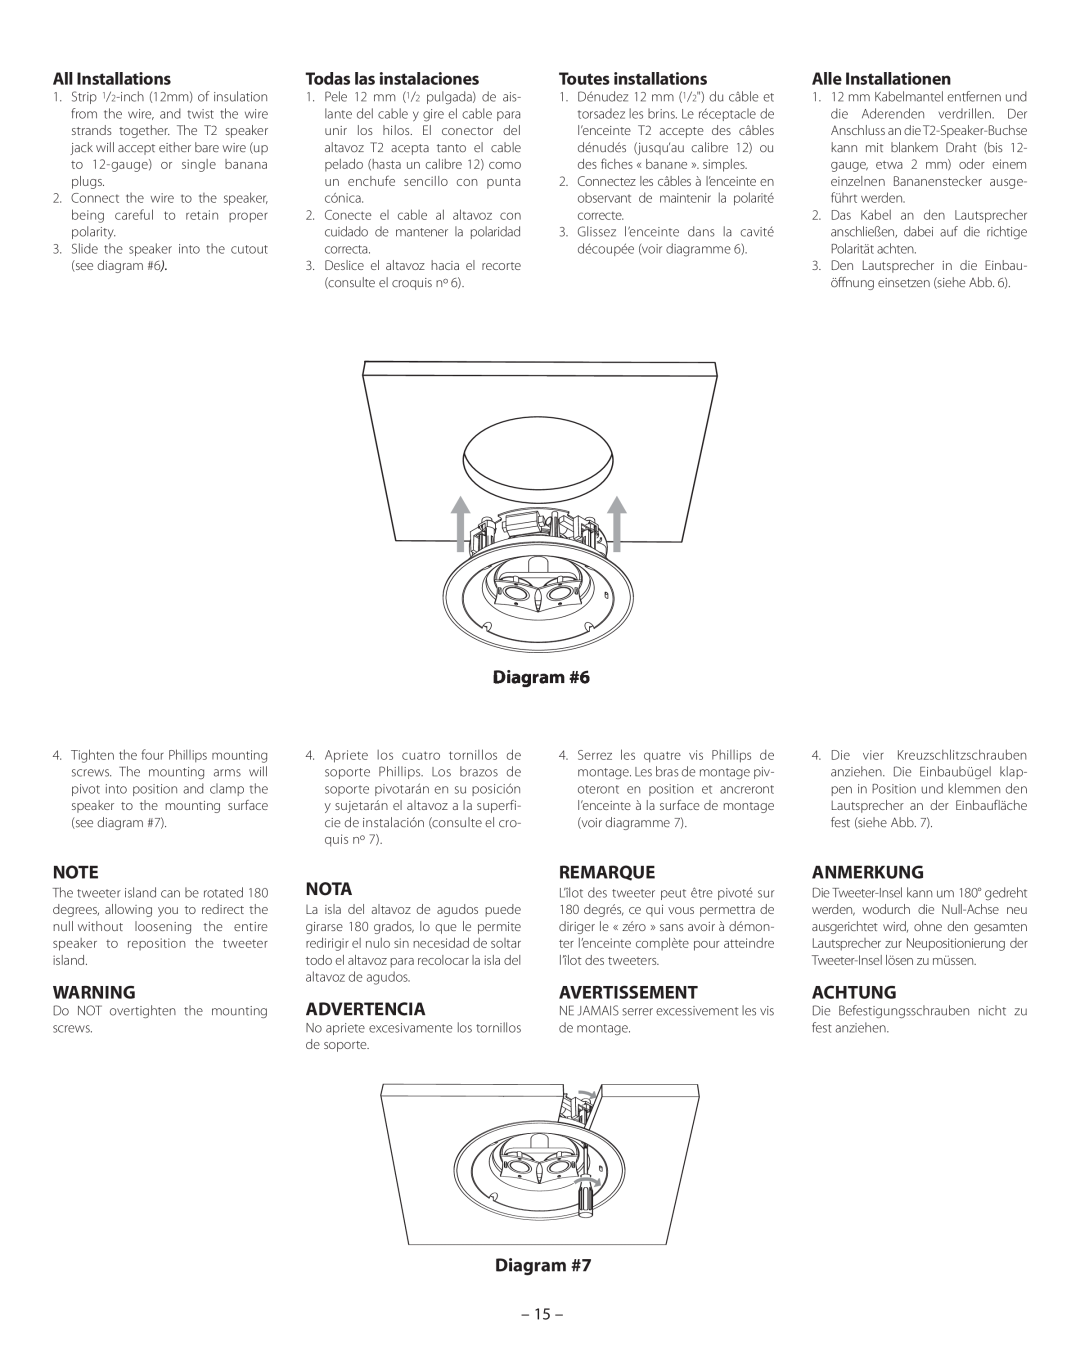
Diagram #6
All Installations
Toutes installations
Alle Installationen
REMARQUE
Diagram #8
Diagram #9
NOTA
Lackierung
Painting
Pintura
Peinture
Power Handling/Hörpegel
Power Handling Listening Levels
If Service Seems Necessary
Si le service semble nécessaire
Notas
Remarques
Anmerkungen
300 Jubilee Drive, Peabody, MA 01960 USA
Document Notes
300 Jubilee Drive Peabody, MA 01960 USA
Artwork P/N Scale 100%
Colors Black Ink Black on white paper
Top
Page
Image
Contents