Initial Setup and Installation
CAUTION:
•Use only the power cord that is supplied by the manufacturer.
•Use the USB interface cable (supplied) that is certified as
•Do not connect the scanner to a USB hub. It is not guaranteed to work.
•Power Requirements: AC outlet
AC 100 – 120 V, 50/60 Hz
AC 220 – 240 V, 50/60 Hz
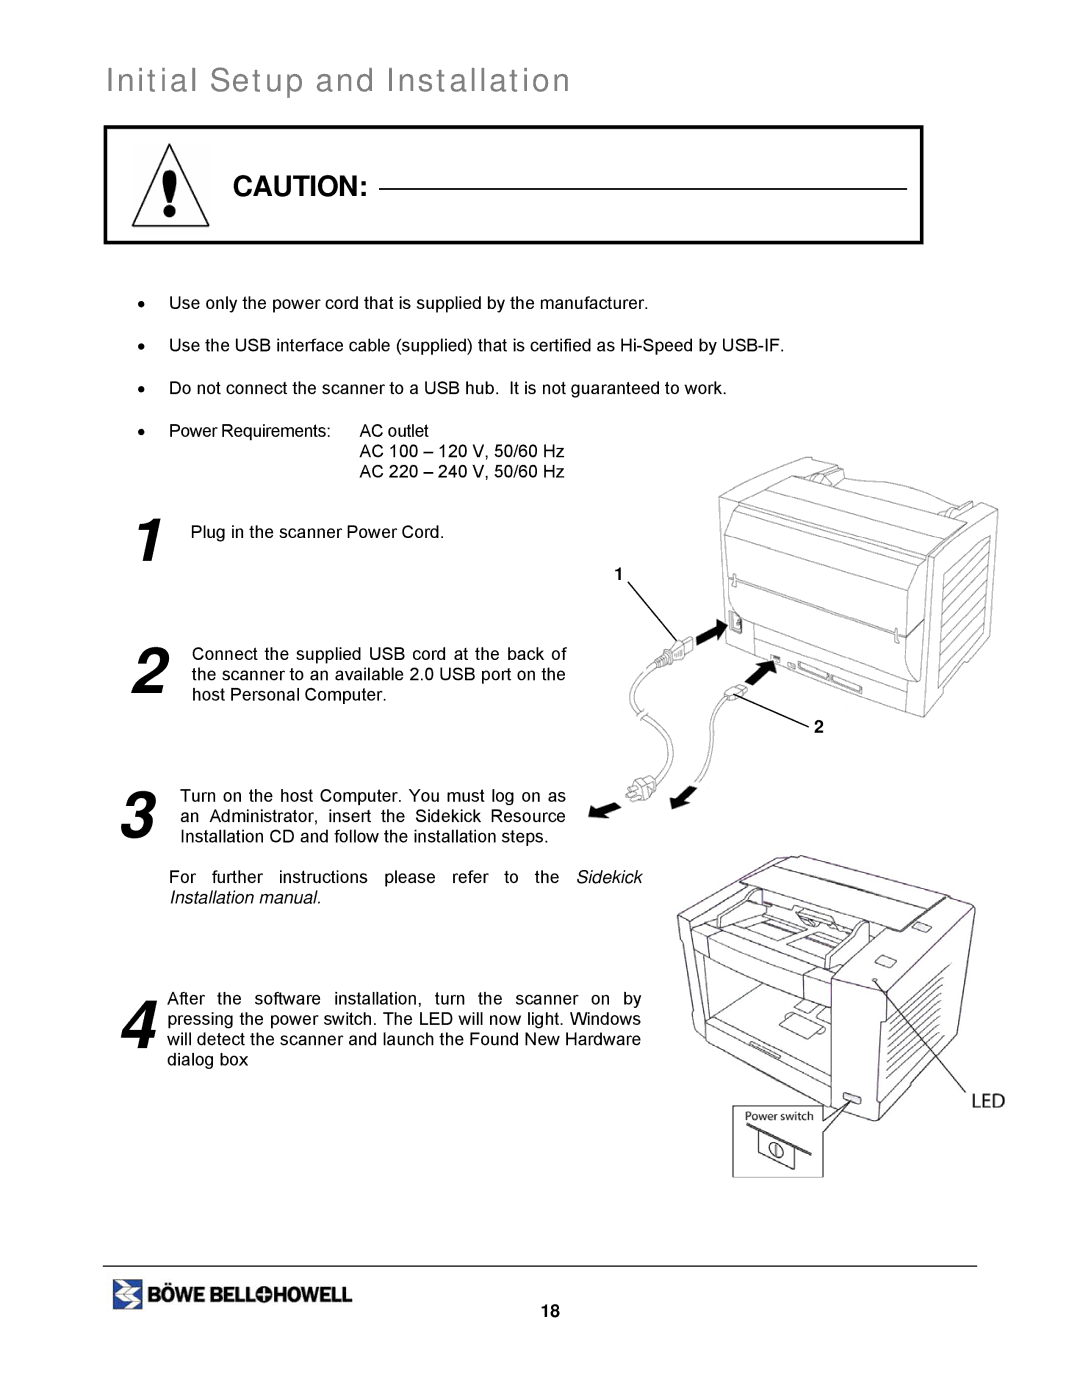
1
Plug in the scanner Power Cord.
1
2
Connect the supplied USB cord at the back of the scanner to an available 2.0 USB port on the host Personal Computer.
![]() 2
2
3
Turn on the host Computer. You must log on as an Administrator, insert the Sidekick Resource Installation CD and follow the installation steps.
For further instructions please refer to the Sidekick Installation manual.
4 After the software installation, turn the scanner on by pressing the power switch. The LED will now light. Windows will detect the scanner and launch the Found New Hardware dialog box
18