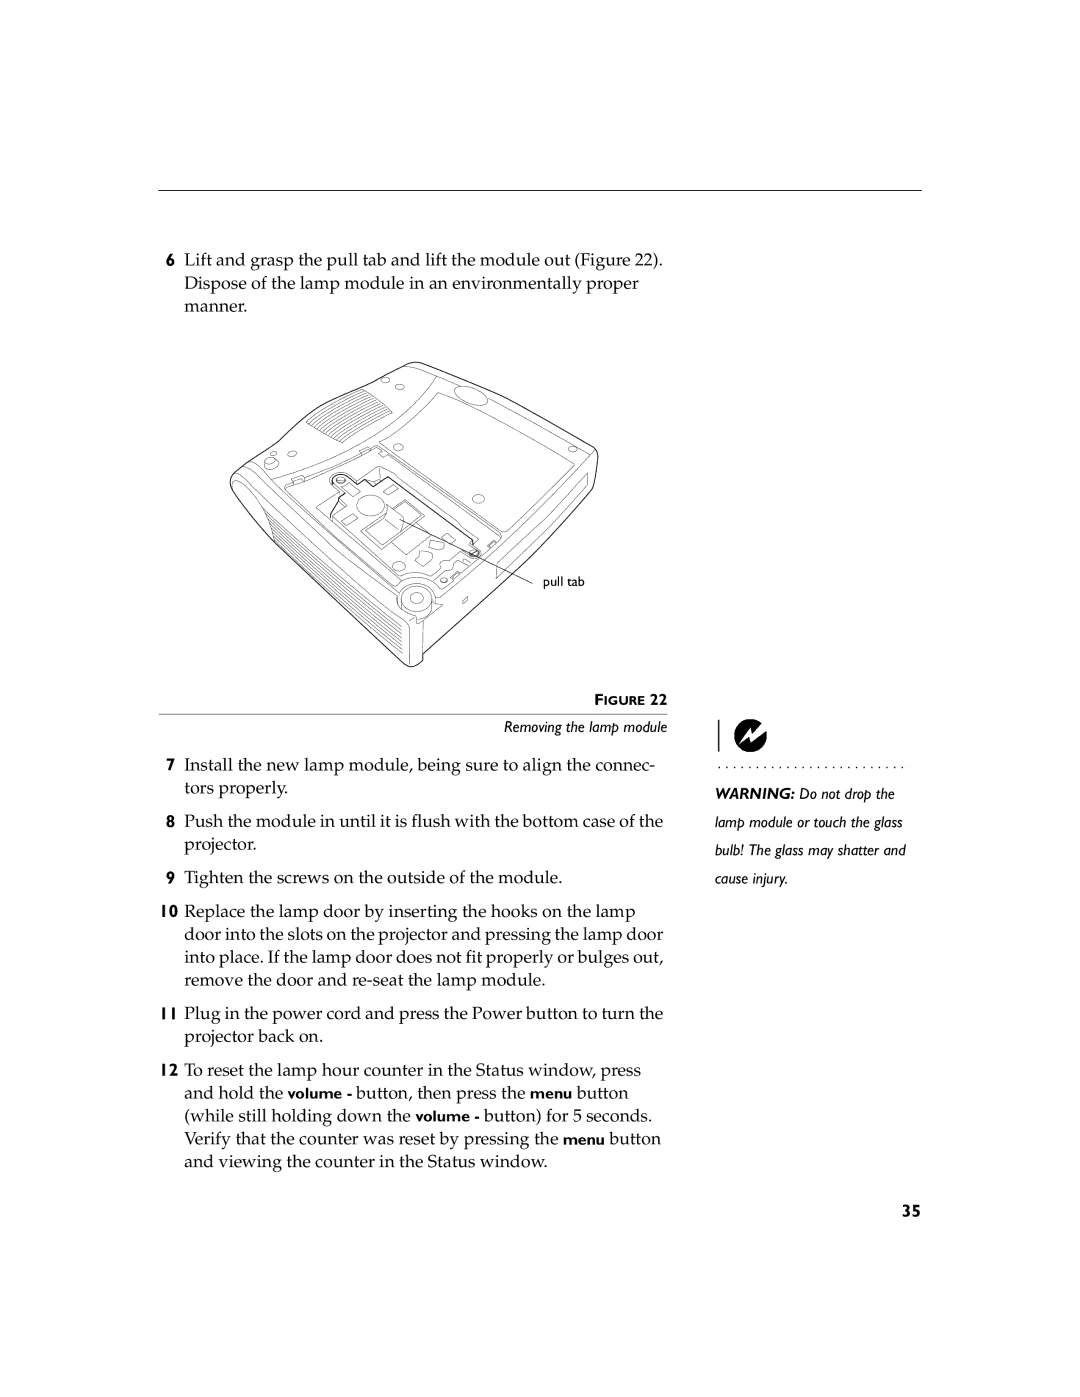
6Lift and grasp the pull tab and lift the module out (Figure 22). Dispose of the lamp module in an environmentally proper manner.
pull tab
FIGURE 22
Removing the lamp module
7Install the new lamp module, being sure to align the connec- tors properly.
8Push the module in until it is flush with the bottom case of the projector.
9Tighten the screws on the outside of the module.
10Replace the lamp door by inserting the hooks on the lamp door into the slots on the projector and pressing the lamp door into place. If the lamp door does not fit properly or bulges out, remove the door and
11Plug in the power cord and press the Power button to turn the projector back on.
12To reset the lamp hour counter in the Status window, press and hold the volume - button, then press the menu button (while still holding down the volume - button) for 5 seconds. Verify that the counter was reset by pressing the menu button and viewing the counter in the Status window.
WARNING: Do not drop the lamp module or touch the glass bulb! The glass may shatter and cause injury.
35
