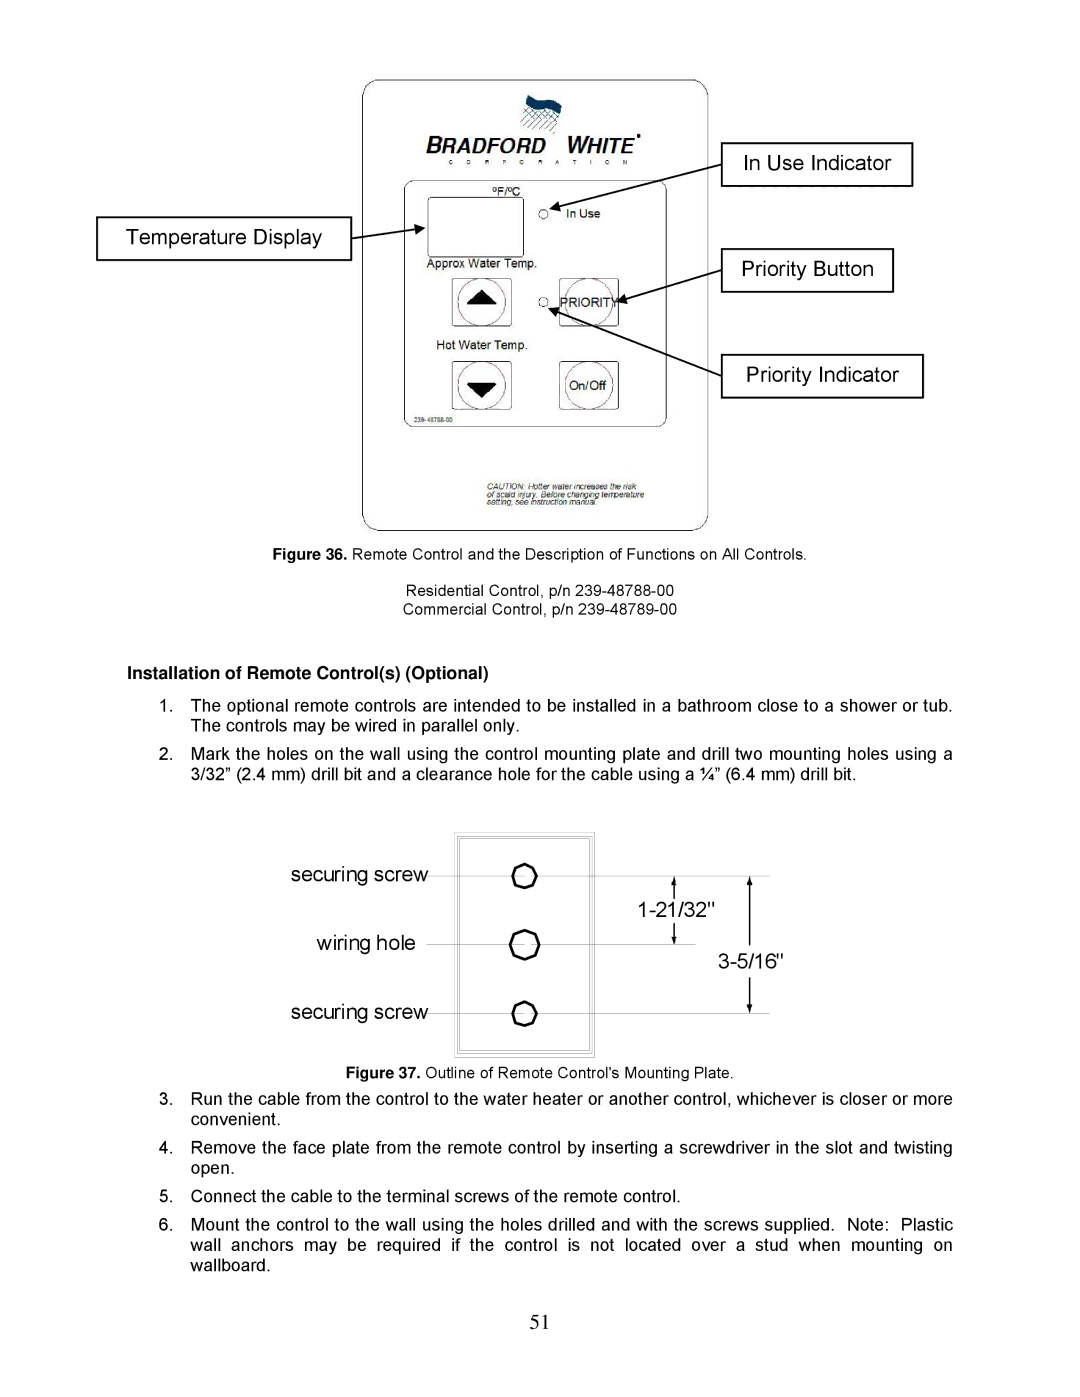
Temperature Display
In Use Indicator
Priority Button
Priority Indicator
Figure 36. Remote Control and the Description of Functions on All Controls.
Residential Control, p/n 239-48788-00
Commercial Control, p/n 239-48789-00
Installation of Remote Control(s) (Optional)
1.The optional remote controls are intended to be installed in a bathroom close to a shower or tub. The controls may be wired in parallel only.
2.Mark the holes on the wall using the control mounting plate and drill two mounting holes using a 3/32” (2.4 mm) drill bit and a clearance hole for the cable using a ¼” (6.4 mm) drill bit.
securing screw
wiring hole
securing screw![]()
1-21/32"
Figure 37. Outline of Remote Control's Mounting Plate.
3.Run the cable from the control to the water heater or another control, whichever is closer or more convenient.
4.Remove the face plate from the remote control by inserting a screwdriver in the slot and twisting open.
5.Connect the cable to the terminal screws of the remote control.
6.Mount the control to the wall using the holes drilled and with the screws supplied. Note: Plastic wall anchors may be required if the control is not located over a stud when mounting on wallboard.
51