INSTALL THE UPPER DECORATIVE FLUE, cont’d.
NON-DUCTED HOODS ONLY (8-FOOT AND 9-FOOT CEILINGS)
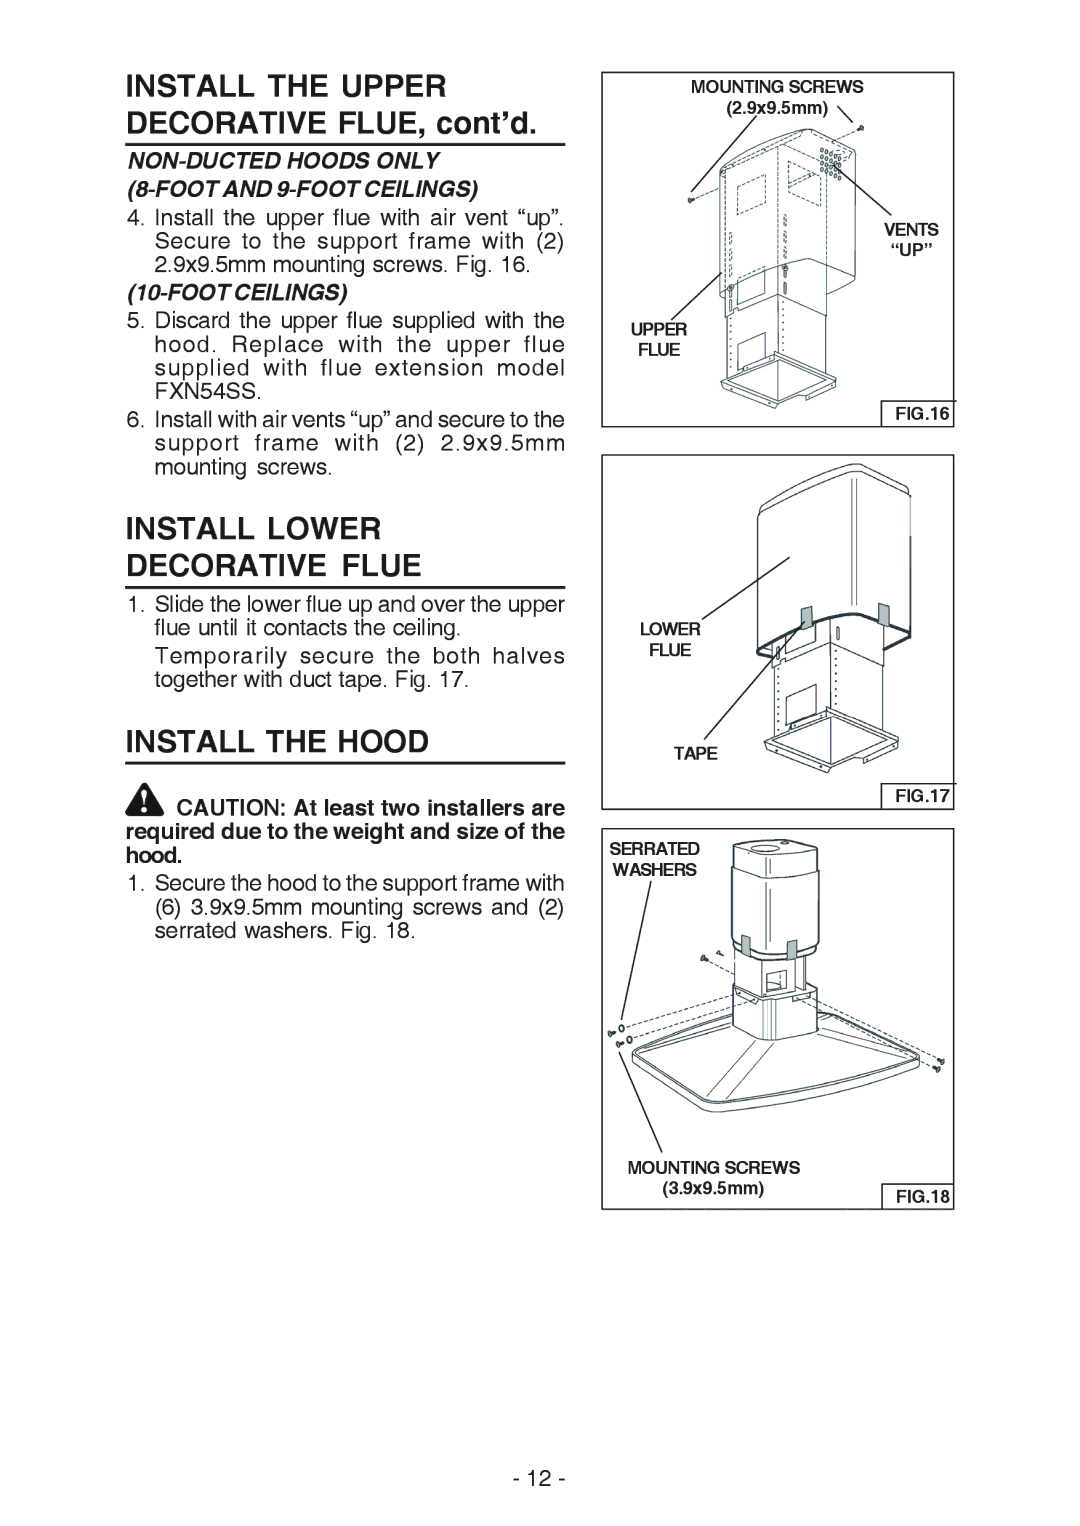
4.Install the upper flue with air vent “up”. Secure to the support frame with (2) 2.9x9.5mm mounting screws. Fig. 16.
(10-FOOT CEILINGS)
5.Discard the upper flue supplied with the hood. Replace with the upper flue supplied with flue extension model FXN54SS.
6.Install with air vents “up” and secure to the support frame with (2) 2.9x9.5mm mounting screws.
INSTALL LOWER
DECORATIVE FLUE
1.Slide the lower flue up and over the upper flue until it contacts the ceiling.
Temporarily secure the both halves together with duct tape. Fig. 17.
INSTALL THE HOOD
![]() !
! ![]() CAUTION: At least two installers are required due to the weight and size of the hood.
CAUTION: At least two installers are required due to the weight and size of the hood.
1.Secure the hood to the support frame with
(6) 3.9x9.5mm mounting screws and (2) serrated washers. Fig. 18.
MOUNTING SCREWS
(2.9x9.5mm)
VENTS
“UP”
UPPER
FLUE
FIG.16
LOWER
FLUE
TAPE
FIG.17
SERRATED
WASHERS
MOUNTING SCREWS
(3.9x9.5mm)FIG.18
- 12 -
