III. Threading
Needle threading
CAUTION
 333
333
333
Always be sure to turn off the power before carrying out the following operation.
(1) Follow the procedure described below to thread the needle.
F | 6 |
|
5 | G | |
| 4 | |
444 |
|
|
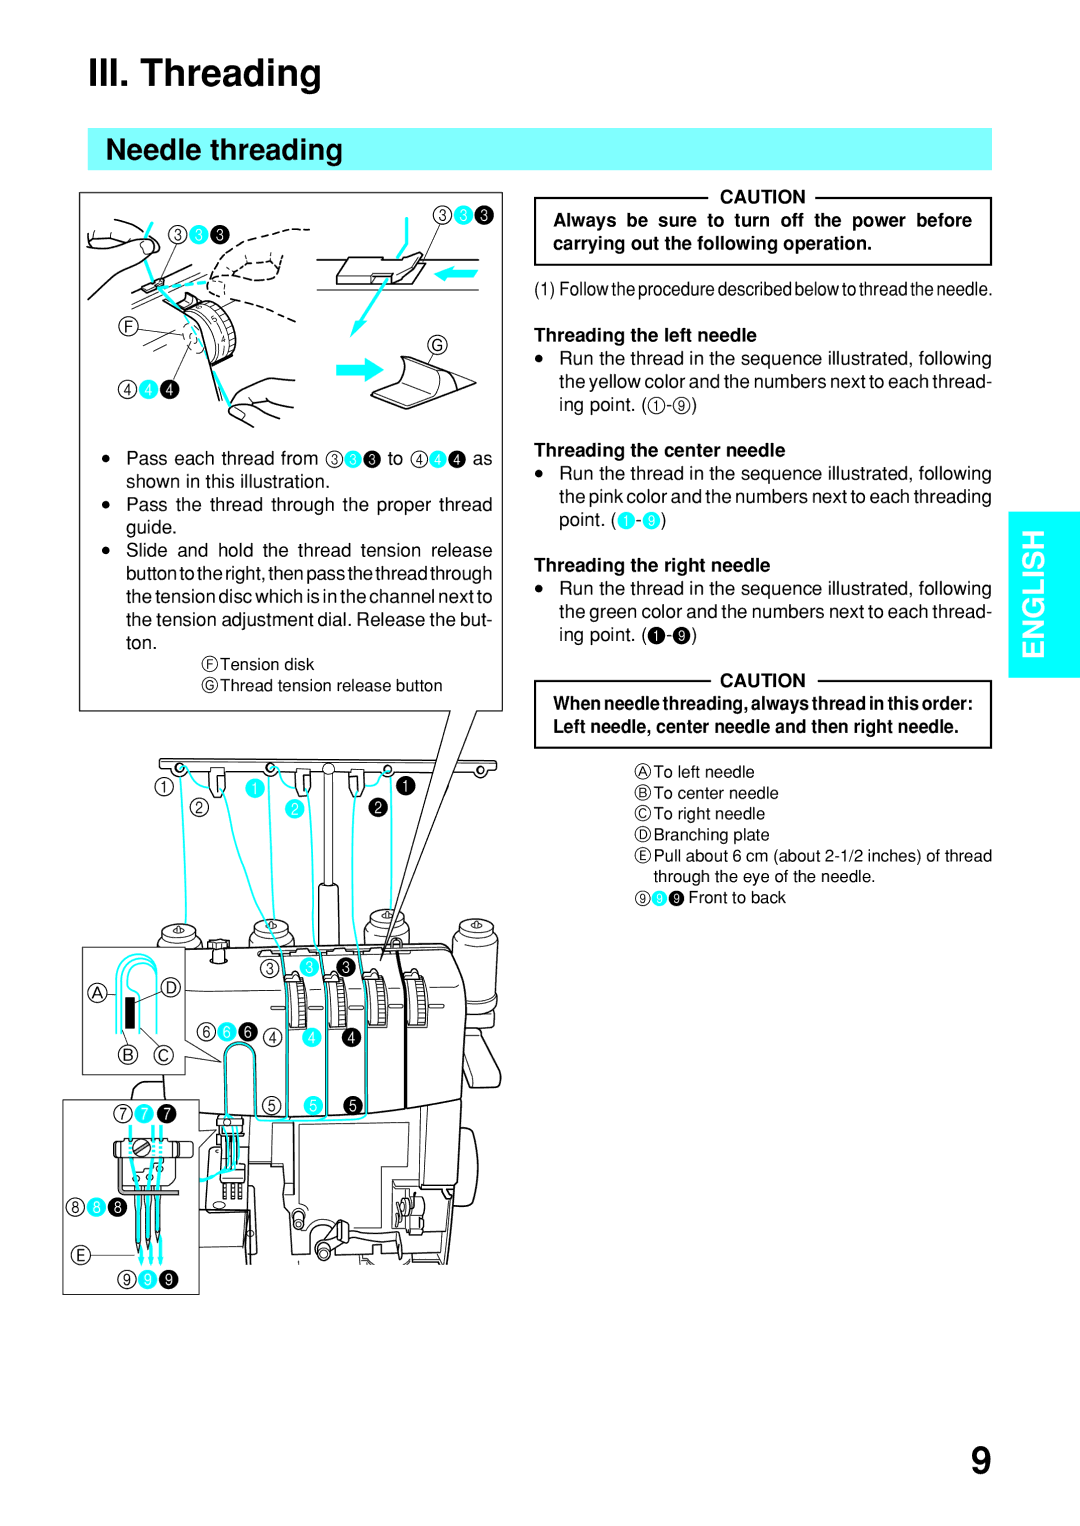
•Pass each thread from 333 to 444 as shown in this illustration.
•Pass the thread through the proper thread guide.
•Slide and hold the thread tension release button to the right, then pass the thread through the tension disc which is in the channel next to the tension adjustment dial. Release the but- ton.
FTension disk
GThread tension release button
1 1 ![]() 1
1 ![]()
2 2 2
3 3 3
A | D |
|
|
|
|
| |
| B C | 6664 4 4 | |
| 777 | 5 | 5 5 |
|
|
| |
888
E
999
Threading the left needle
•Run the thread in the sequence illustrated, following the yellow color and the numbers next to each thread- ing point.
Threading the center needle
•Run the thread in the sequence illustrated, following the pink color and the numbers next to each threading point.
Threading the right needle
•Run the thread in the sequence illustrated, following the green color and the numbers next to each thread- ing point.
CAUTION
When needle threading, always thread in this order: Left needle, center needle and then right needle.
ATo left needle
BTo center needle
CTo right needle DBranching plate
EPull about 6 cm (about
999 Front to back
ENGLISH
9
