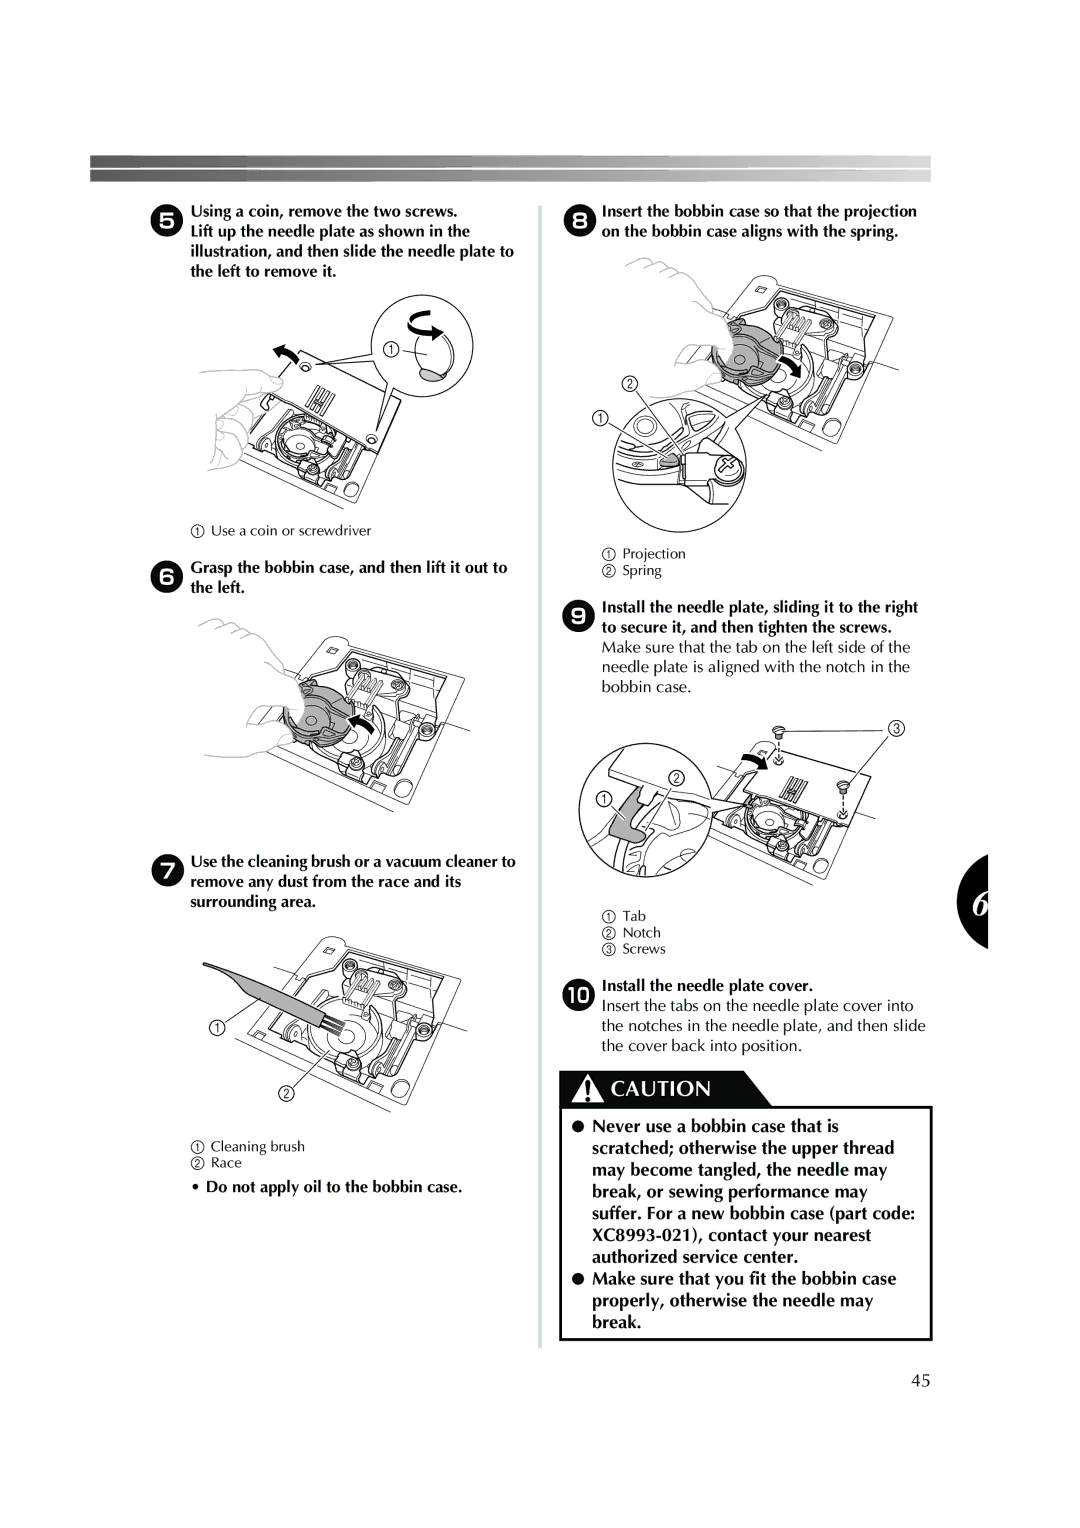
5Using a coin, remove the two screws.
Lift up the needle plate as shown in the illustration, and then slide the needle plate to the left to remove it.
1Use a coin or screwdriver
6Graspthe left.the bobbin case, and then lift it out to
7Use the cleaning brush or a vacuum cleaner to remove any dust from the race and its surrounding area.
1Cleaning brush
2 Race
• Do not apply oil to the bobbin case.
8Insert the bobbin case so that the projection on the bobbin case aligns with the spring.
1Projection
2 Spring
9Install the needle plate, sliding it to the right to secure it, and then tighten the screws. Make sure that the tab on the left side of the needle plate is aligned with the notch in the bobbin case.
![]() 3
3
1 Tab | 6 |
2Notch
3 Screws
0Install the needle plate cover.
Insert the tabs on the needle plate cover into the notches in the needle plate, and then slide the cover back into position.
![]()
![]() CAUTION
CAUTION
●Never use a bobbin case that is scratched; otherwise the upper thread may become tangled, the needle may break, or sewing performance may suffer. For a new bobbin case (part code:
●Make sure that you fit the bobbin case properly, otherwise the needle may break.
45
