5USING ATTACHMENTS AND APPLICATIONS
![]() CAUTION
CAUTION
●Always turn off the machine before replacing the presser foot. Otherwise, injuries may occur if the foot controller is accidentally pressed and the machine starts sewing.
Zipper insertion
Stitch |
|
| Stitch | Stitch |
| |
Pattern | Length | Width | Foot | |||
Name | ||||||
|
| [mm (inch)] | [mm (inch)] |
| ||
|
|
|
| |||
Straight | 2 | 2.5 | Zipper | |||
Stitch |
|
|
| (center) | Foot “I” | |
|
| (3/32) | ||||
|
|
|
|
| ||
|
|
|
|
|
| |
You can use the zipper foot “I” to sew different types of zippers, and can easily position it to the right or left side of the needle.
When sewing with the zipper on the right side, attach the shank to the left pin of the zipper foot. When sewing with the zipper on the left side, attach the shank to the right pin of the zipper foot.
1 | 3 |
| |
2 | I |
| 4 |
1Right pin for sewing with the zipper on the left side
2Left pin for sewing with the zipper on the right side
3Needle drop point for sewing with the zipper on the left side
4Needle drop point for sewing with the zipper on the right side
1Prepare the fabric with the zipper basted on the wrong side.
| 1 | 1 |
|
| |
3 |
| 3 |
|
| 5 |
4 | 2 | 4 |
|
|
1Basting stitching
2Reverse stitches
3Wrong side of fabric
4End of zipper opening
5Zipper
2Turn off the machine. Attach the zipper foot “I”.
![]() CAUTION
CAUTION
●Turn the handwheel toward you (counterclockwise) and check that the needle does not touch the zipper foot before you start sewing. Choosing a different stitch will cause the needle to hit the presser foot and break, and you may be injured.
3Turn on the machine.
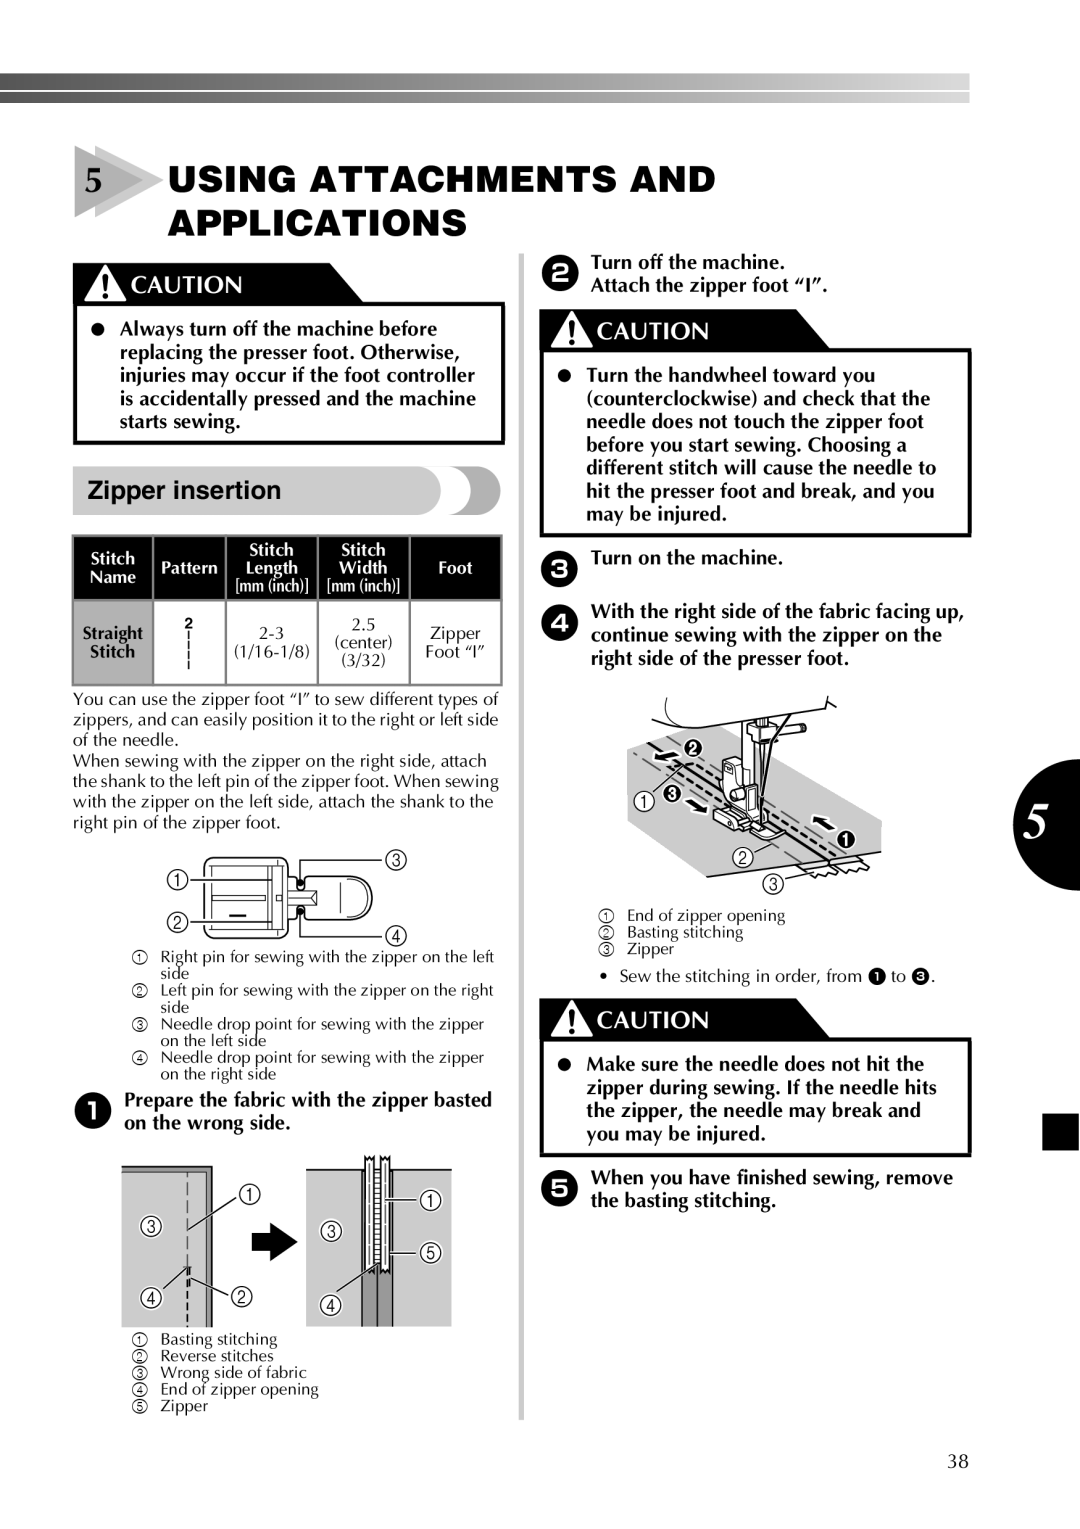
4With the right side of the fabric facing up, continue sewing with the zipper on the right side of the presser foot.
1 | 5 |
| |
| 2 |
3![]()
1End of zipper opening
2Basting stitching
3Zipper
• Sew the stitching in order, from 1 to 3.
![]() CAUTION
CAUTION
●Make sure the needle does not hit the zipper during sewing. If the needle hits the zipper, the needle may break and you may be injured.
5When you have finished sewing, remove the basting stitching.
38