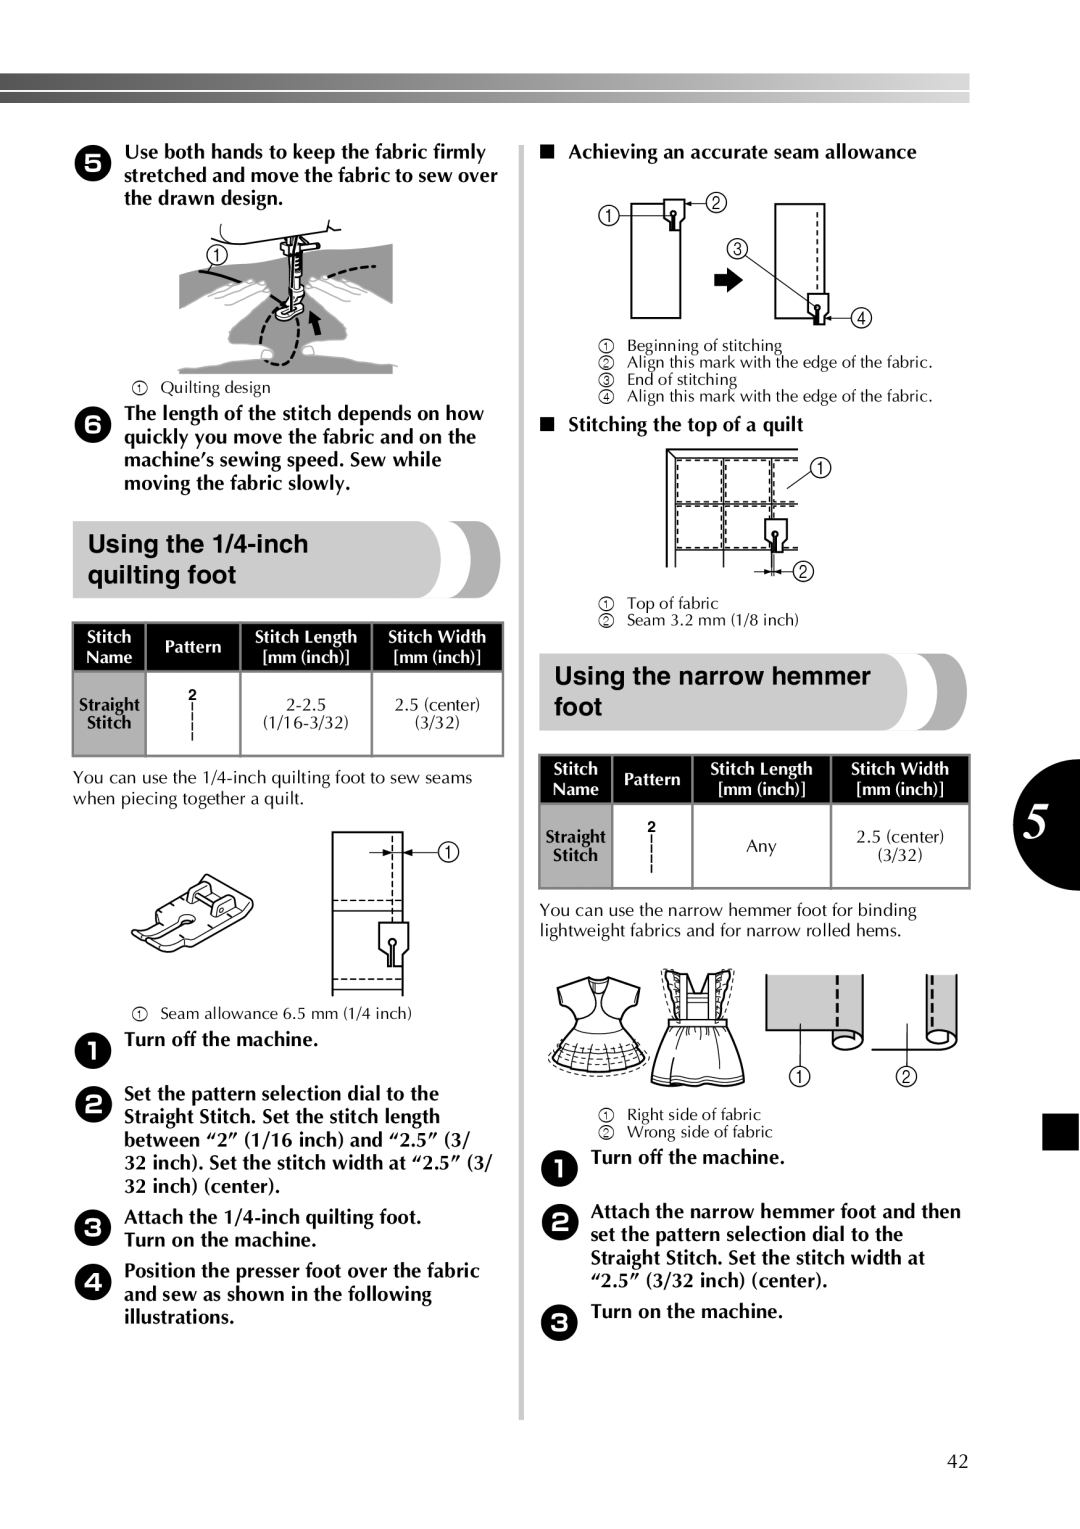
5Use both hands to keep the fabric firmly stretched and move the fabric to sew over the drawn design.
1![]()
![]()
1Quilting design
6The length of the stitch depends on how quickly you move the fabric and on the machine’s sewing speed. Sew while moving the fabric slowly.
Using the 1/4-inch quilting foot
Stitch | Pattern | Stitch Length | Stitch Width | ||
Name | [mm (inch)] | [mm (inch)] | |||
|
| ||||
Straight | 2 | 2.5 (center) | |||
|
| ||||
Stitch |
|
|
| (3/32) | |
|
| ||||
|
|
|
|
| |
|
|
|
|
| |
You can use the
![]()
![]()
![]() 1
1
1Seam allowance 6.5 mm (1/4 inch)
1 Turn off the machine.
2Set the pattern selection dial to the Straight Stitch. Set the stitch length between “2” (1/16 inch) and “2.5” (3/ 32 inch). Set the stitch width at “2.5” (3/ 32 inch) (center).
3Attach the
4Position the presser foot over the fabric and sew as shown in the following illustrations.
■Achieving an accurate seam allowance
1![]()
![]() 2
2
3
![]()
![]() 4
4
1Beginning of stitching
2Align this mark with the edge of the fabric.
3End of stitching
4Align this mark with the edge of the fabric.
■Stitching the top of a quilt
![]() 1
1
![]()
![]()
![]() 2
2
1Top of fabric
2Seam 3.2 mm (1/8 inch)
Using the narrow hemmer foot
Stitch | Pattern | Stitch Length | Stitch Width | ||
Name | [mm (inch)] | [mm (inch)] | |||
|
| ||||
Straight | 2 | Any | 2.5 (center) | ||
|
| ||||
Stitch |
|
| (3/32) | ||
|
|
| |||
|
|
|
|
| |
|
|
|
|
| |
You can use the narrow hemmer foot for binding lightweight fabrics and for narrow rolled hems.
1 2
1Right side of fabric
2Wrong side of fabric
1Turn off the machine.
2Attach the narrow hemmer foot and then set the pattern selection dial to the Straight Stitch. Set the stitch width at “2.5” (3/32 inch) (center).
3Turn on the machine.
5
42