Using the blind stitch foot
Stitch | Pattern | Stitch Length | Stitch Width | ||
Name | [mm (inch)] | [mm (inch)] | |||
|
| ||||
Straight | 2 |
|
| ||
|
| Any | Any | ||
Stitch |
|
| |||
|
|
|
| ||
|
|
|
|
| |
|
|
|
|
| |
Zigzag | 3 | ||||
|
| ||||
Stitch |
|
| |||
|
|
|
|
| |
Blind | 4 | ||||
Hem |
|
| |||
|
| ||||
Stitch |
|
| |||
|
|
|
| ||
|
|
|
|
| |
Stretch | 7 |
|
| ||
Blind | |||||
|
| ||||
Hem |
|
| |||
Stitch |
|
|
|
| |
This foot comes in handy not only for blind hem stitching, but also for sewing fabric edges and seams.
■When edge stitching
1Turn off the machine.
2Attach the blind stitch foot. Turn on the machine.
3Position the needle the distance you want the stitch to be from the edge of the fabric, and then lower the needle in that position.
4Turn the foot guide screw and carefully adjust to guide the fabric.
1
2 |
|
2 | 1 |
|
1Screw
2Guide
■When sewing seams
1Turn off the machine.
2Attach the blind stitch foot. Turn on the machine.
3Set the pattern selection dial to the Straight Stitch, and then set the stitch width at “2.5” (3/32 inch) (center). Align the foot guide with the needle position.
4SetStitch.the pattern selection dial to the Zigzag
5Place the fabric under the foot so the foot guide is aligned between both edges of the fabric.
6Lower the presser foot and start sewing.
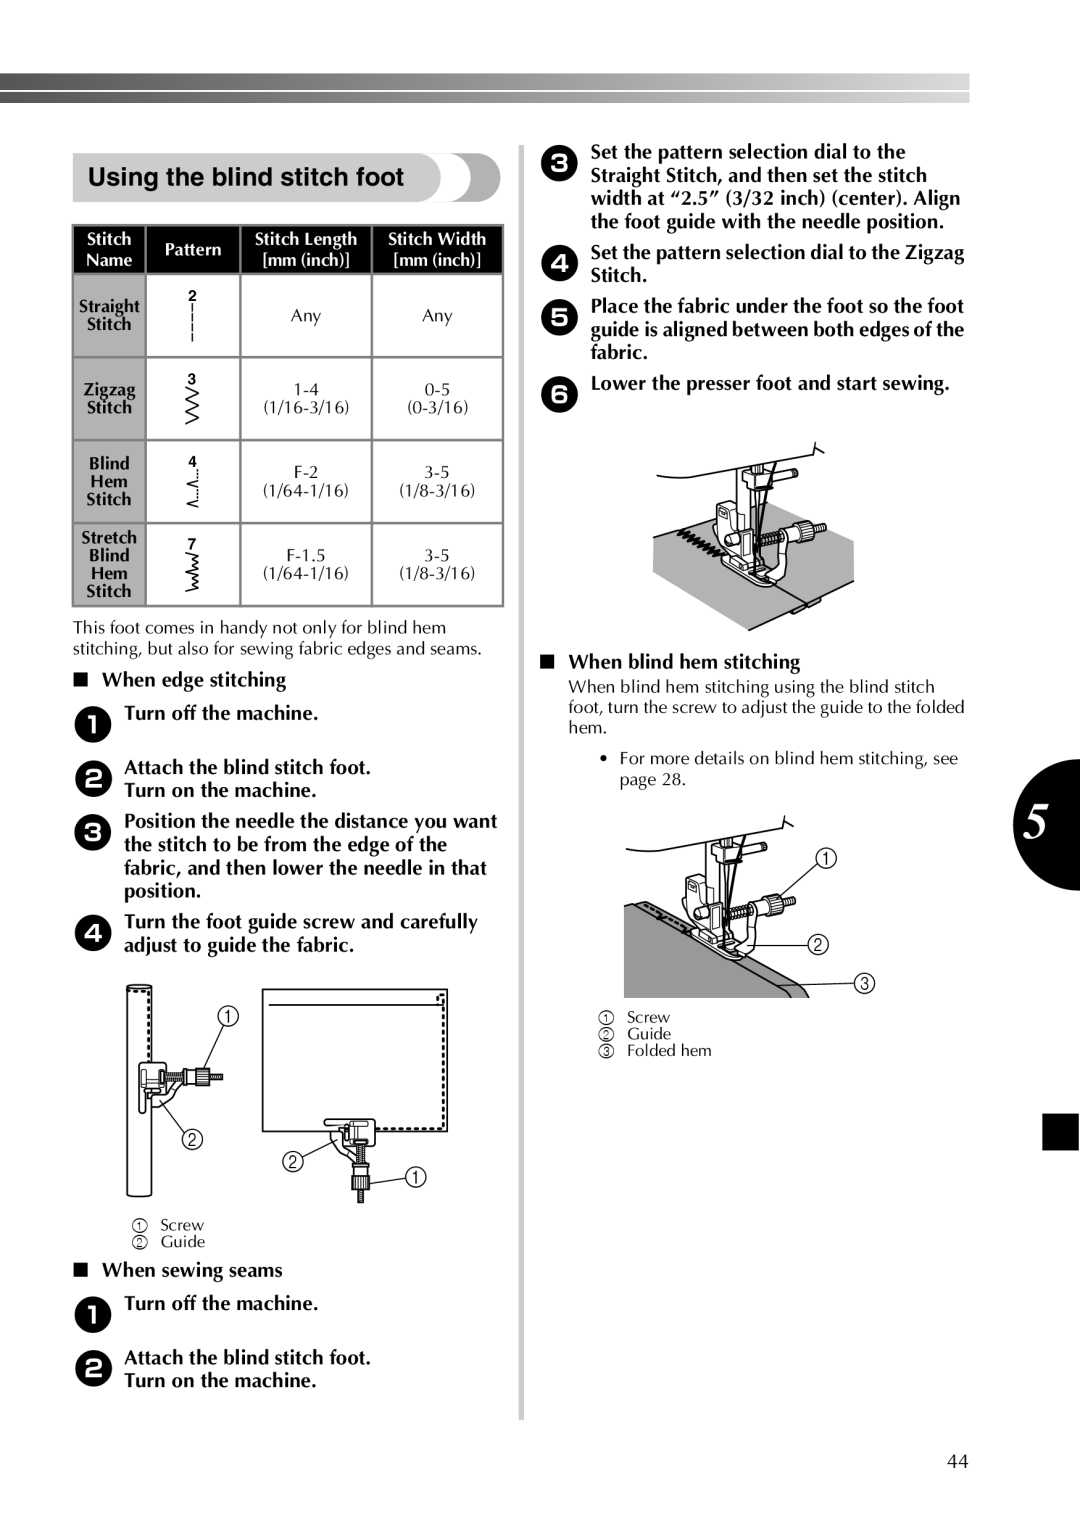
■When blind hem stitching
When blind hem stitching using the blind stitch foot, turn the screw to adjust the guide to the folded hem.
•For more details on blind hem stitching, see page 28.
5
1
2
3
1Screw
2Guide
3Folded hem
44