18
Installation Assembly/
low a controlled amount of air flow through the screen and into the fuel supply tube. Flame should have good retention. For a proper burn and as a general rule, the air shutter for propane installation should be completely open, and the air shutter for NG installation should be mostly closed. This can be adjusted later to create a clean and desired flame.
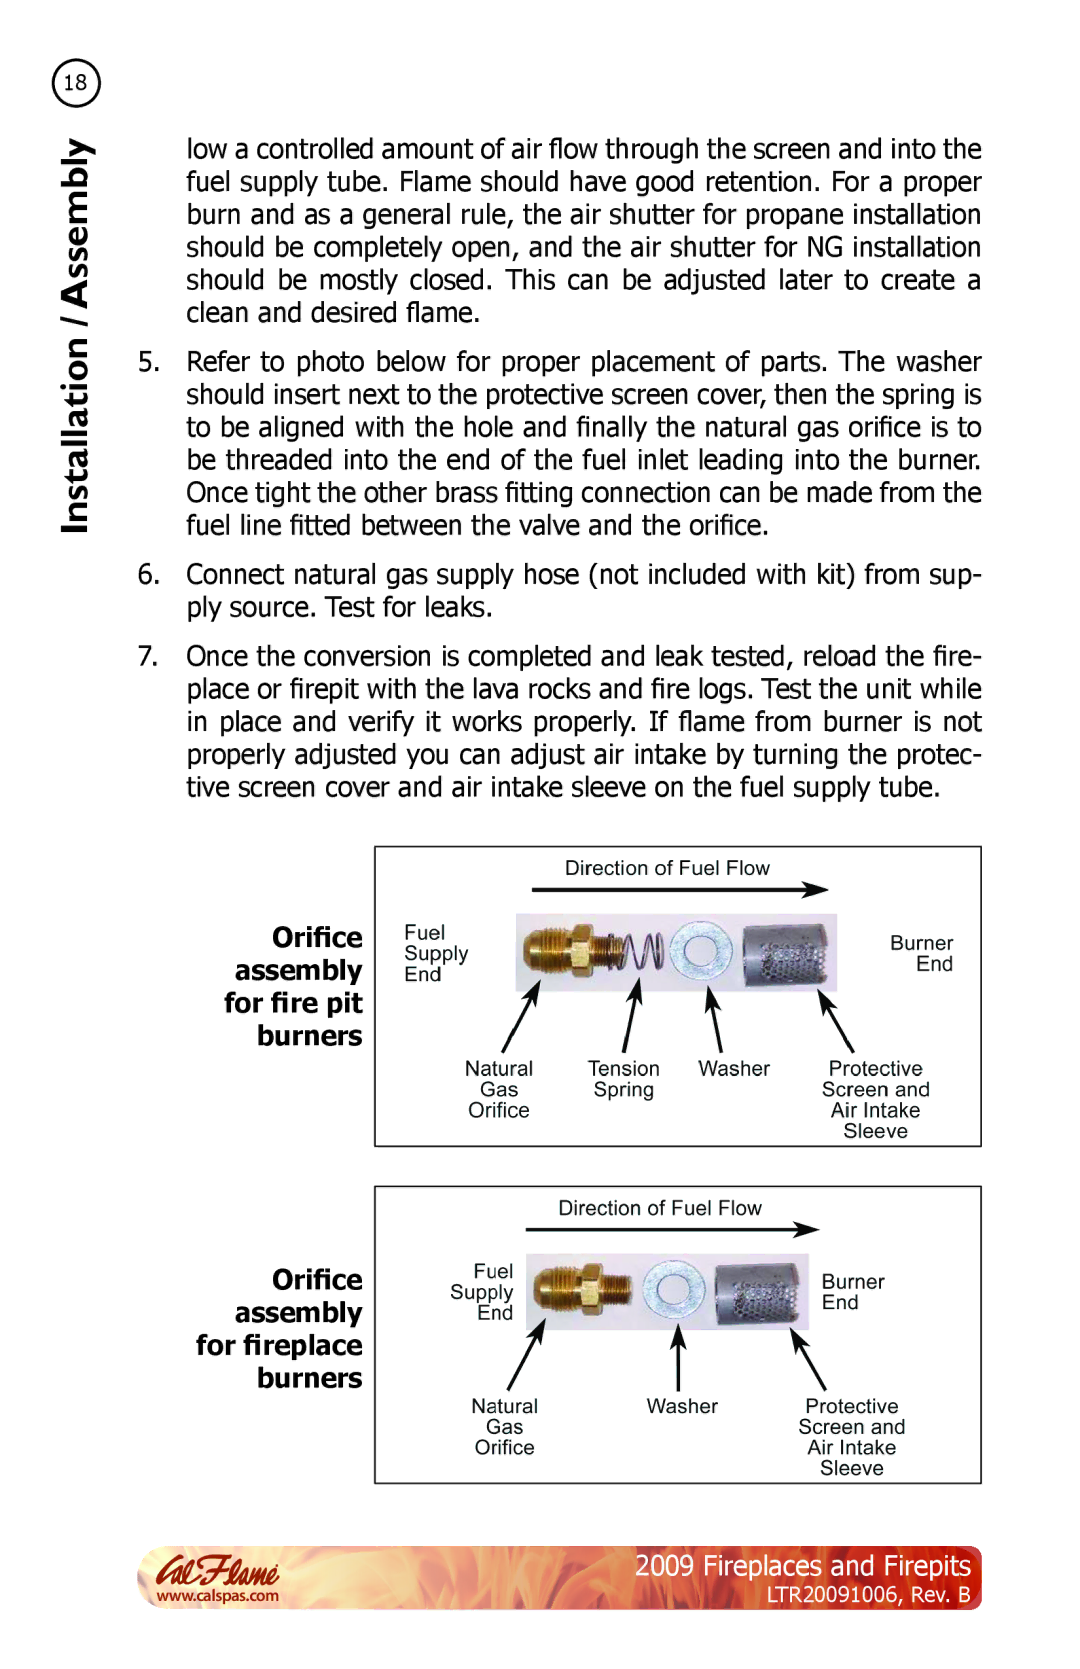
5.Refer to photo below for proper placement of parts. The washer should insert next to the protective screen cover, then the spring is to be aligned with the hole and finally the natural gas orifice is to be threaded into the end of the fuel inlet leading into the burner.
Once tight the other brass fitting connection can be made from the fuel line fitted between the valve and the orifice.
6.Connect natural gas supply hose (not included with kit) from sup- ply source. Test for leaks.
7.Once the conversion is completed and leak tested, reload the fire- place or firepit with the lava rocks and fire logs. Test the unit while in place and verify it works properly. If flame from burner is not properly adjusted you can adjust air intake by turning the protec- tive screen cover and air intake sleeve on the fuel supply tube.
Orifice assembly for fire pit burners
Orifice assembly for fireplace burners
2009 Fireplaces and Firepits
www.calspas.com | LTR20091006, Rev. B |