PW1587, PW1586 specifications
The Campbell Hausfeld PW1586 and PW1587 are two exceptional pressure washer models designed for both casual users and professionals seeking efficient cleaning solutions. These machines are engineered to tackle tough cleaning tasks with ease, making them ideal for various applications, including home exterior cleaning, driveway cleaning, and even preparing surfaces for painting.One of the standout features of both the PW1586 and PW1587 is their powerful electric motor, which delivers impressive cleaning power. The PW1586 operates at a maximum pressure of 1,600 PSI and a flow rate of 1.2 GPM, while the PW1587 steps up the performance with 2,000 PSI and a flow rate of 1.3 GPM. This combination of pressure and flow allows users to effectively remove dirt, grime, and stubborn stains from various surfaces, including patios, decks, and vehicles.
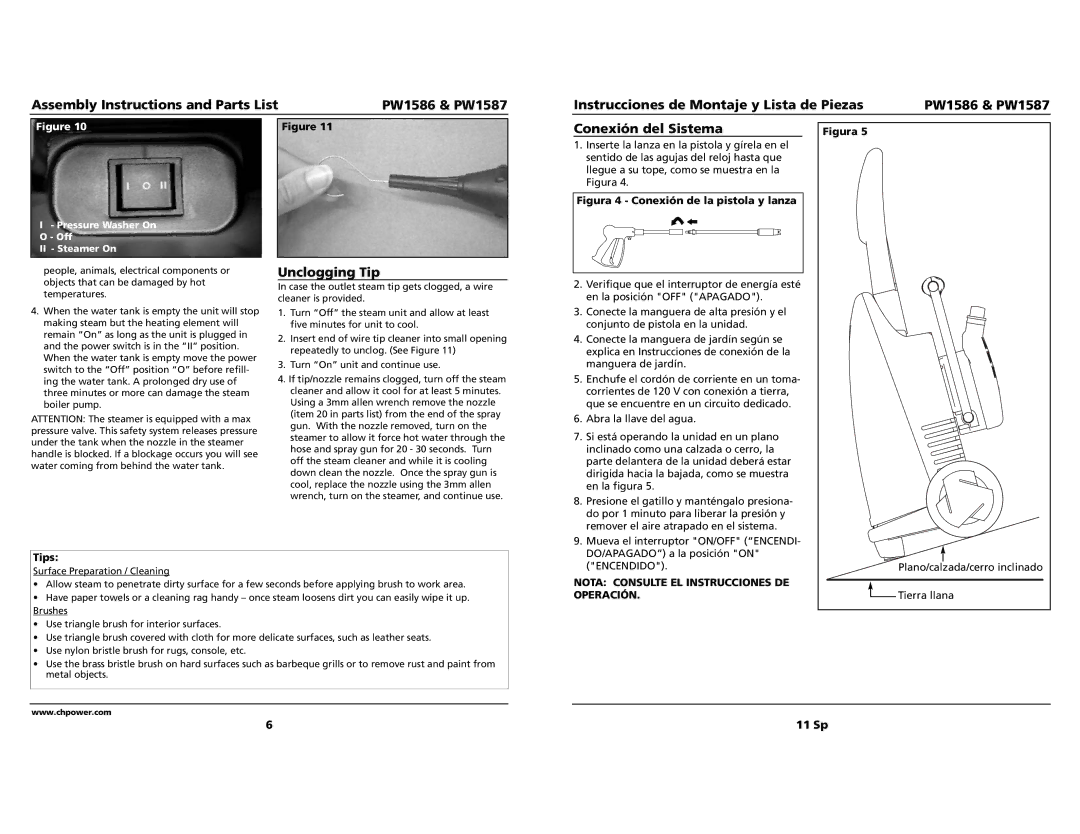
Both models come equipped with multiple quick-connect spray nozzles, providing versatility for different cleaning tasks. The nozzles allow users to easily switch between varying spray patterns, from a tight pinpoint stream for tough stains to a wide fan spray for broader cleaning applications. This adaptability ensures that users can tackle any job with the appropriate level of pressure.
The PW1586 and PW1587 also feature a durable and compact design, making them easy to maneuver and store. Their lightweight construction ensures that they can be transported effortlessly, while built-in wheels provide added mobility. Moreover, they include an onboard storage solution for the power cord and hoses, keeping everything organized and ready for use.
In terms of technology, both pressure washers come with a feature that enhances user safety and convenience. An automatic shut-off system ensures that the motor turns off when the trigger is not in use, which not only prolongs the machine’s lifespan but also enhances energy efficiency.
In addition to these features, the PW1586 and PW1587 models are designed for ease of operation with user-friendly controls and an ergonomic handle for comfortable use. The combination of their robust performance, thoughtful design, and efficient features makes them standout choices in the realm of electric pressure washers. Whether you are a homeowner looking to refresh your outdoor spaces or a professional needing reliable cleaning equipment, the Campbell Hausfeld PW1586 and PW1587 offer the power and versatility to get the job done effectively.