F

Ré glage de l’entré e audio — Enregistrements sur deux canaux

Réglez l’entrée de stéréo 1 de l’une des deux manières, A ou B, selon la source d’entrée.

A. En utilisant le microphone fourni ou en raccordant un microphone externe sur les mini-prises.

1.Changez le mode audio dans le menu si nécessaire (voir page 26).

2.Faites glisser le sélecteur INPUT SELECT sur MIC.

Les mini-prises MIC sont assignées comme source pour l’entrée audio.

A la place du microphone fourni, vous pouvez raccorder un microphone externe sur les mini-prises.

Si vous voulez utiliser un atténuateur pour obtenir un son plus naturel sans distorsion (quand vous enregistrez dans des endroits où le son est fort), faites glisser le sélecteur INPUT SELECT sur ATT.

B. Utilisation des prises RCA AUDIO 1

1.Sélectionnez le mode audio dans le menu si nécessaire (voir ci-dessus).

2.Faites glisser le sélecteur INPUT SELECT sur AUDIO 1.

• Les prises RCA AUDIO 1 sont affectées comme source pour l’entrée audio.

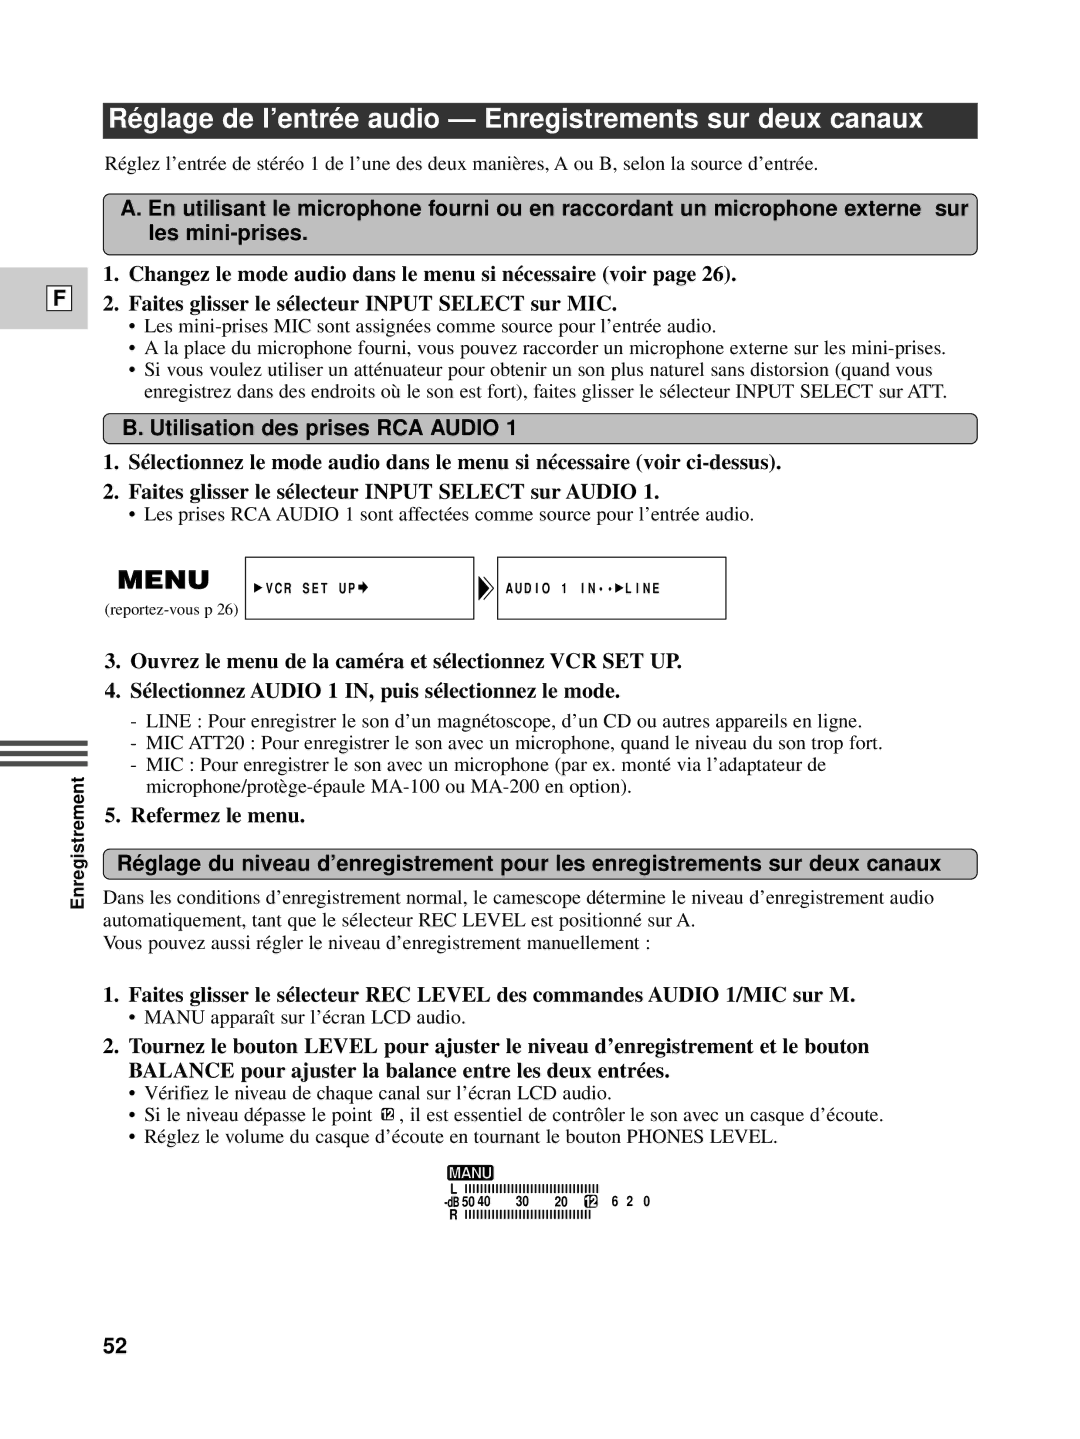
(reportez-vous p 26)

VCR SET UP

AUDIO 1 IN••LINE

Enregistrement

3.Ouvrez le menu de la caméra et sélectionnez VCR SET UP.

4.Sélectionnez AUDIO 1 IN, puis sélectionnez le mode.

-LINE : Pour enregistrer le son d’un magnétoscope, d’un CD ou autres appareils en ligne.

-MIC ATT20 : Pour enregistrer le son avec un microphone, quand le niveau du son trop fort.

-MIC : Pour enregistrer le son avec un microphone (par ex. monté via l’adaptateur de microphone/protège-épaule MA-100 ou MA-200 en option).

5.Refermez le menu.

Ré glage du niveau d’enregistrement pour les enregistrements sur deux canaux

Dans les conditions d’enregistrement normal, le camescope détermine le niveau d’enregistrement audio automatiquement, tant que le sélecteur REC LEVEL est positionné sur A.

Vous pouvez aussi régler le niveau d’enregistrement manuellement :

1.Faites glisser le sélecteur REC LEVEL des commandes AUDIO 1/MIC sur M.

MANU apparaît sur l’écran LCD audio.

2.Tournez le bouton LEVEL pour ajuster le niveau d’enregistrement et le bouton BALANCE pour ajuster la balance entre les deux entrées.

Vérifiez le niveau de chaque canal sur l’écran LCD audio.

Si le niveau dépasse le point 12 , il est essentiel de contrôler le son avec un casque d’écoute.

Réglez le volume du casque d’écoute en tournant le bouton PHONES LEVEL.

MANU

L

-dB 50 40 30 20 12 6 2 0

R

52

Page 52
Image 52
Canon XL1S instruction manual Ré glage de l’entré e audio Enregistrements sur deux canaux, Utilisation des prises RCA Audio

XL1S specifications

The Canon XL1S is a notable digital camcorder that made waves in the early 2000s, particularly among videographers and filmmakers seeking a compact yet professional-grade video solution. Introduced in 2002, the XL1S is an evolution of the original XL1, boasting enhanced capabilities and features that catered to a more discerning audience.

One of the defining characteristics of the XL1S is its modular design, which allows users to swap out lenses, a feature that distinguishes it from many other camcorders of its time. The camcorder comes equipped with a detachable 16x zoom lens, offering versatility for various shooting scenarios. Additionally, the XL1S is compatible with Canon’s line of EF lenses, enabling filmmakers to explore a wide range of creative options.

The XL1S records video in 16:9 and 4:3 aspect ratios, providing flexibility for filmmakers to choose the desired framing for their projects. It captures footage in standard DV format, benefiting from 24-bit audio recording, ensuring high-quality audio to accompany the video. The camera also features a 3CCD system, which uses three separate charge-coupled devices for capturing red, green, and blue components. This technology results in better color accuracy and improved low-light performance, making the XL1S a reliable choice for various shooting conditions.

An impressive aspect of the XL1S is its user-friendly interface, featuring a customizable menu that allows users to tailor settings to their preferences. The camcorder also includes features like a built-in microphone, headphone jack, and timecode functionality, further enhancing its production capabilities.

Moreover, the XL1S supports an array of professional video outputs, including FireWire, making it easier for videographers to transfer footage to editing systems. The camcorder’s construction is robust, designed to withstand the rigors of on-location shooting, which makes it an appealing choice for independent filmmakers and documentarians.

In summary, the Canon XL1S is celebrated for its professional-grade features, modular design, and outstanding video quality, making it a beloved tool among filmmakers. Its combination of advanced technology and user-friendly controls marked it as a significant entry in the world of digital videography, allowing creators to push the boundaries of storytelling through dynamic visuals.