Manuals
/
Celestron
/
Lawn and Garden
/
Telescope
Celestron
CGE800, CGE925, CGE1100, CGE1400
manual
Appendix C Maps of Time Zones
Models:
CGE1400
CGE800
CGE1100
CGE925
1
66
75
75
Download
75 pages
56.52 Kb
63
64
65
66
67
68
69
70
Specification
Install
Periodic Error Correction PEC
Warranty
Maintenance
Setting up the Tripod
Additional RS232 Commands
Alignment Procedures
Adjusting the Mount
Powering the Telescope
Page 66
Image 66
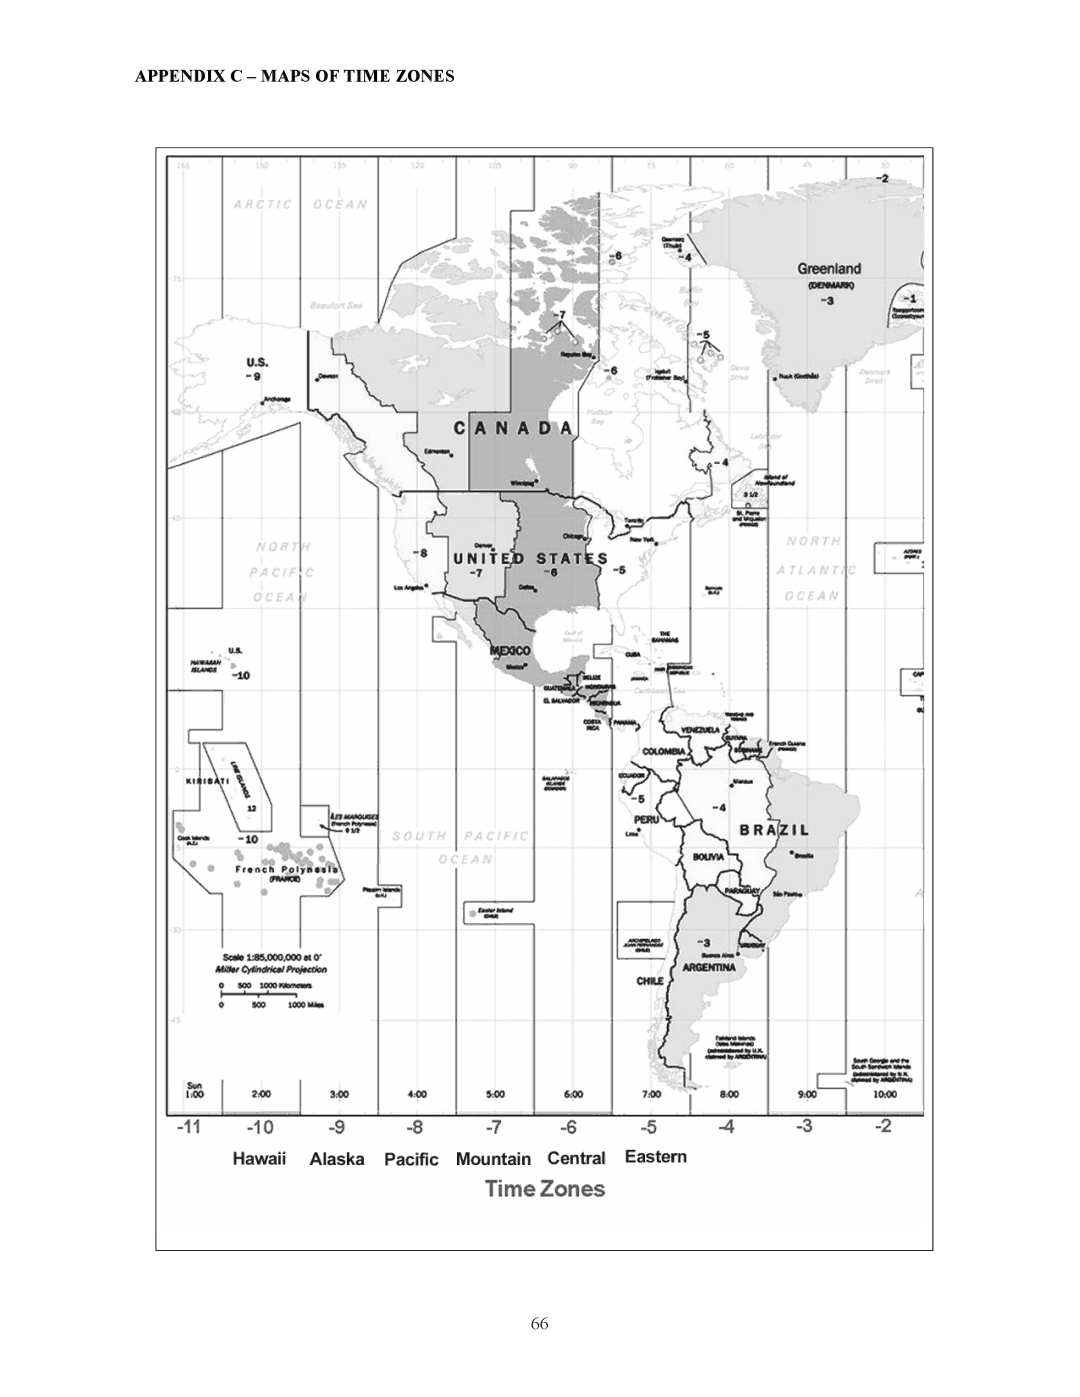
APPENDIX C – MAPS OF TIME ZONES
66
Page 65
Page 67
Page 66
Image 66
Page 65
Page 67
Contents
CGE800 CGE925 CGE1100 CGE1400
User Defined Objects
Telescope Maintenance
Some of the many standard features of the CGE include
CGE 1400 Shown
12v Output Jack
Counterweight
Setting up the Tripod
Power Supply
Diagonal
Attaching the Center Leg Brace
Attaching the Electronics Pier
Counterweight Locking Screw Safety Screw Washer
Installing the Counterweight Bar
Installing the Counterweight
Attaching the Equatorial Mount
Attaching the Optical Tube to the Mount
Attaching the Visual Back
Dovetail Slide Bar Dovetail Locking Knobs Mounting Platform
Installing the Star Diagonal
Installing the Eyepiece
Installing the Finderscope
Adjusting the Mount
Moving the Telescope Manually
Balancing The Mount in R.A
Balancing The Mount in DEC
Powering the Telescope
Attaching the Motor Cables
Transporting the CGE
Page
CGE Hand Control
Double Stars
Named Stars
Named Objects
Variable Stars
Alignment Procedures
Startup Procedure
Auto Two-Star Align
Auto One-Star Align
Quick-Align
Last Alignment
CGE Re-Alignment
Slewing to an Object
Object Catalog
Selecting an Object
Finding Planets
Direction Buttons
Tour Mode
Constellation Tour
Rate Button
Setup Procedures
Identify
Scope Setup Features
Precise GoTo
Observing Tip Helpful Hint
Utility Features
Helpful Hint
Page
CGE Ready
Image Orientation
Focusing
Calculating Magnification
Determining Field of View
General Observing Hints
Celestial Coordinate System
Motion of the Stars
Latitude Scales
Pointing at Polaris
Finding the North Celestial Pole
Declination Drift Method of Polar Alignment
Observing the Planets
Observing the Moon
Lunar Observing Hints
Planetary Observing Hints
Observing Deep Sky Objects
Observing the Sun
Solar Observing Hints
Seeing Conditions
Seeing
Short Exposure Prime Focus Photography
Eyepiece Projection
Full
Long Exposure Prime Focus Photography
Planet ISO Moon Mercury Venus Mars Jupiter Saturn
Periodic Error Correction PEC
Using Periodic Error Correction
Reducing Vibration
Terrestrial Photography
Metering
CCD Imaging
Fastar Compatible Optical System
Fastar F/2 Imaging
With Reducer/Corrector
Medium size to small galaxies
Planetary or Lunar
Auto Guiding
Care and Cleaning of the Optics
Collimation
Collimated telescope Should appear Symmetrical with
Page
At f/10 and 163 power with the CGE
Page
Technical Specifications
Idle Current
Appendix a Longitudes Latitudes
Georgia
Minnesota
Rhode Island
Canada
Appendix B RS-232 Connection
Communication Protocol
Additional RS232 Commands
Reset The Position Of Azm Or Alt
Appendix C Maps of Time Zones
Page
Page
Page
Page
Page
Page
Page
Celestron TWO Year Warranty
Top
Page
Image
Contents