Celestron CGE1400, CGE925, CGE1100, CGE800 manual Installing the Finderscope

Models: CGE1400 CGE800 CGE1100 CGE925

1 75
Download 75 pages 56.52 Kb
Page 11
Image 11
Installing the Finderscope

focal length (i.e., the smaller the number) the higher the magnification. Generally, you will use low-to-moderate power when viewing. For more information on how to determine power, see the section on “Calculating Magnification.”

Installing the Finderscope

The CGE telescopes come with a 6x30 or 9x50 finderscope used to help you locate and center objects in the main field of your telescope. To accomplish this, the finder has a built-in cross-hair reticle that shows the optical center of the finderscope.

Start by removing the finder and hardware from the plastic wrapper. Included are the following:

Finderscope

Finder Bracket

Rubber O-ring

Three Nylon Tipped Thumbscrews (10-24x1/2")

Two Phillips Head Screws (8-32x1/2" or 10-24x1/2")

To install the finderscope:

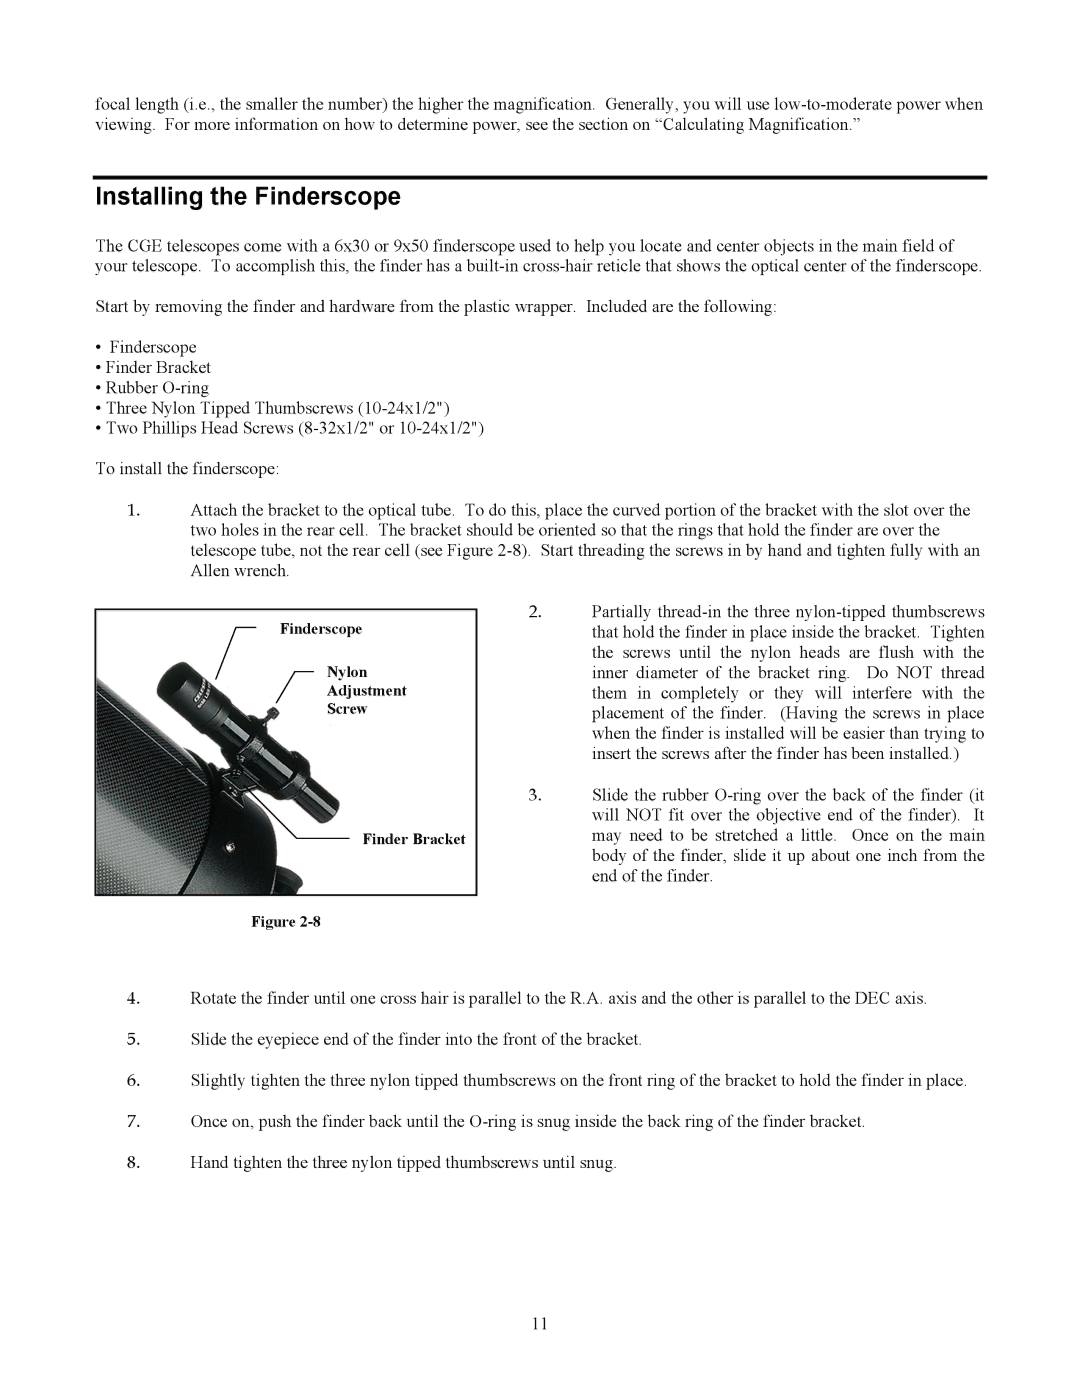
1.Attach the bracket to the optical tube. To do this, place the curved portion of the bracket with the slot over the two holes in the rear cell. The bracket should be oriented so that the rings that hold the finder are over the telescope tube, not the rear cell (see Figure 2-8). Start threading the screws in by hand and tighten fully with an Allen wrench.

Finderscope

Nylon

Adjustment

Screw

Finder Bracket

2.Partially thread-in the three nylon-tipped thumbscrews that hold the finder in place inside the bracket. Tighten the screws until the nylon heads are flush with the inner diameter of the bracket ring. Do NOT thread them in completely or they will interfere with the placement of the finder. (Having the screws in place when the finder is installed will be easier than trying to insert the screws after the finder has been installed.)

3.Slide the rubber O-ring over the back of the finder (it will NOT fit over the objective end of the finder). It may need to be stretched a little. Once on the main body of the finder, slide it up about one inch from the end of the finder.

Figure 2-8

4.Rotate the finder until one cross hair is parallel to the R.A. axis and the other is parallel to the DEC axis.

5.Slide the eyepiece end of the finder into the front of the bracket.

6.Slightly tighten the three nylon tipped thumbscrews on the front ring of the bracket to hold the finder in place.

7.Once on, push the finder back until the O-ring is snug inside the back ring of the finder bracket.

8.Hand tighten the three nylon tipped thumbscrews until snug.

11

Page 11
Image 11
Celestron CGE1400, CGE925, CGE1100, CGE800 manual Installing the Finderscope