Installation Instructions | CM2C40 |
Bottom Cover Installation
After the CM2C40 has been properly configured for the display and the display installed, the bottom cover height must be adjusted to ensure proper fit into ceiling.
WARNING: IMPROPER INSTALLATION CAN LEAD TO SEVERE PERSONAL INJURY OR DAMAGE TO EQUIPMENT! Weight of bottom cover MUST NOT exceed 25lbs (11.34kg).
To install the bottom cover :
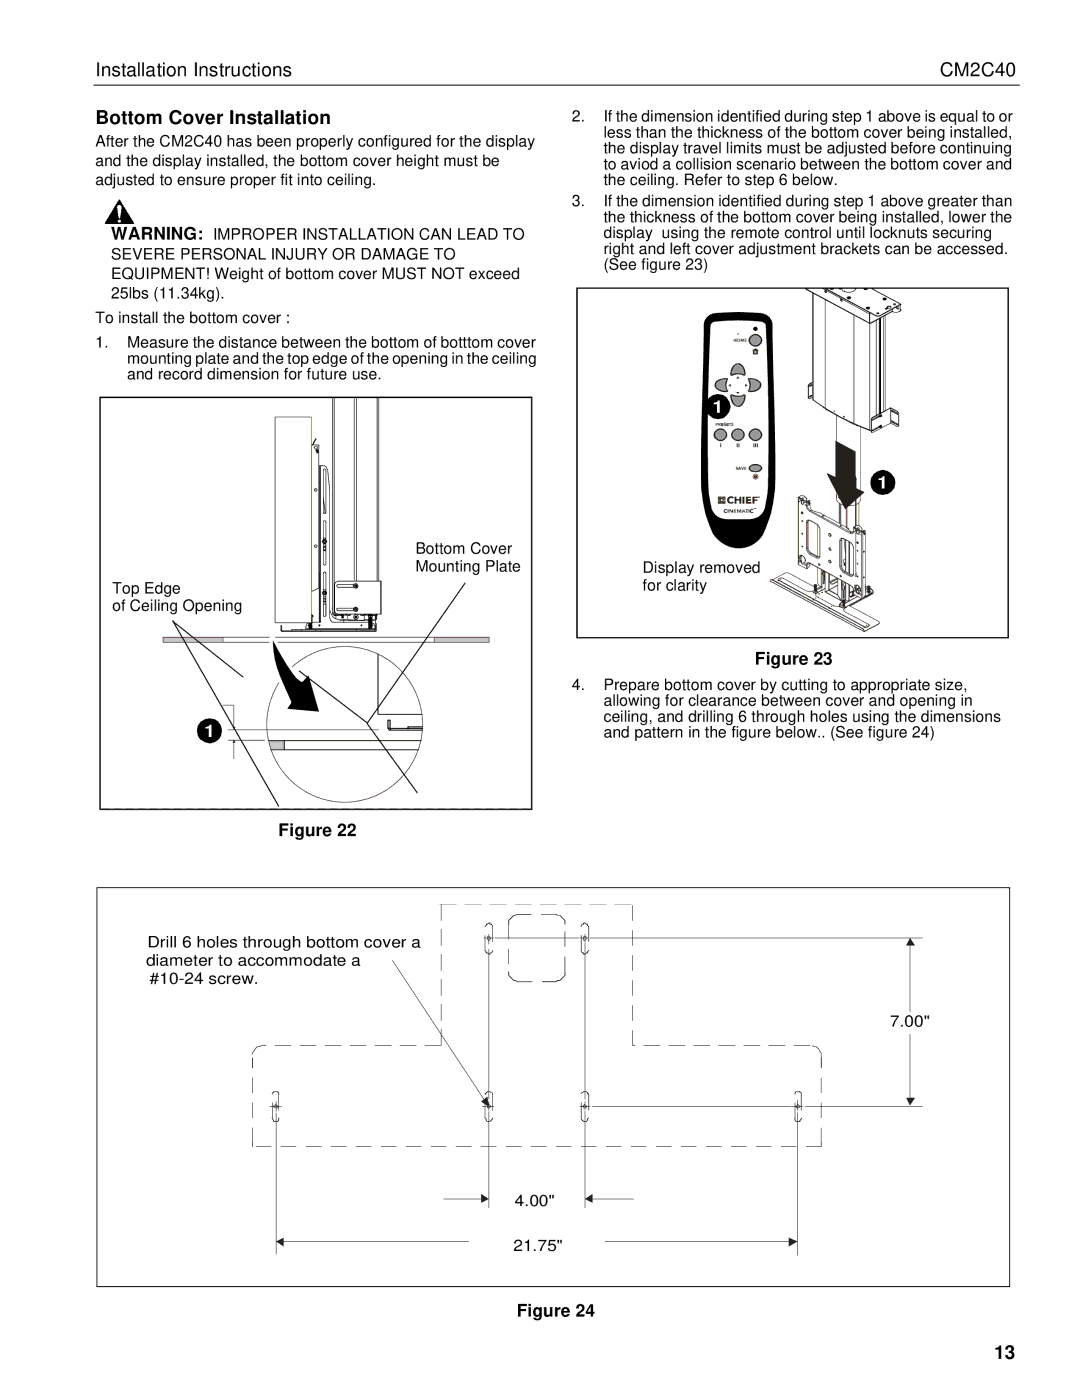
1.Measure the distance between the bottom of botttom cover mounting plate and the top edge of the opening in the ceiling and record dimension for future use.
Bottom Cover |
Mounting Plate |
Top Edge |
of Ceiling Opening |
1 |
Figure 22
2.If the dimension identified during step 1 above is equal to or less than the thickness of the bottom cover being installed, the display travel limits must be adjusted before continuing to aviod a collision scenario between the bottom cover and the ceiling. Refer to step 6 below.
3.If the dimension identified during step 1 above greater than the thickness of the bottom cover being installed, lower the display using the remote control until locknuts securing right and left cover adjustment brackets can be accessed. (See figure 23)
1 |
1 |
Display removed |
for clarity |
Figure 23
4.Prepare bottom cover by cutting to appropriate size, allowing for clearance between cover and opening in ceiling, and drilling 6 through holes using the dimensions and pattern in the figure below.. (See figure 24)
Drill 6 holes through bottom cover a diameter to accommodate a
7.00"
4.00"
21.75"
Figure 24
13