Chapter 2 Camera Installation
IP Camera Installation
IP Camera Installation
Install the 6020 IP camera using one of the following procedures:
•Mounting the IP Camera Directly to a Surface, page
•Mounting the IP Camera Flush with a Surface, page
•Mounting the IP camera with a Vandal Resistant Enclosure, page
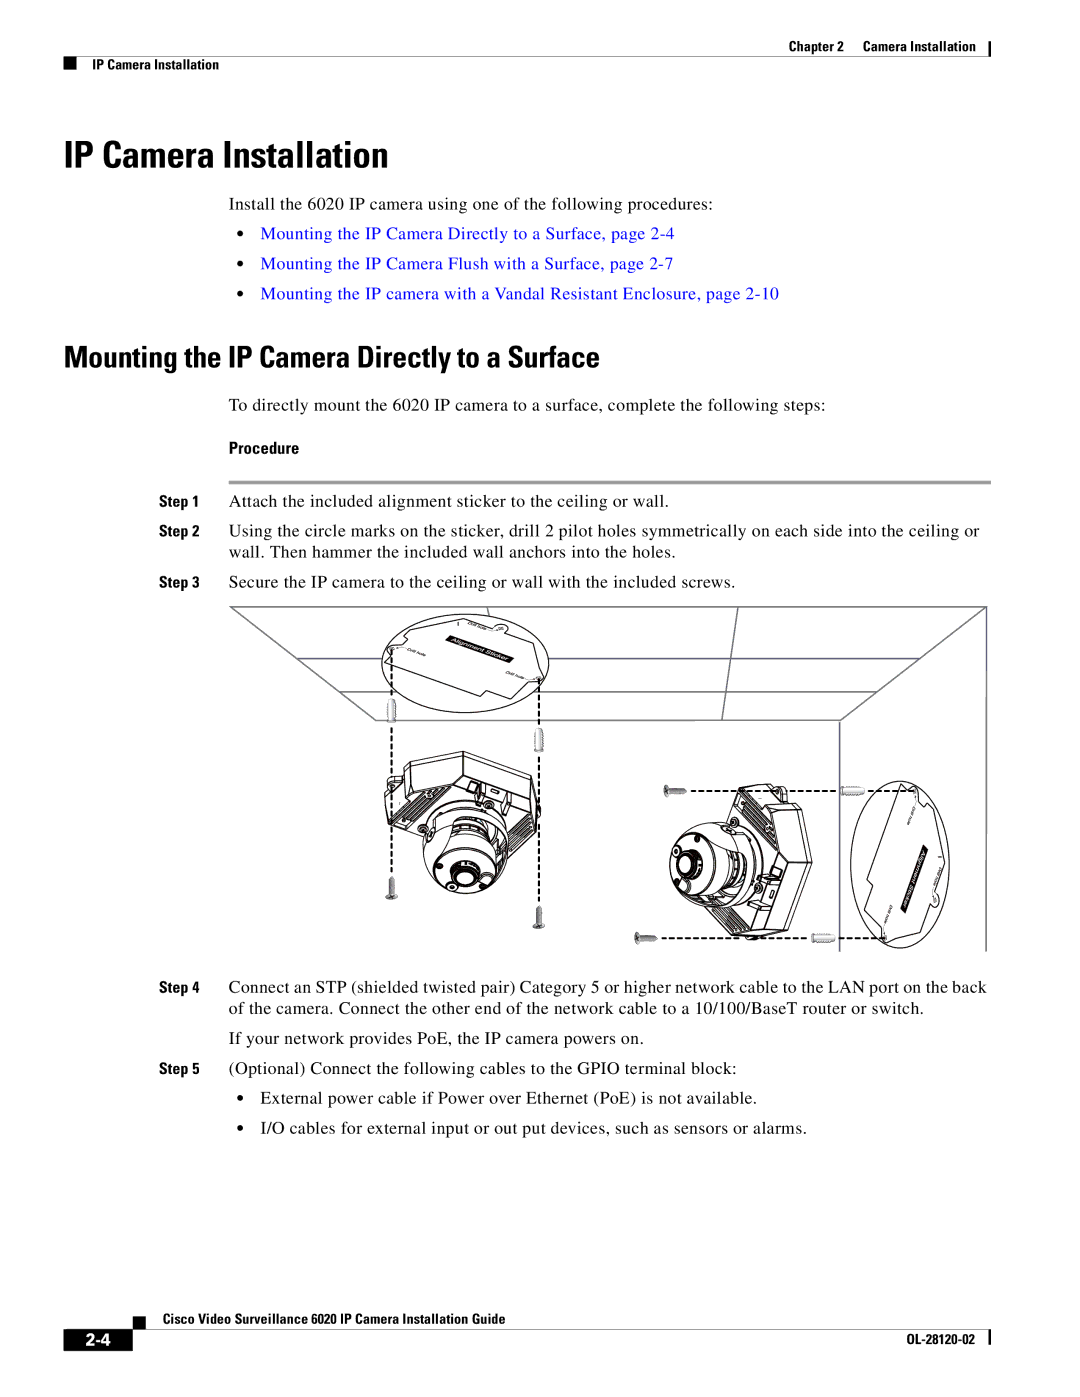
Mounting the IP Camera Directly to a Surface
To directly mount the 6020 IP camera to a surface, complete the following steps:
Procedure
Step 1 Attach the included alignment sticker to the ceiling or wall.
Step 2 Using the circle marks on the sticker, drill 2 pilot holes symmetrically on each side into the ceiling or wall. Then hammer the included wall anchors into the holes.
Step 3 Secure the IP camera to the ceiling or wall with the included screws.
Step 4 Connect an STP (shielded twisted pair) Category 5 or higher network cable to the LAN port on the back of the camera. Connect the other end of the network cable to a 10/100/BaseT router or switch.
If your network provides PoE, the IP camera powers on.
Step 5 (Optional) Connect the following cables to the GPIO terminal block:
•External power cable if Power over Ethernet (PoE) is not available.
•I/O cables for external input or out put devices, such as sensors or alarms.
Cisco Video Surveillance 6020 IP Camera Installation Guide
|
| |
|