Chapter 2 Installation
Optional Installation Steps
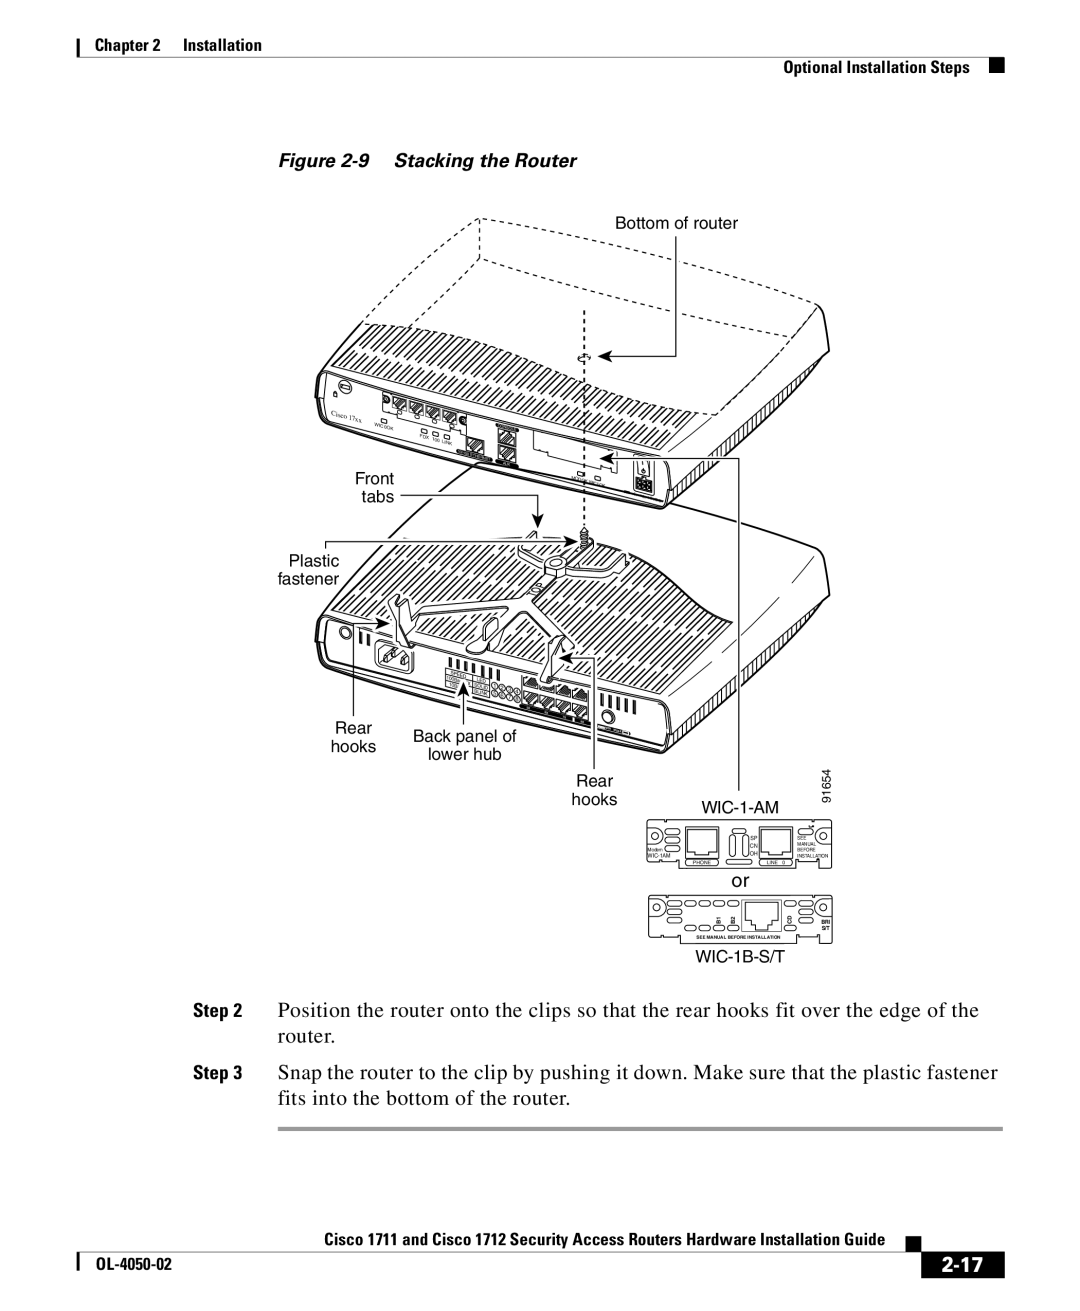
Figure 2-9 Stacking the Router
Bottom of router
WIC |
|
|
|
|
|
|
|
|
|
|
|
|
|
4ESW ACT |
|
| ACT 3x | LNK |
|
|
|
|
|
|
|
|
|
Cisco 1 | 4x | LNK |
|
|
|
|
|
|
|
|
| ||
7xx |
|
|
|
| ACT 2x | LNK ACT |
|
|
|
|
| ||
WIC0OK |
|
|
|
|
|
| 1x | LNK | CONSOLE |
|
| ||
|
|
|
|
|
|
|
|
|
| ||||
|
|
|
| FDX | 100 | LINK |
|
|
|
| |||
|
|
|
|
|
|
|
|
|
| ||||
|
|
|
|
|
|
|
|
|
|
|
| ||
|
|
|
|
|
|
|
|
|
| 10/100 | ETHERNET |
|
|
|
|
|
|
|
|
|
|
|
|
|
|
| |
Front |
|
|
|
|
|
|
|
|
|
| AUX |
|
|
|
|
|
|
|
|
|
|
|
| M | WIC1OK |
| |
tabs |
|
|
|
|
|
|
|
|
|
| ODOK |
|
|
|
|
|
|
|
|
|
|
|
|
| +5, | C | |
|
|
|
|
|
|
|
|
|
|
|
|
| +12, - |
|
|
|
|
|
|
|
|
|
|
|
|
| 12 VD |
Plastic fastener
| SPEED |
|
|
|
|
|
|
|
| 100BaseTX | LED |
| 2 |
|
|
|
|
| 10BaseT | SOLID | 1 | 3 | 4 |
|
| |
|
| BLINK | 5 | 6 |
|
| ||
|
| 7 | 8 |
|
| |||
|
|
|
|
|
|
| ||
|
|
|
|
|
|
| 5X |
|
|
|
|
|
|
|
| 6X |
|
Rear |
|
|
|
|
|
| 7X |
|
|
|
|
|
|
| 8X |
| |
Back panel of | MDI | |||||||
hooks |
|
| ||||||
lower hub |
|
|
|
| ||||
|
|
|
|
| ||||
Rear
hooks
Modem
| 91654 | ||
|
| ||
| SP |
| SEE |
| CN |
| MANUAL |
| OH |
| BEFORE |
|
| INSTALLATION | |
PHONE | LINE | 0 |
|
| or |
|
|
B1 | B2 | CD | BRI |
|
|
| S/T |
SEE MANUAL BEFORE INSTALLATION |
|
| |
Step 2 Position the router onto the clips so that the rear hooks fit over the edge of the router.
Step 3 Snap the router to the clip by pushing it down. Make sure that the plastic fastener fits into the bottom of the router.
|
| Cisco 1711 and Cisco 1712 Security Access Routers Hardware Installation Guide |
|
|
|
|
| ||
|
|
| ||
|
|
|