Manuals
/
Cisco Systems
/
Computer Equipment
/
Network Card
Cisco Systems
Engine 611
manual
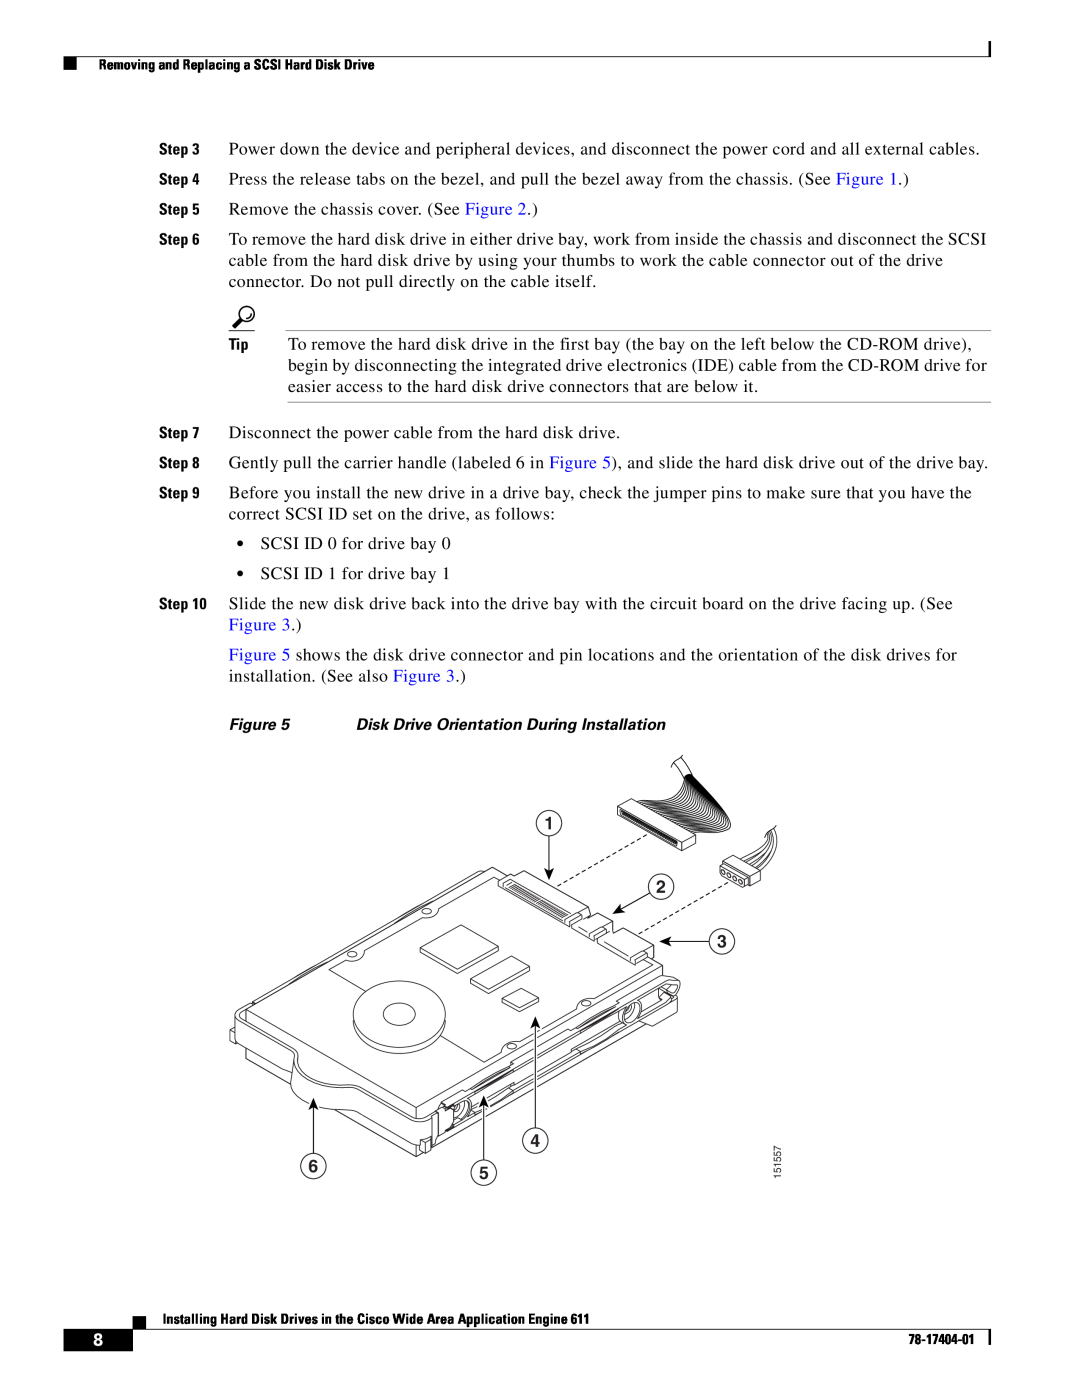
Remove the chassis cover. See Figure
Models:
Engine 611
1
8
14
14
Download
14 pages
12.89 Kb
5
6
7
8
9
10
11
12
Submitting a Service Request
Page 8
Image 8
Page 7
Page 9
Page 8
Image 8
Page 7
Page 9
Contents
Installing Hard Disk Drives in the Cisco Wide Area Application Engine
Contents
Safety Overview
Safety Overview, page Introduction, page
Rack Installation Safety Guidelines
Protecting Against Electrostatic Discharge
Warning IMPORTANT SAFETY INSTRUCTIONS
SAVE THESE INSTRUCTIONS
Related Documentation
Introduction
Required Tools
Removing the Bezel and Cover
Captive screw
Assigning SCSI IDs
Removing and Replacing a SCSI Hard Disk Drive
Step 5 Remove the chassis cover. See Figure
Replacing the Cover and Bezel and Completing the Installation
Obtaining Documentation
Cisco Product Security Overview
Reporting Security Problems in Cisco Products
Obtaining Technical Assistance
Cisco Technical Support & Documentation Website
Emergencies - security-alert@cisco.com
Submitting a Service Request
http//tools.cisco.com/RPF/register/register.do
Definitions of Service Request Severity
2006 Cisco Systems, Inc. All rights reserved
Top
Page
Image
Contents