| Mounting the Cisco WAP551 and WAP561 | |
3 | ||
|
You can place your access point on a desktop, or mount it on a wall or ceiling.
Placement Tips
•Ambient
•Air
•Mechanical
Wall and Ceiling Mounting
The Cisco WAP551 and WAP561 can be wall or
The mounting bracket has some flexibility so that you can reuse existing holes drilled for a Cisco WAP121 or WAP321 device. The installer can remove the Cisco WAP121 or WAP321 and mount the Cisco WAP5xx.
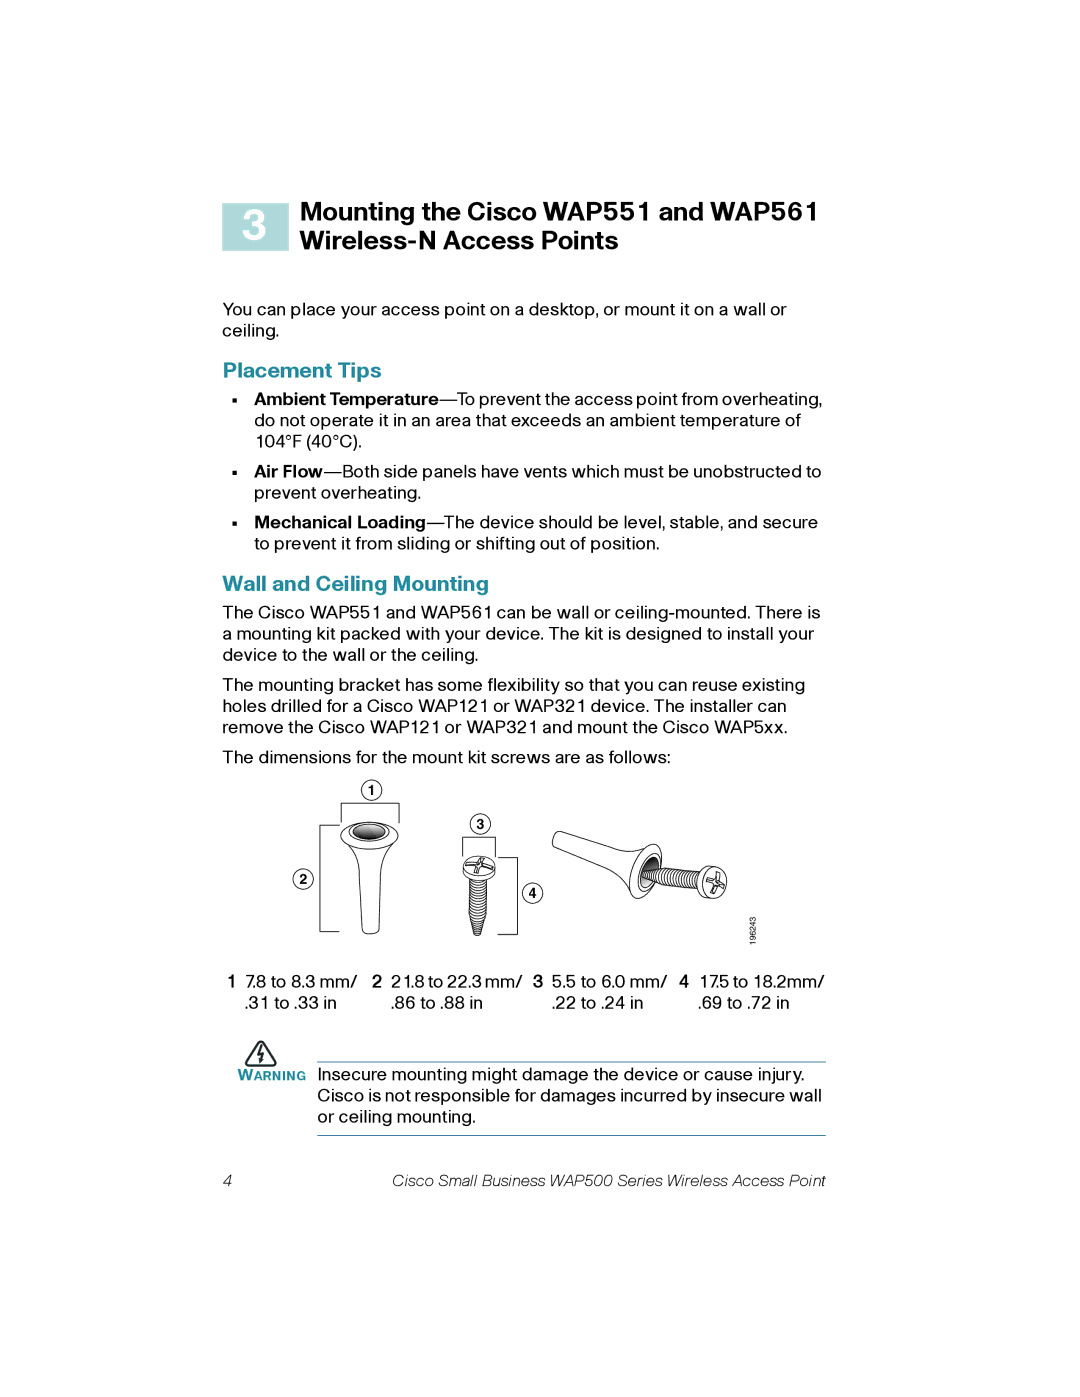
The dimensions for the mount kit screws are as follows:
2
1
3
4
196243
1 7.8 to 8.3 mm/ | 2 21.8 to 22.3 mm/ | 3 5.5 to 6.0 mm/ | 4 17.5 to 18.2mm/ |
.31 to .33 in | .86 to .88 in | .22 to .24 in | .69 to .72 in |
WARNING Insecure mounting might damage the device or cause injury. Cisco is not responsible for damages incurred by insecure wall or ceiling mounting.
4 | Cisco Small Business WAP500 Series Wireless Access Point |