STEP 7 Follow the Setup Wizard instructions to finish the WAP device installation. We strongly recommend you use the Setup Wizard for the first installation.The Setup Wizard turns on the
Congratulations, you can now start using your wireless access point.
7 Suggested Next Steps
In case of an error while installing, try the following troubleshooting procedures:
Troubleshooting
If you cannot display the configuration utility, you can test the ability of the computer to communicate with the device by using ping. To use ping on a computer running Windows:
STEP 1 Verify that the Cisco WAP551 or WAP561 is powered on and the lights indicate the appropriate links.
STEP 2 Locate the device’s IP address. While there are different ways to locate your device’s IP address, this procedure uses Cisco FindIT.
a.If you have previously downloaded Cisco FindIT, open Internet Explorer and launch Cisco FindIT. For more information on downloading Cisco FindIT, see www.cisco.com/go/findit.
b.In the Cisco FindIT display, place your mouse over the device’s name. The device IP address is displayed along with other device information.
STEP 3 Open a command window by using Start > Run and enter cmd.
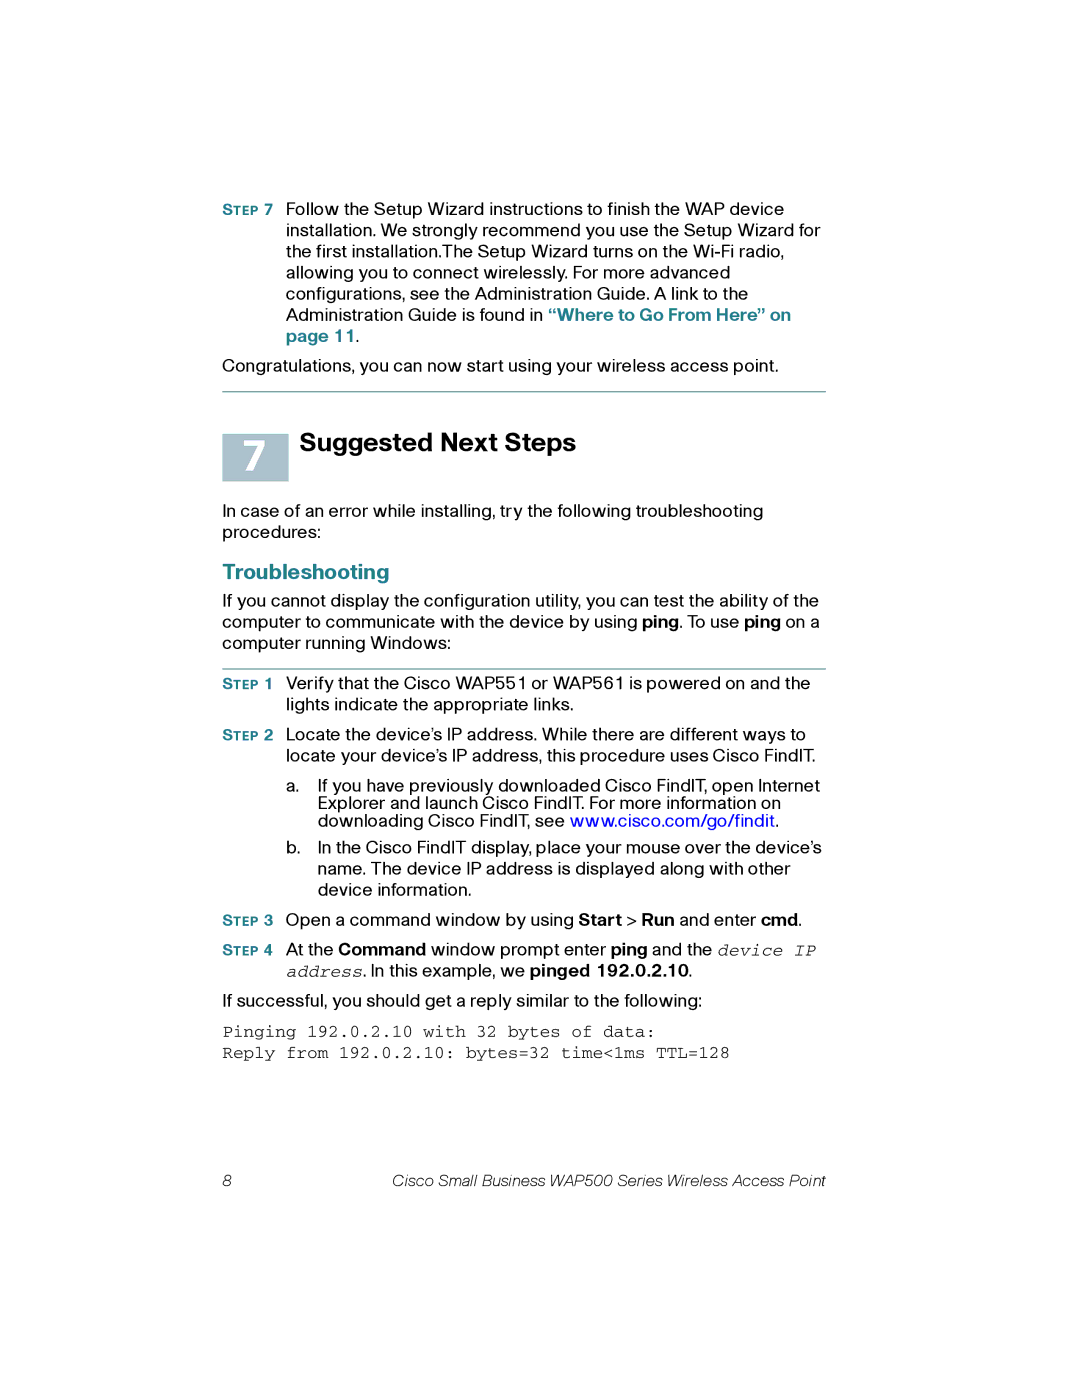
STEP 4 At the Command window prompt enter ping and the device IP address. In this example, we pinged 192.0.2.10.
If successful, you should get a reply similar to the following:
Pinging 192.0.2.10 with 32 bytes of data:
Reply from 192.0.2.10: bytes=32 time<1ms TTL=128
8 | Cisco Small Business WAP500 Series Wireless Access Point |