Part Two: Mount, Align, and Record
Mounting, Aligning, and Recording great action video out of the box is an important part of the VholdR experience. The following explains how to record video from your point of view successfully on the first try.
Mount
1Your standing position and riding positions are different. When going down hill your head is lower than you think and when traveling uphill your camera can be filming the sky. Therefore, first get into a true riding position.
2Select your preferred mounting location on your helmet.
Note: The top of the helmet provides the most centered view.
3Find a flat or slightly curved surface. Clean off the surface with alcohol or a damp cloth and let dry. Remove the cover on the adhesive pad and then adhere the base to your surface.
Note: Press firmly and for best results let sit overnight to cure.
attach and adjust camera according to your riding position (it’s no fun watching videos of the ground)
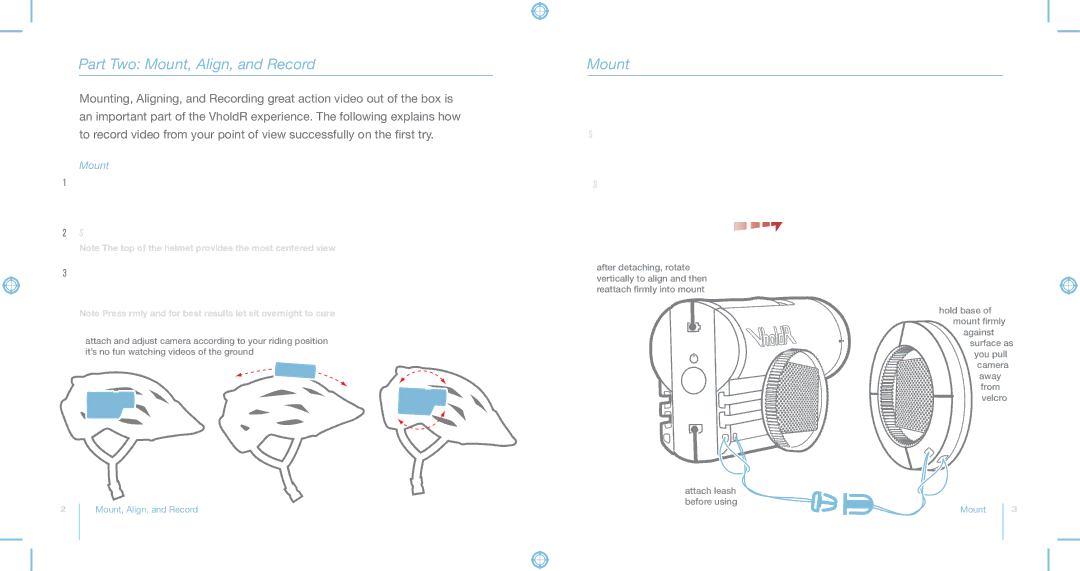
Mount
4Loop the leash through either of the two holes on the back of VholdR before attaching the VholdR to the mount.
5Slide your camera onto the rails of the mount with the two notches on the mount facing towards the back of the camera.
6To adjust the vertical position of your mount you can detach the rails from the base of the mount. Simply hold down the base and pull the VholdR away from the mount until the Velcro detaches. For best results and longevity it is best to not pull straight but to apply pressure out from the rear half.
after detaching, rotate vertically to align and then reattach firmly into mount
hold base of mount firmly
against surface as
you pull
camera
away
from velcro
12
| attach leash |
|
Mount, Align, and Record | before using | Mount |
|
13