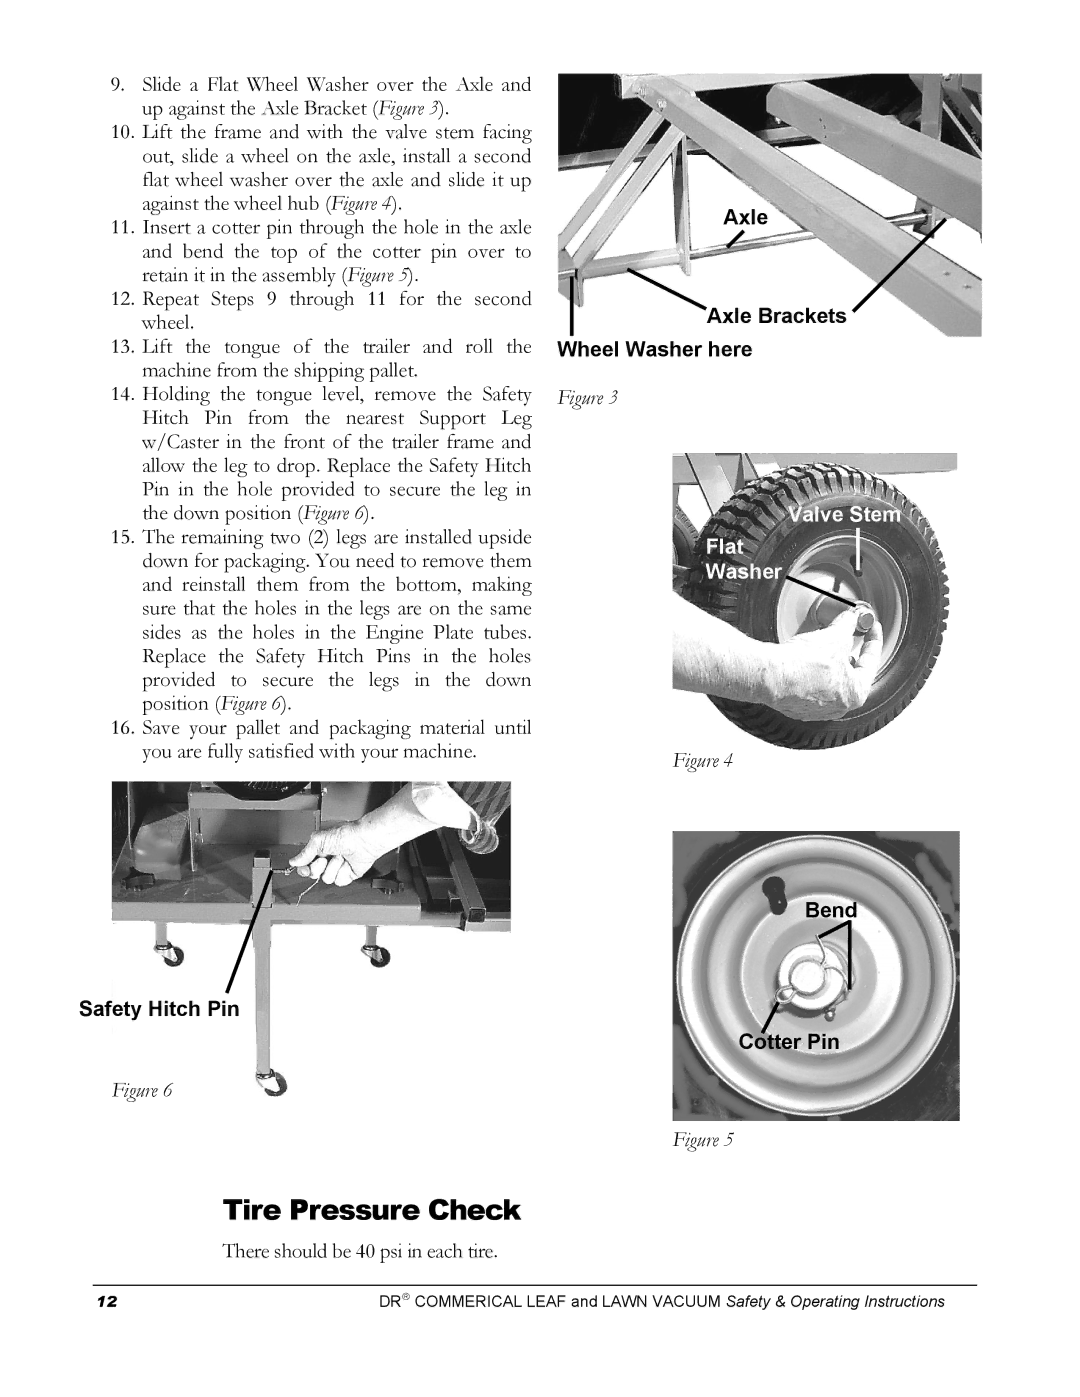
9.Slide a Flat Wheel Washer over the Axle and up against the Axle Bracket (Figure 3).
10.Lift the frame and with the valve stem facing out, slide a wheel on the axle, install a second flat wheel washer over the axle and slide it up against the wheel hub (Figure 4).
11.Insert a cotter pin through the hole in the axle and bend the top of the cotter pin over to retain it in the assembly (Figure 5).
12.Repeat Steps 9 through 11 for the second wheel.
13.Lift the tongue of the trailer and roll the machine from the shipping pallet.
14.Holding the tongue level, remove the Safety Hitch Pin from the nearest Support Leg w/Caster in the front of the trailer frame and allow the leg to drop. Replace the Safety Hitch Pin in the hole provided to secure the leg in the down position (Figure 6).
15.The remaining two (2) legs are installed upside down for packaging. You need to remove them and reinstall them from the bottom, making sure that the holes in the legs are on the same sides as the holes in the Engine Plate tubes. Replace the Safety Hitch Pins in the holes provided to secure the legs in the down position (Figure 6).
16.Save your pallet and packaging material until you are fully satisfied with your machine.
Safety Hitch Pin
Figure 6
Tire Pressure Check
There should be 40 psi in each tire.
Axle
Axle Brackets
Wheel Washer here
Figure 3
Valve Stem
Flat
Washer
Figure 4
Bend
Cotter Pin
Figure 5
12 | DR COMMERICAL LEAF and LAWN VACUUM Safety & Operating Instructions |
