Removing and Replacing the Blower Hoses
![]() WARNING! Before performing any maintenance procedure, stop the engine and disconnect the spark plug wire.
WARNING! Before performing any maintenance procedure, stop the engine and disconnect the spark plug wire.
| Hose Clamp | |
Collector Box Hose: |
| |
Tools Needed: | Connector | |
Diagonal or wire cutter | ||
Fitting | ||
Screwdriver or nut driver | ||
|
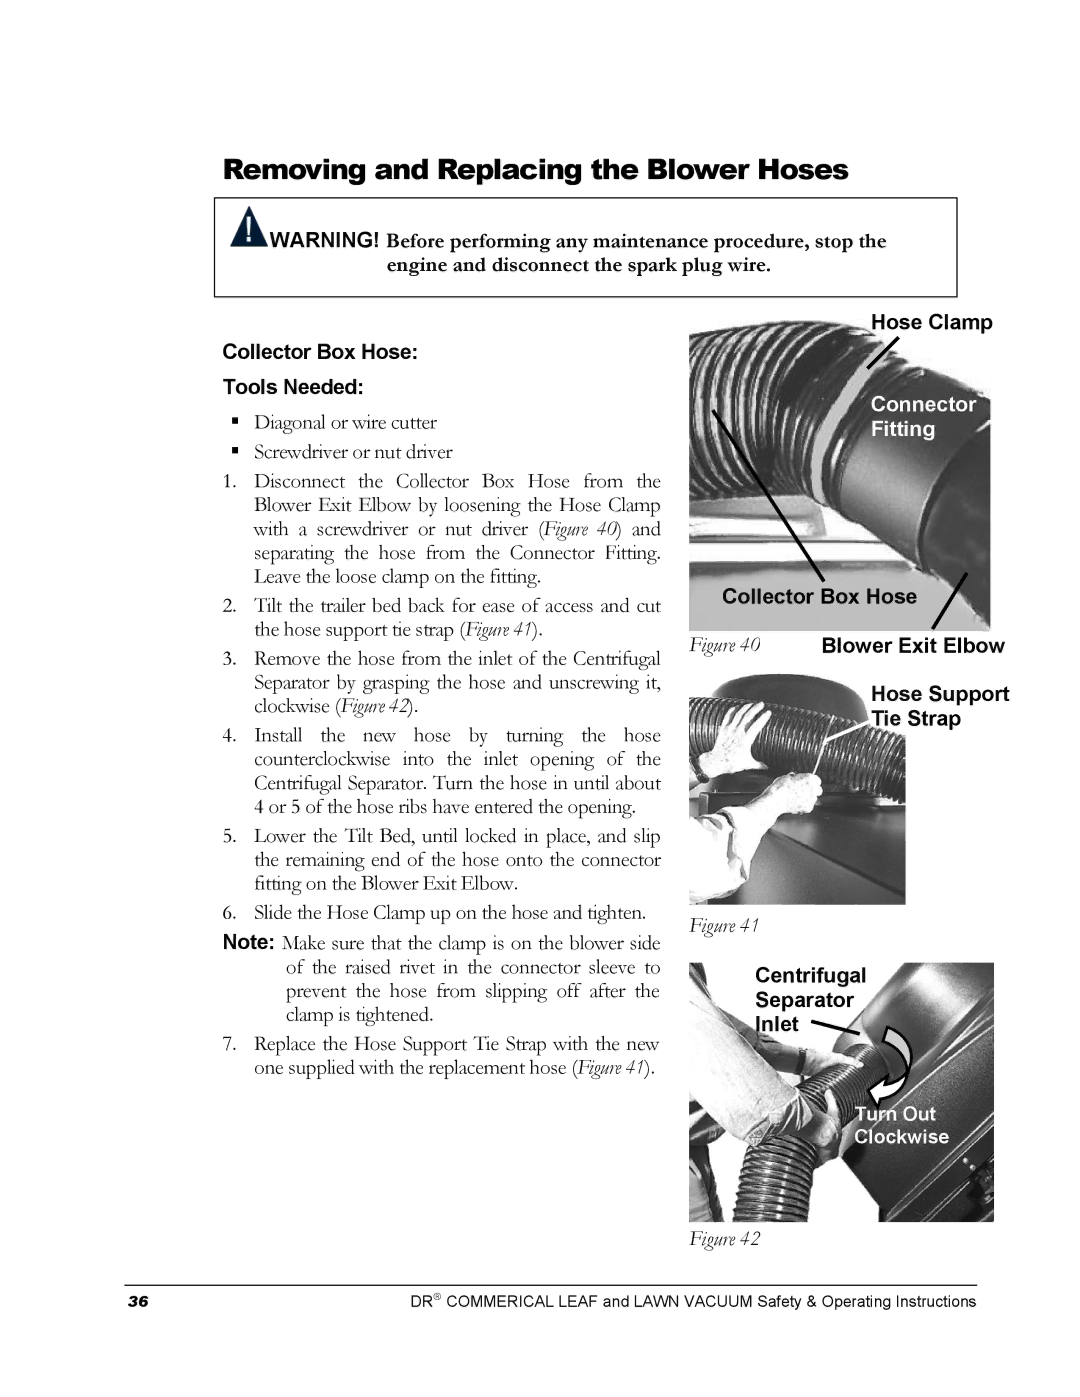
1.Disconnect the Collector Box Hose from the Blower Exit Elbow by loosening the Hose Clamp with a screwdriver or nut driver (Figure 40) and separating the hose from the Connector Fitting. Leave the loose clamp on the fitting.
2.Tilt the trailer bed back for ease of access and cut the hose support tie strap (Figure 41).
3.Remove the hose from the inlet of the Centrifugal Separator by grasping the hose and unscrewing it, clockwise (Figure 42).
4.Install the new hose by turning the hose counterclockwise into the inlet opening of the Centrifugal Separator. Turn the hose in until about 4 or 5 of the hose ribs have entered the opening.
5.Lower the Tilt Bed, until locked in place, and slip the remaining end of the hose onto the connector fitting on the Blower Exit Elbow.
6.Slide the Hose Clamp up on the hose and tighten.
Note: Make sure that the clamp is on the blower side of the raised rivet in the connector sleeve to prevent the hose from slipping off after the clamp is tightened.
7.Replace the Hose Support Tie Strap with the new one supplied with the replacement hose (Figure 41).
Collector Box Hose
Figure 40 Blower Exit Elbow
Hose Support
Tie Strap
Figure 41
Centrifugal
Separator
Inlet
Turn Out
Clockwise
Figure 42
36 | DR COMMERICAL LEAF and LAWN VACUUM Safety & Operating Instructions |