To Adjust:
•To adjust, loosen the auxiliary handle assembly by turning the handle counterclockwise.
•Rotate auxiliary handle assembly to desired operating position.
•Securely tighten by turning the auxiliary handle clockwise.
USING DEPTH GAGE ROD
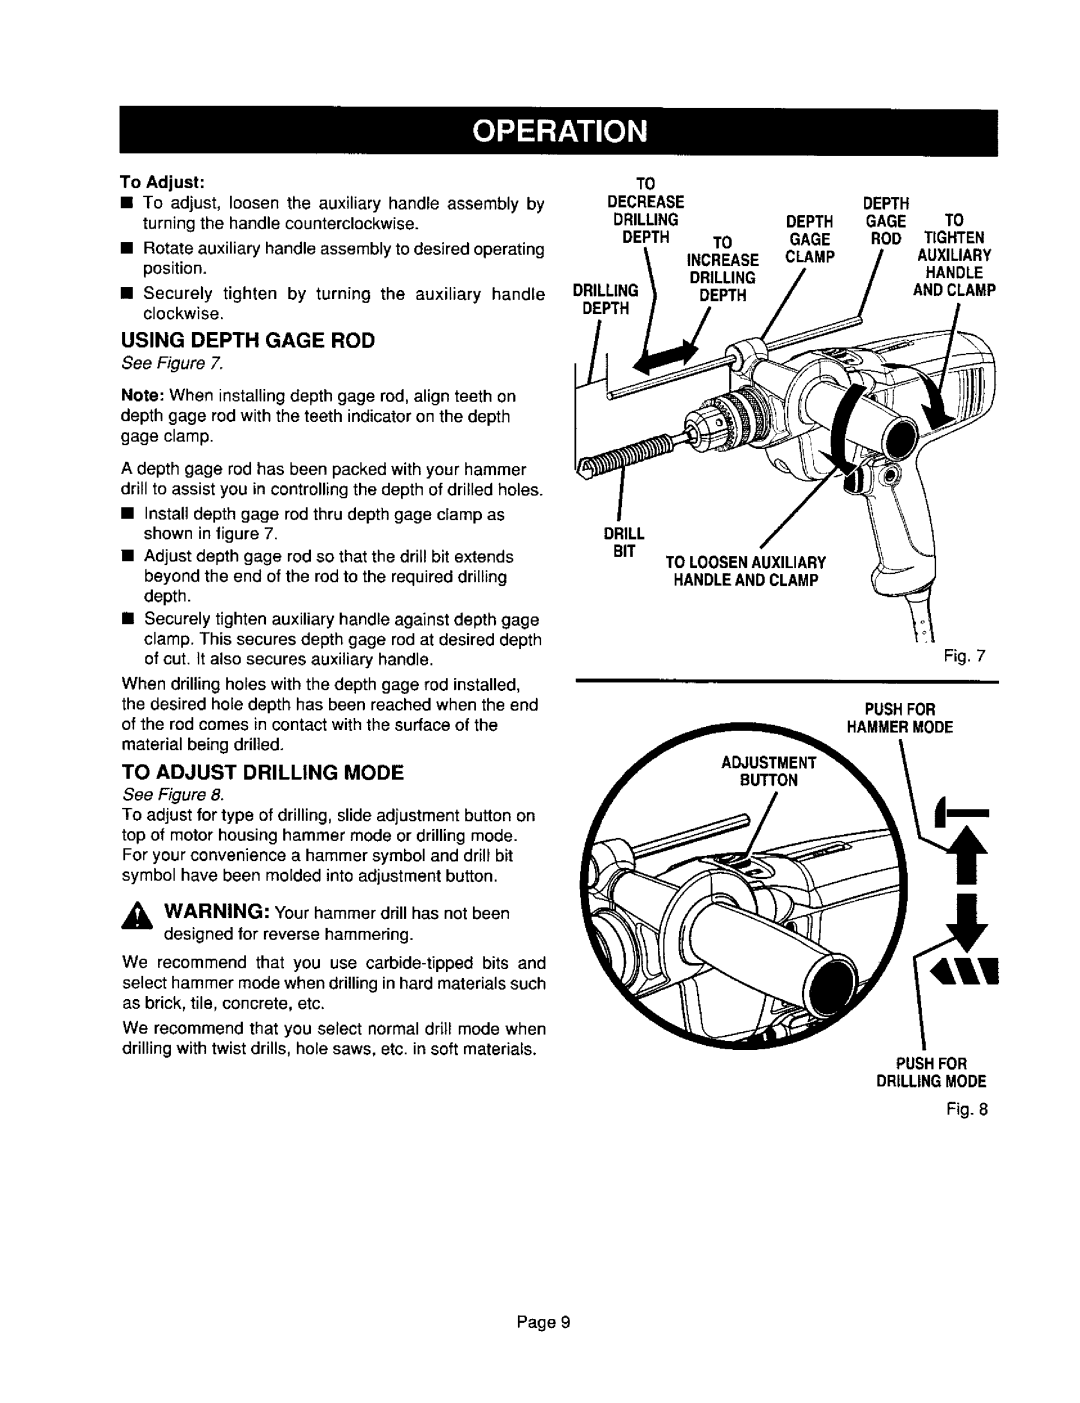
See Figure 7.
Note: When installing depth gage rod, align teeth on depth gage rod with the teeth indicator on the depth gage clamp.
A depth gage rod has been packed with your hammer drill to assist you in controlling the depth of drilled holes.
•Install depth gage rod thru depth gage clamp as shown in figure 7.
•Adjust depth gage rod so that the drill bit extends beyond the end of the rod to the required drilling depth.
•Securely tighten auxiliary handle against depth gage
clamp. This secures depth gage rod at desired depth of cut. It also secures auxiliary handle.
When drilling holes with the depth gage rod installed, the desired hole depth has been reached when the end of the rod comes in contact with the surface of the material being drilled.
TO ADJUST DRILLING MODE See Figure 8.
To adjust for type of drilling, slide adjustment button on top of motor housing hammer mode or drilling mode. For your convenience a hammer symbol and drill bit symbol have been molded into adjustment button.
TO |
|
|
|
|
DECREASE |
| DEPTH | ||
DRILLING | DEPTH | GAGE | TO | |
DEPTH | TO | GAGE | ROD | TIGHTEN |
| INCREASE | CLAMP |
| AUXILIARY |
| DRILLING |
|
| HANDLE |
DRILLING | DEPTH |
| AND CLAMP | |
DEPTH |
|
|
|
|
DRILL
BIT
TO LOOSEN AUXILIARY
HANDLEAND CLAMP
Fig. 7
PUSHFOR
HAMMERMODE
,_ WARNING: Your hammer drill has not been designed for reverse hammering.
We recommend that you use
We recommend that you select normal drill mode when drilling with twist drills, hole saws, etc. in soft materials.
PUSH FOR
DRILLING MODE
Fig. 8
Page 9